ProMinent
®
Page 33
Repairs
TAKE CARE
• The leakage hole must point downwards when the pump is fully assembled
(see fig. 23).
• Position the top plate (4) correctly on the pump housing (6). Do not distort
the top plate on the pump housing , otherwise the safety diaphragm (5) will
not fit.
S Lay the diaphragm (3) into the top plate (4).
S Hold the top plate and screw the diaphragm (3) in a clockwise direction until it is firmly in
position (you will feel the resistance of the return spring).
TAKE CARE
• Do not overtighten the diaphragm (3).
• The top plate (4) must remain in position to prevent the safety diaphragm (5)
from distorting.
S The top plate (4) must remain in position to prevent the safety diaphragm (5) from distorting.
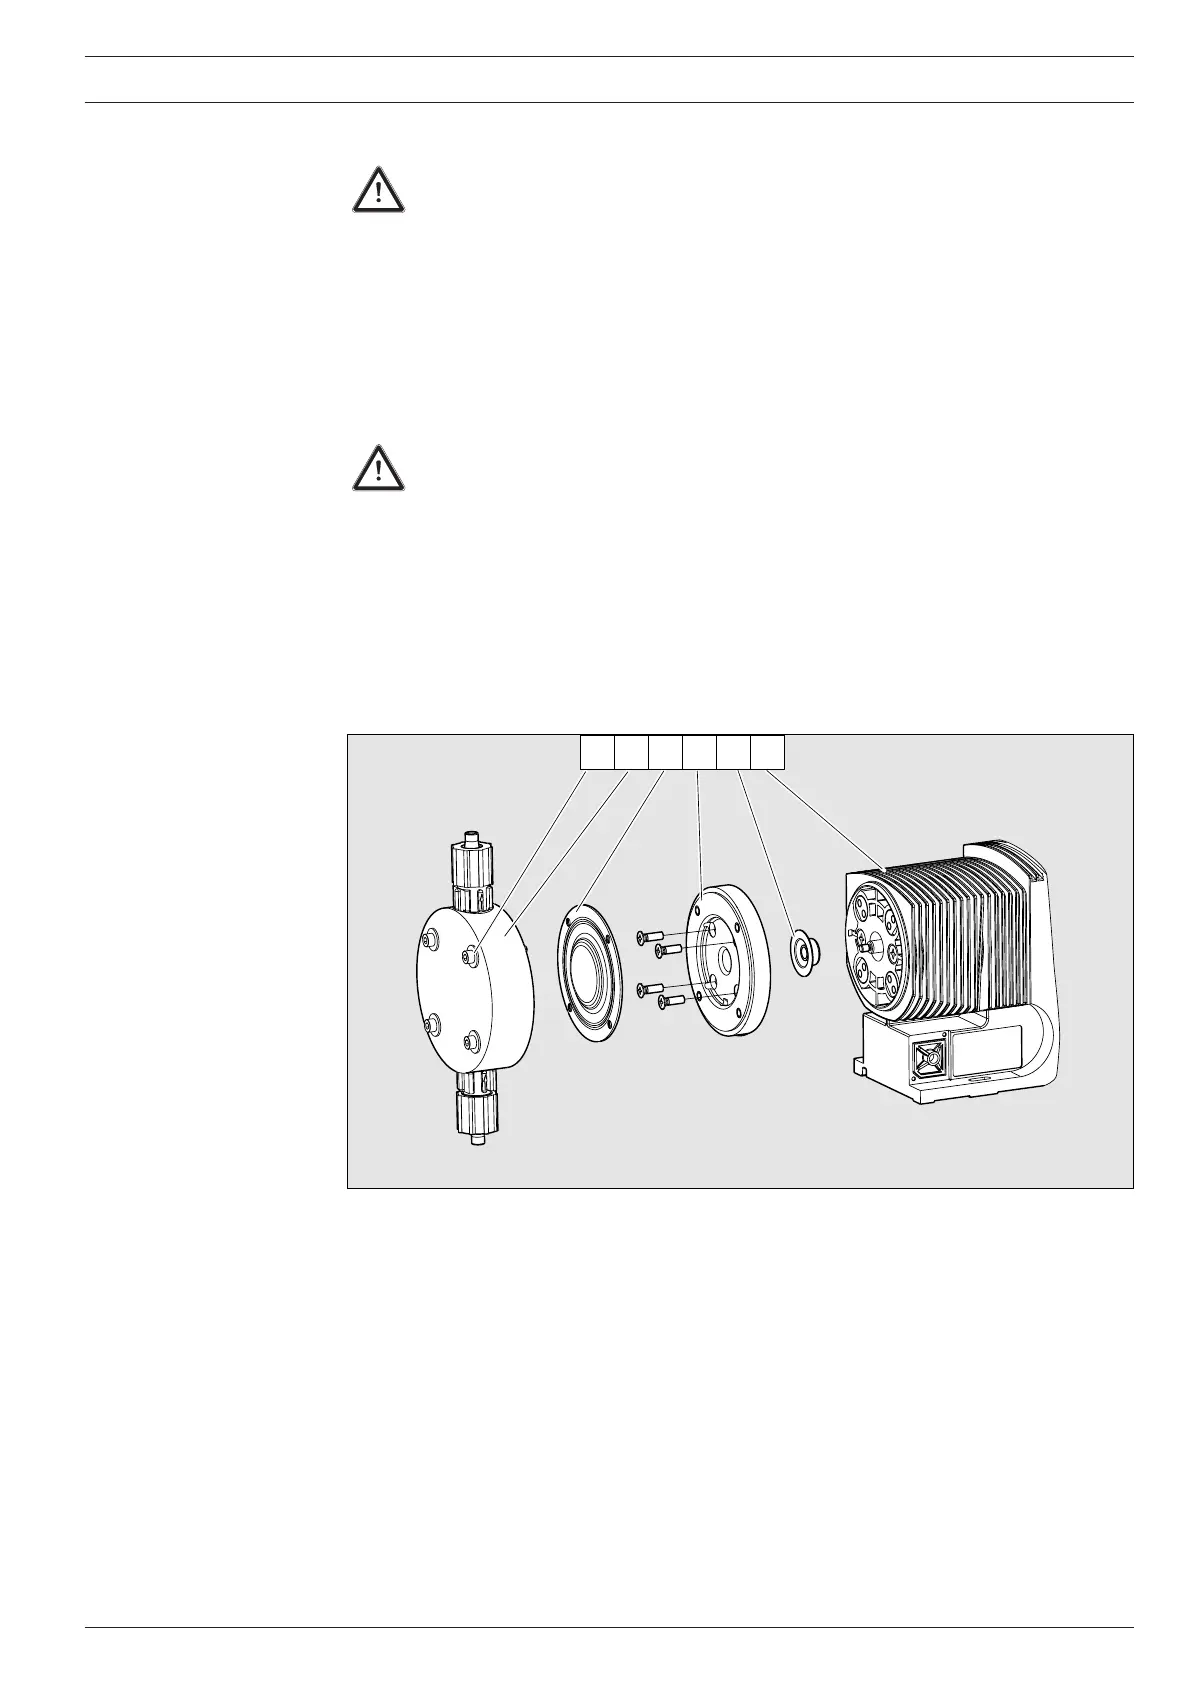
S Position the liquid end (2) with the screws (1) on the diaphragm (3) and the top plate (4) (the
priming connector must point downwards once the pump is fully assembled).
S Screw on screws (1) lightly and tighten (starting torque, see above).
S For coarse/fine bleed versions: ensure the liquid end cover engages in the liquid end, then
push the coarse/fine bleed (knob) into the liquid end.
1
2
3
4
5
6
Fig. 30
1 Screws 4 Top plate
2 Liquid end 5 Safety diaphragm
3 Diaphragm 6 Pump housing
GUIDELINE
• Check the screw torque after 24 hours in operation!
• For PP liquid ends recheck the screw torque after three months!
 Loading...