39
Vess A2200 Quick Installation Guide
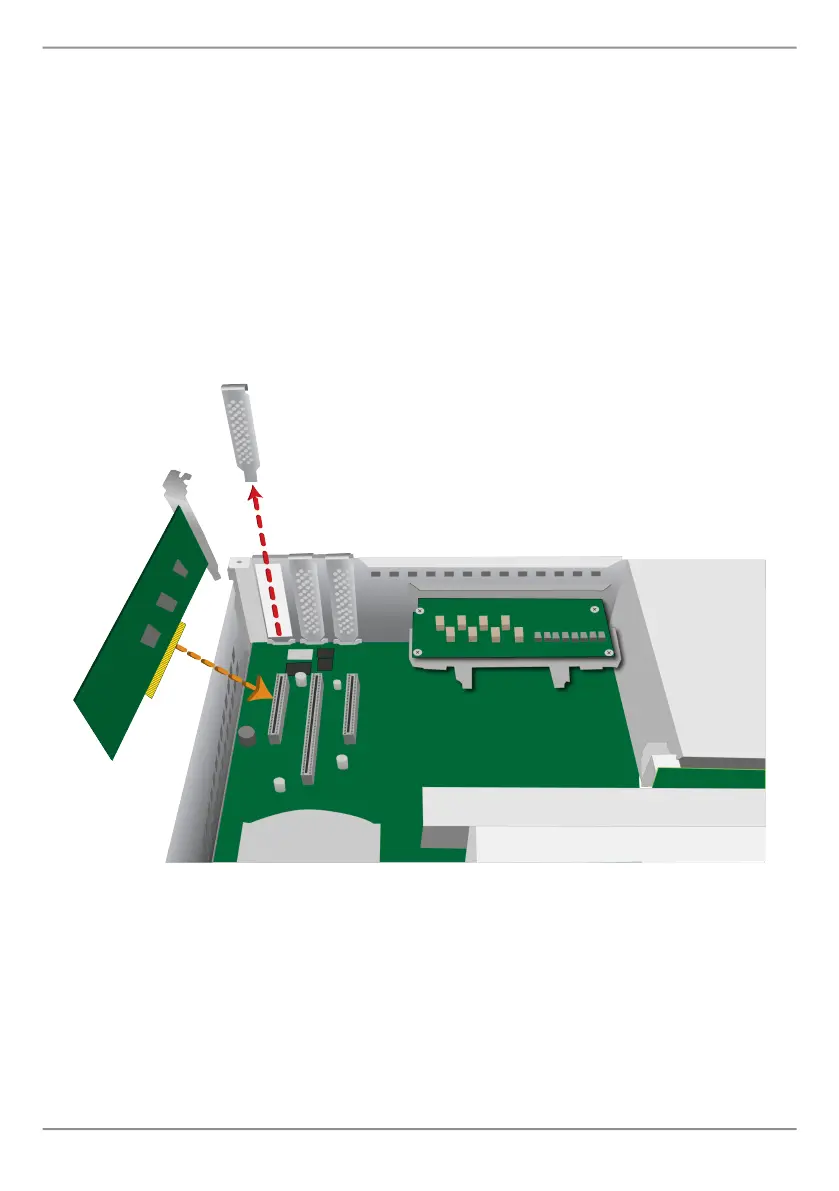
steP 3: insert Pcie cArd
RemovalofthecoverexposesthePCIeslotslocatedintherearleftcorner.
1. PullouttheprotectivecoverforthePCIeopeningfortheslotthatwillbe
used.Savethisprotectivecoverforfutureuse.
2. InsertthePCIecardsothatitisrmlyseatedinthePCIeslot.Whenprop-
erlyseated,thebracketwillushwiththebackplateofthedeviceallowing
accesstothePCIefunctionalconnection.Itisnotnecessarytoanchorthe
bracketwithascrewsincethehousingcoverwillholdthecardsecurelyin
placewhenthedeviceiscompletelyreassembled.
Figure 31: Remove PCIe cover and insert card
steP 4: rePLAce hoUsing coVer
Nowsimplyreplacethehosingcoveronthedevice.Placethecoverintotheaccom-
modatingguidesoneachsideofthehousingandpushthecoverbackintoplace.
Securethecoverwiththevescrews(oneatheadscrewoneachside,thethreere-
mainingontheback),donotovertightenthescrews.
 Loading...