VTrak J610s, J310s Product Manual
14
The rail is designed to slide freely over the plate.
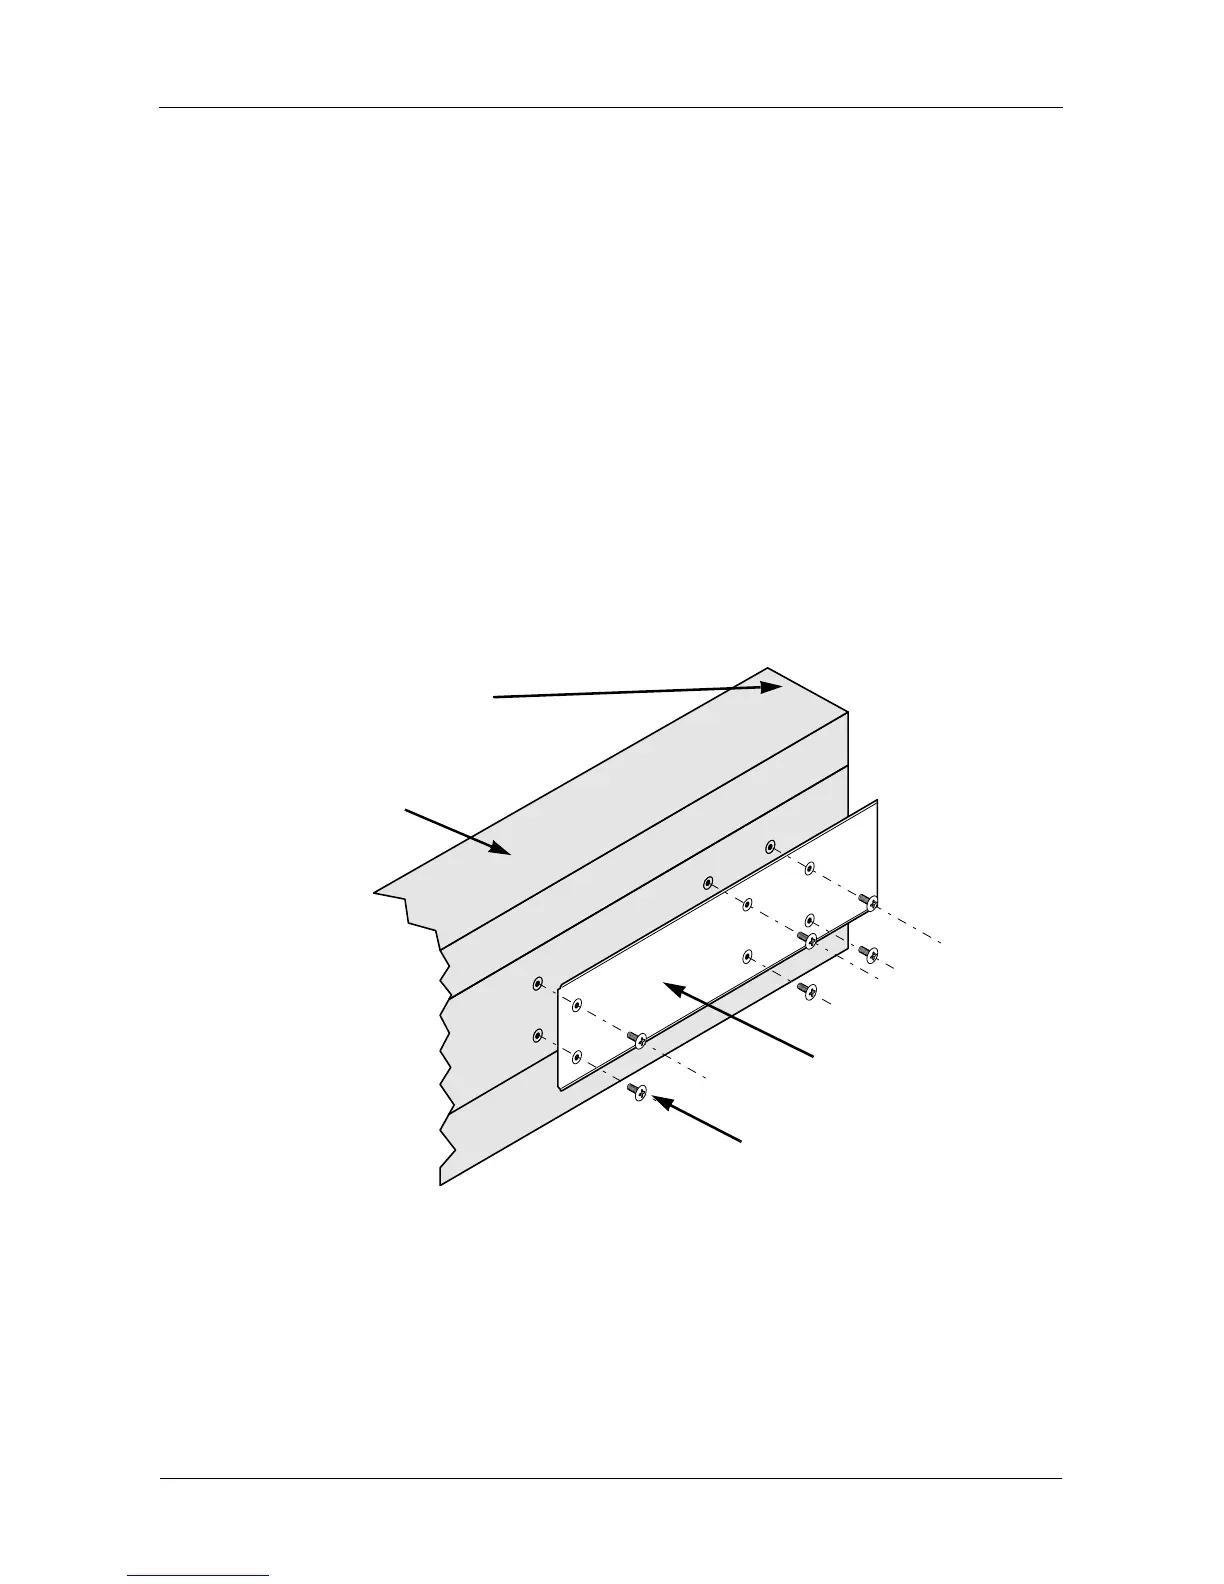
5. Attach a flange to each end of the rail, with the rail on the opposite side of
the flange from the two-hole bracket.
6. Install the rail adjustment screws (included) through the flange into the rail.
There are four screws for each flange. See Figure 7.
7. Place the subsystem with mounting rails into your rack system.
8. Attach the mounting rail assemblies to the outside of the rack posts, using
the attaching screws from your rack system.
9. Square the rail assemblies in the rack.
10. Tighten the adjustment screws and the attaching screws.
11. Place the VTrak subsystem onto the rails.
12. Secure the VTrak subsystem to the rack through each handle, using the
attaching screws from your rack system.
Figure 6. Sliding flange installation
Sliding plate
VTrak J310s
Screws (6 each side)
Rear (connector end)
of the subsystem
 Loading...