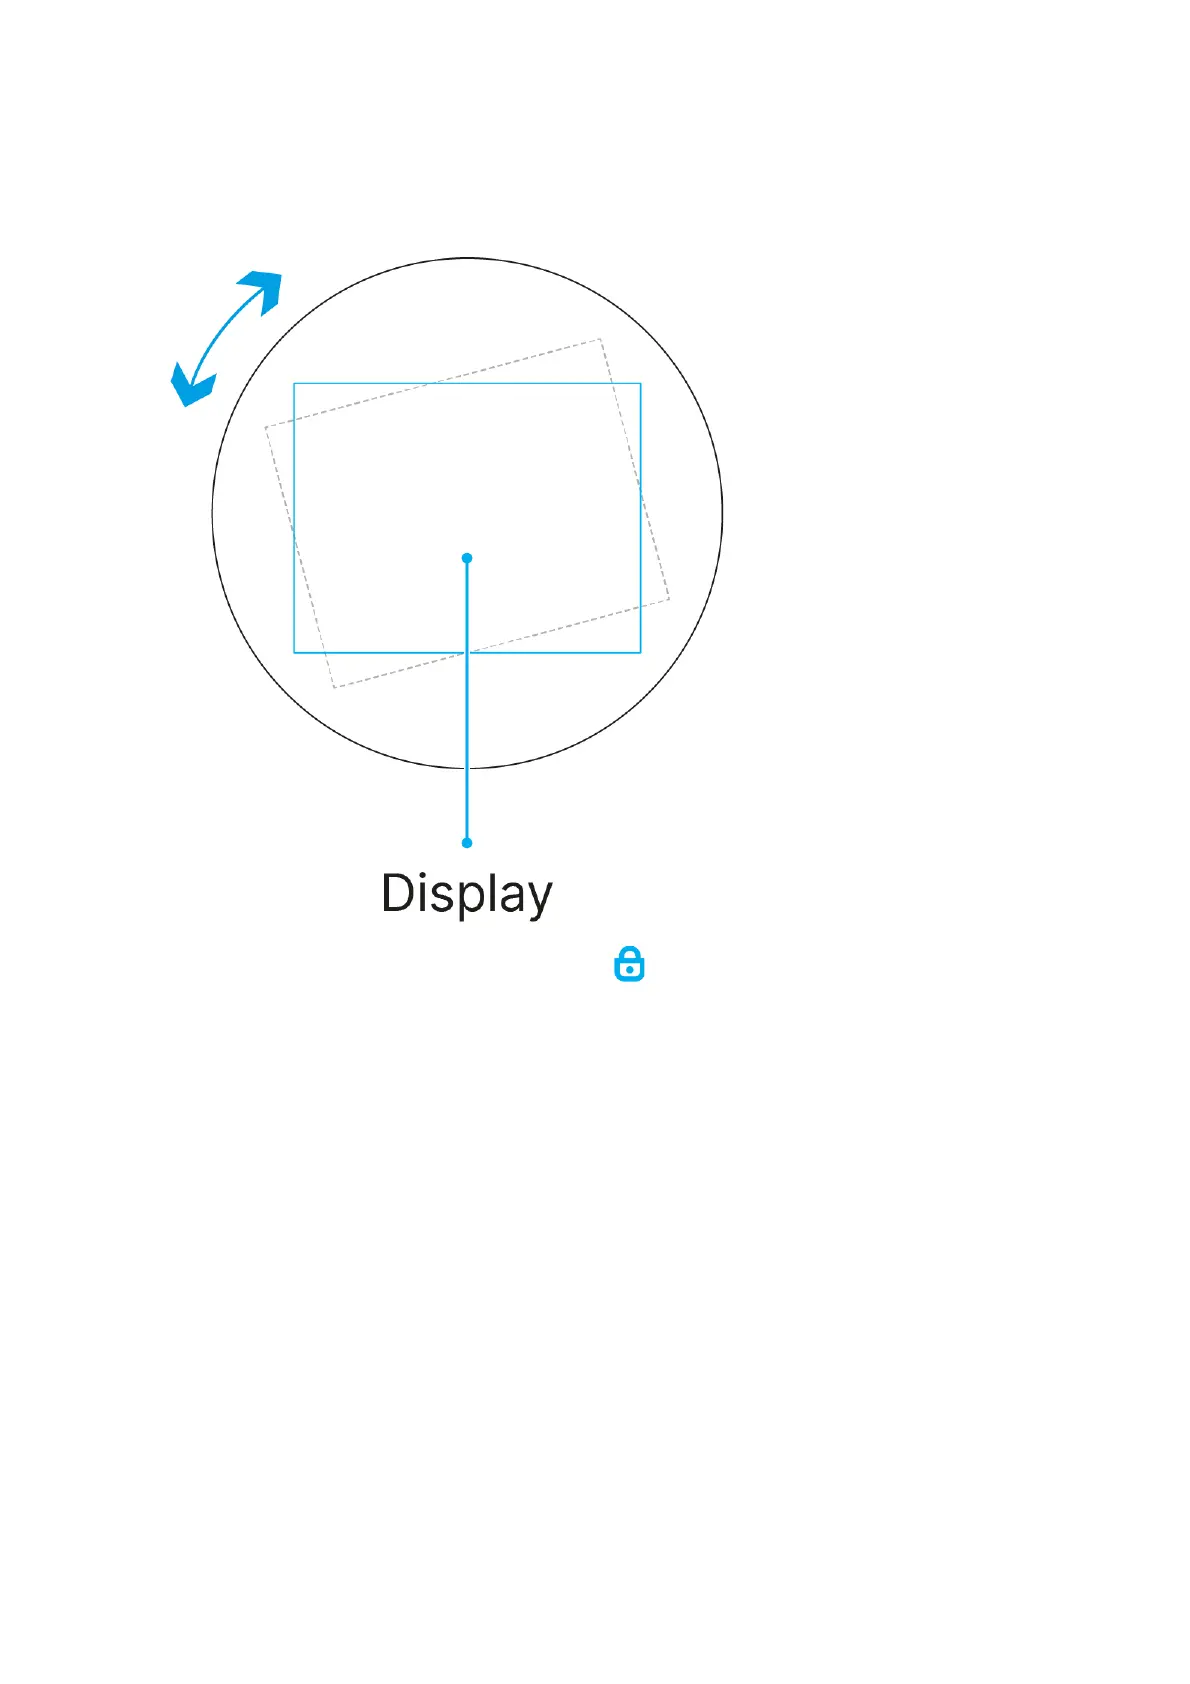
6. Align top and bottom display boundaries parallel to the horizontal axis by
turning the adapter with thermal imaging module clockwise or
counterclockwise.
7. Move the lever (17) to the CLOSE position.
Powering on and Image Settings
1. Open the lens cover (1).
2. Turn on the device by pressing the ON/OFF (8) button.
3. Adjust the eyepiece dioptre ring of your daylight optical device until the
symbols in the display are sharp. In future, it will not be necessary to adjust
the eyepiece dioptre regardless of the distance and other conditions.
4. Rotate the lens focus knob (9) to focus on the visual target.
5. Enter the main menu with a long press of the MENU (6) button and select the
desired calibration mode: manual (M), semi-automatic (SA) or automatic (A).
6. Calibrate the image by briefly pressing the ON/OFF (8) button. Close the lens
cover when calibrating manually.
 Loading...


