Category Item
Hardware and peripherals • Storage drives
For the list of compatible drive models, go to
https://www.qnap.com/compatibility.
• Network cable
Tools • Phillips #1 or #2 screwdriver
• Anti-static wrist strap
Setting Up the NAS
Important
Read all safety requirements and information in Safety Information carefully before setting
up the NAS or installing NAS components.
1. Place your NAS device in an environment that meets the requirements.
For details, see Installation Requirements.
2. Install the drives.
For details, see the following topics:
• Drive Configuration
• Installing 2.5-inch Hard Drives and Solid-State Drives on 2.5-inch Trays
For a list of compatible drives and expansion cards, go to http://www.qnap.com/compatibility.
3. Install expansion cards.
For details, see Installing Expansion Cards.
4. Optional: Install the NAS on a rack.
For details, see Rail Kits.
5. Connect the NAS to the network.
For details, see the following topics:
• Management Port Configuration
• Multipath I/O Network Configuration
6. Connect the SAS Expansion Units.
For details, see Connecting SAS Expansion Units.
7. Connect the power cord and all applicable cables.
8. Power on the NAS.
For details, see Front Panel Buttons.
9. Install QES.
For details, see QES Installation.
10. Log on to QES.
If QES finds unused disks in your NAS, it will ask you to initialize these disks. Click Initialize to start the
process.
11. Open High Availability .
If any of the components are experiencing issues, ensure that they are properly installed.
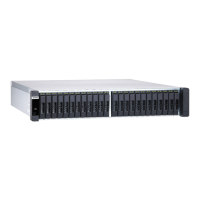
ES2486dc User Guide
Product Overview 21