Page10
October 27, 2011
R
Castile & Santa Fe CE Insert
7069-101B
H. Fire Characteristics
Aproperlyadjustedrewiththeheatoutputcontrolbutton
seton“HIGH”hasashortactiveamepatternthatextends
outoftherepotapproximately102mm.
Iftherehastallameswithblacktailsandseemssomewhat
lazy,thefeedratewillneedtobereduced.
Ifthereisnot102mmtall,increasethefeedrate.Amedium
andlowsettingwillgiveashorterame.Theamewillrise
andfallsomewhat.Thisisnormal.
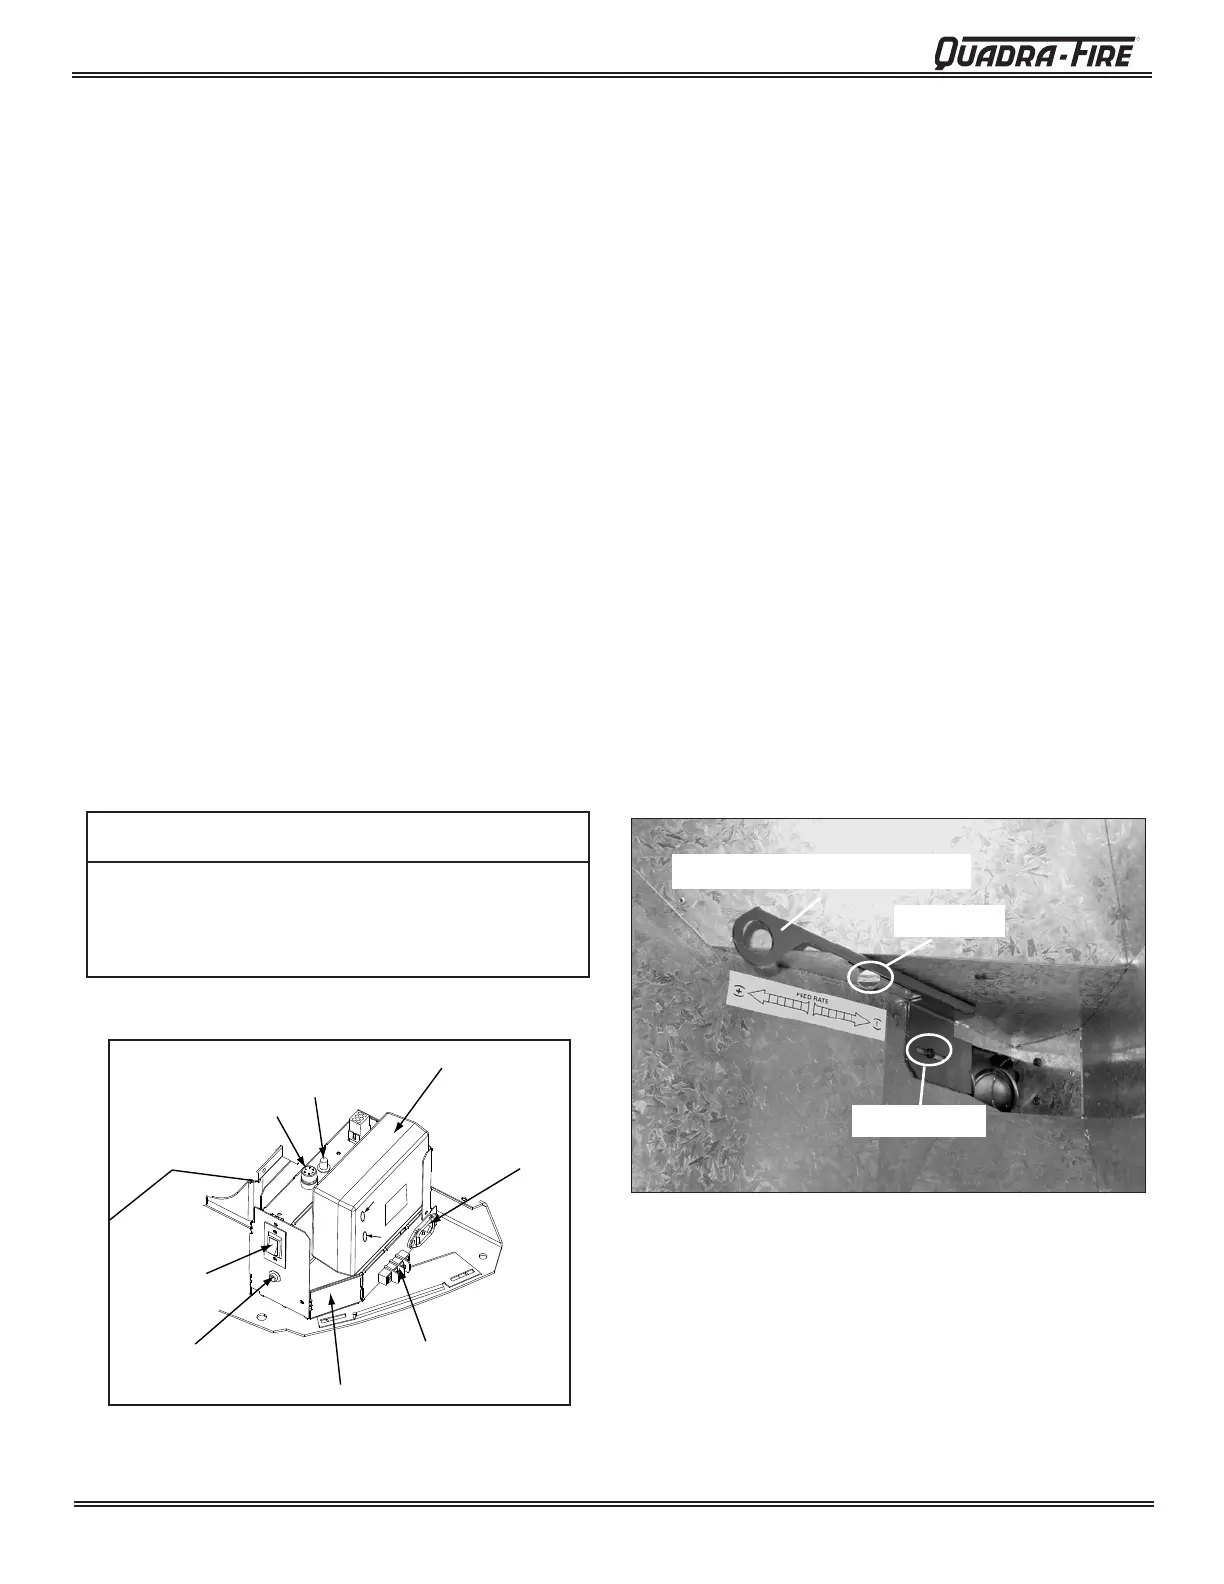
Thefeedadjustmentcontrolrodisfactoryset,andshouldbe
adequateformostfuels.T
hecontrolrodwillslidebyonly
looseningthewingscrew.
However,iftheflameheightistoohighortoolow,youwill
needtoadjustthefeedrate.Waituntiltheappliancehasbeen
burningfor15minutesbeforemakingyouradjustmentsand
a
llow15minutesforfeedadjustmenttotakeeffect.
Make
adjustmentsinapproximately12.7mmincrements.
1. Loosenthewingscrew.Figure 10.2
2. Adjustthefueladjustmentcontrolrodtowardstotheright
anduptoincreasethefeedrateandameheightorto
theleftanddowntodecreasethefeedrateandame
height.
3. Re-tightenthewingscrew.
I. Feed Rate Adjustment Instructions
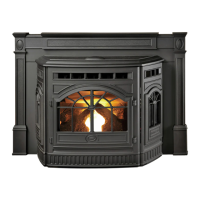
G. Starting Your First Fire
1. A thermostat is required for proper operation of this
appliance.Atthistime,llthehopperwithpellets,set
thethermostattoitslowestsetting.Plugthepowercord
intonearbyoutlet.
2. The exhaust blower will stay on for approximately 18
minutes even though the thermostat is not calling for
heat.Thisisnormal.
3. Locatetheheatoutputcontrolswitchonthelowerright
sideofthereboxbehinddecorativefrontdoor.Settothe
HIGHsettingandthenadjustthethermostattoitshighest
setting.Theredcalllightwillbeonwhichislocatedon
thetopofthejunctionboxbehindtherightaccesspanel.
Thisindicatesthethermostatiscallingforheat.Figure
10.1.
4.
Thefuelfeedsystemandtheignitershould
now
beon.
5. Foryourrstreitwillbenecessarytopressthereset
buttononceperminuteuntilpelletsstarttodropintothe
repot,thenpressbutton1moretime.Thiswillllthe
feedsystemandallowtheappliancetobegindropping
pellets.Theappliancewillcontinuetorunaslongasthe
thermostatiscallingforheat.
6. Oncetheappliancehasignited,letitburnforapproximately
15minutes,thensetthethermostattothedesiredroom
temperature.Adjusttheheatoutputcontrolswitchtothe
desiredsetting.
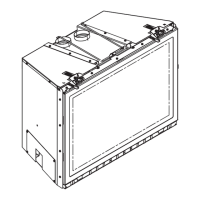
Figure 10.1
Odorsandvaporsreleasedduringinitialoperation.
• Curingofhightemperaturepaint.
• Openwindowsforaircirculation.
Odorsmaybeirritatingtosensitiveindividuals.
CAUTION
Control Box
Junction Box
Reset Button
Heat Output
Switch
Power Cord
Outlet
Thermostat
Block
Fuse
Red Call
Light
Red/Green/Amber Light
Blue Light
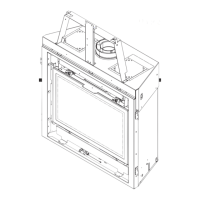
Feed Adjustment Control Rod
Set Screw
Wing Nut
Figure 10.2
 Loading...