Part Replacement Replacing the Encoder
CubiScan 25 Service Manual 32
5. Disconnect the receive ribbons DB25 and DB9 by
simultaneously pushing the tabs located at each end
of the connector outwards. The ribbons are indicated
in Figure 29.
6. Unscrew the six screws holding the receiver board in
place, using a Phillips screwdriver. These screws are
shown in Figure 30.
7. Carefully remove the damaged receiver board and
replace it with the new receiver board. Handle the
board with care; the LEDs are fragile and can be
broken. Make sure you orient the receiver board
correctly, with the power connector on the right (if
you are facing the front of the CubiScan 25) and
towards the back of the machine.
8. Screw the replacement receiver board into place
using the screws from step 6.
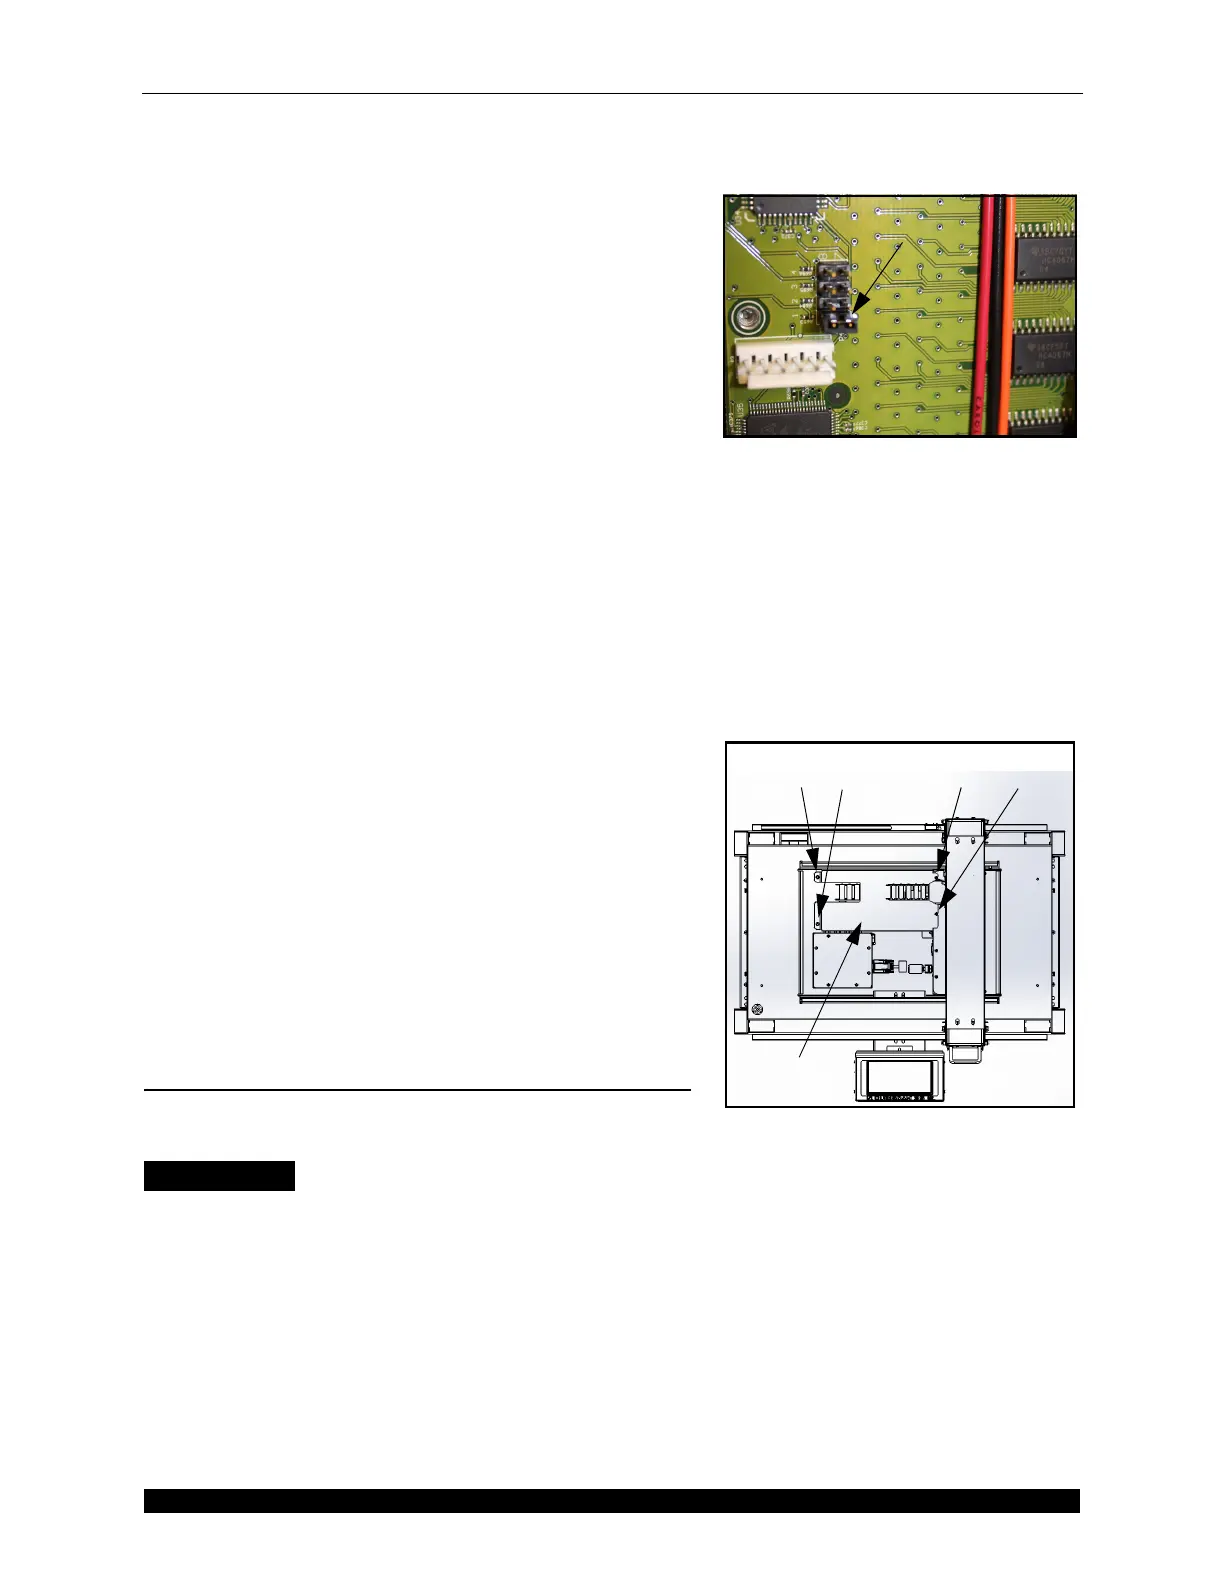
9. Make sure that the jumper indicated in Figure 31 is
set to the
1 position.
10. Reattach the power cables and receive ribbons, as
indicated in Figure 29. Make sure the transmit
ribbons have been firmly locked into place, with both
tabs securely snapped.
11. Replace the gate cover and tighten the screws from
step 2.
12. Power the CubiScan 25 on.
Replacing the Encoder
This section describes how to replace the encoder.
Items Needed
• 3/32'' Allen Wrench
• 11/32'' Nut Driver
• Phillips Screwdriver
• Replacement Encoder Cable
Complete the following steps to replace the encoder
cable.
1. Power off the CubiScan 25.
Figure 31
Width Receive Jumper
Figure 32
Shroud and Encoder Cable Screws