Part Replacement Replacing the Proximity Sensor
CubiScan 25 Service Manual 35
3. Use a solvent to remove the sticky residue left on the
linear guide by the encoder magnet.
4. Peel the plastic backing off of the replacement
encoder magnet and carefully place it on the linear
guide. The magnet should be placed on the right
edge (if standing facing the back of the CubiScan 25)
of the linear guide. The magnet should extend until it
is underneath the encoder. The magnet should be
roughly centered on the width of the linear guide;
equal parts of the linear guide should show on each
side of the encoder magnet.
5. Power the CubiScan 25 back on.
Replacing the Proximity Sensor
This section describes how to replace the proximity
sensor.
Items Needed
• 3/32'' Allen Wrench
• 11/32'' Nut Driver
• Phillips Screwdriver
•Replacement Proximity Sensor
Complete the following steps to replace the proximity
sensor.
1. Power the CubiScan 25 off.
2. Carefully remove the glass platform and place it in a
safe location.
3. Remove the four thumb screws (two at each end of
the CubiScan 25) holding the scale plate in place.
4. Remove the scale plate and set it aside.
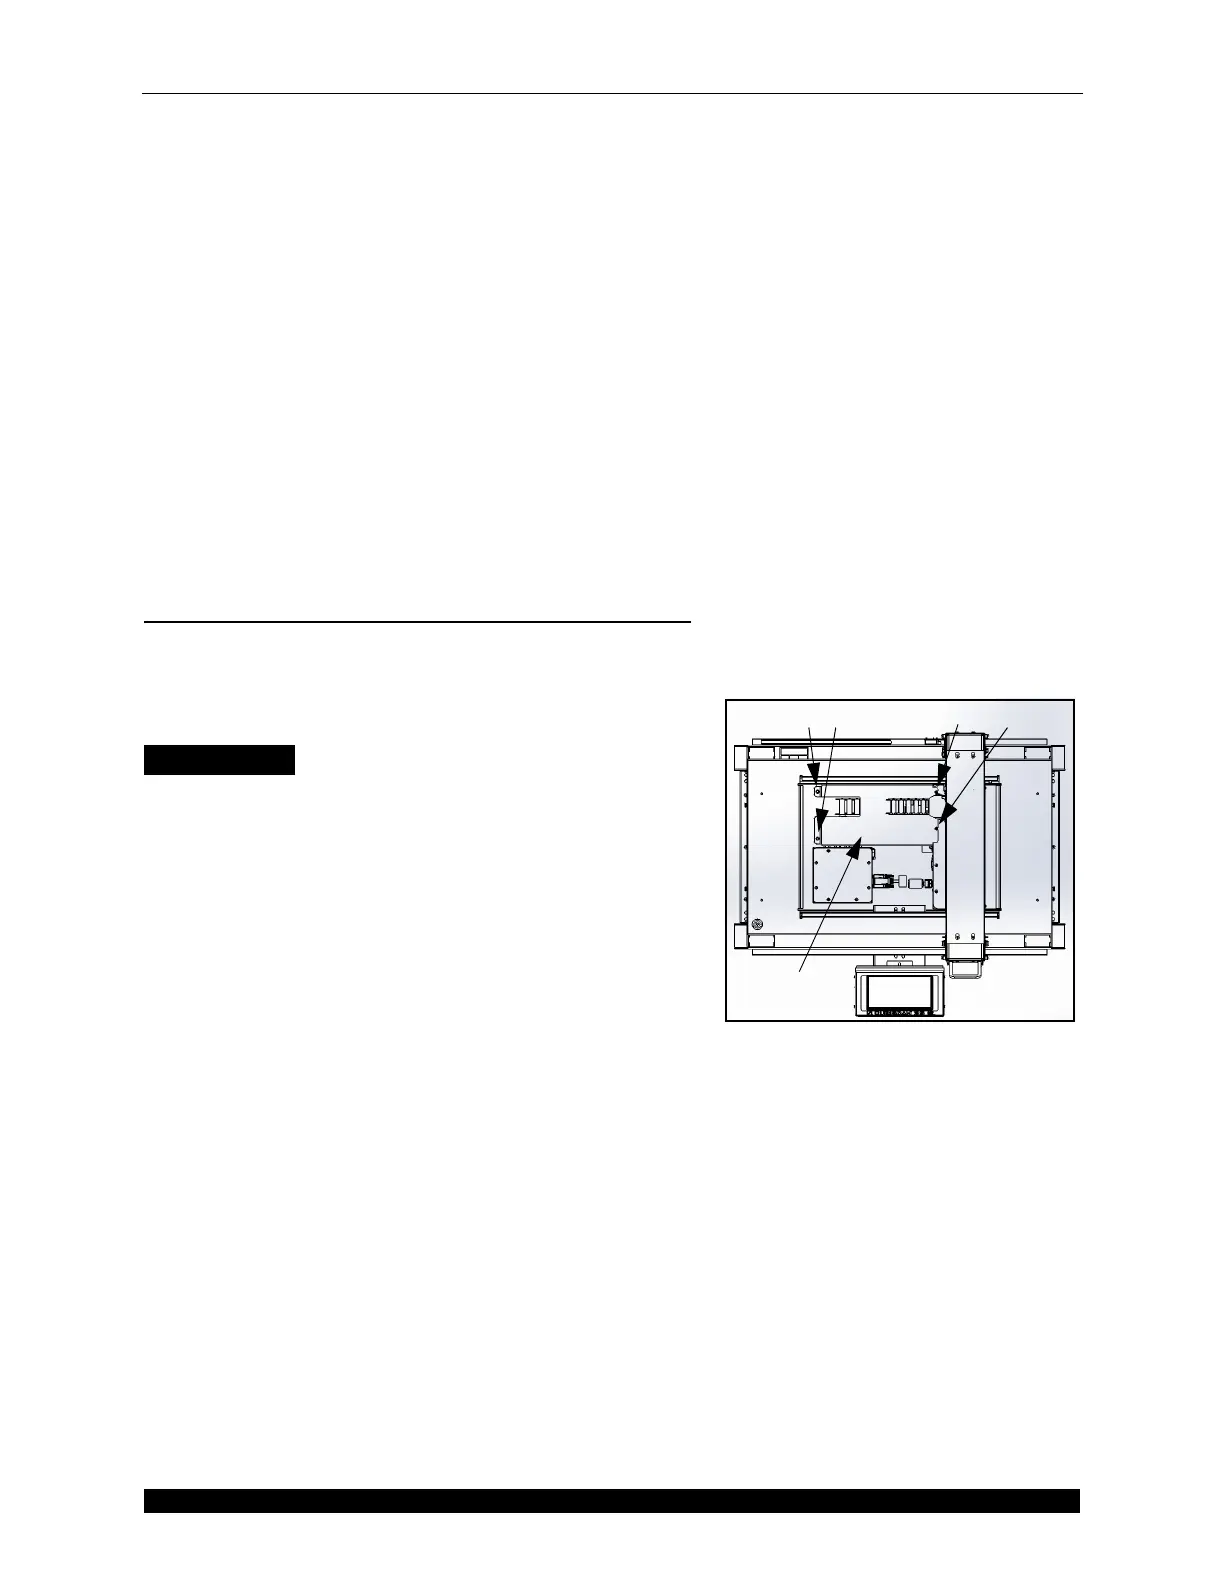
5. Use the 3/32'' Allen wrench to remove the two
screws holding the shroud in place. Refer to
Figure 38.
6. Remove the two nuts holding the shroud in place
using an 11/32'' nut driver. Refer to Figure 38.
Figure 38
Shroud Nuts and Screws