4-22 Repair/Replacement and Calibration Cardiac Stress Treadmills Service Manual
10. Pull the walking belt towards the rear of the deck, then slide the rear
roller out from between the siderails toward the rear of the treadmill.
11. Replace the rollers and reassemble the treadmill following steps 1-10
in reverse order.
12. Adjust the walking belt tension and tracking using the procedures on
the following pages.
13. Adjust the rear roller finger guards.
Removing the Deck Assembly from Headframe
♦ The following steps are oriented as though you were exercising on the
treadmill.
1. Elevate the treadmill to 10% grade.
2. Remove the front and rear rollers as previously described in
“Replacing Rollers” on page 4-21.
♦ Most technicians remove only the left siderail bolts and cover. The belt
slides on and off. Mark the location of the rail to the headframe before
removing the bolts.
3. Remove the drive pulley bottom cover:
a. Remove the two screws holding the cover to the headframe.
b. Remove the two hex nuts holding the cover to the deck frame.
4. Use a wrench to remove the four bolts holding the deck frame to the
headframe.
5. Slide the walking belt off the deck assembly.
Replacing the Walking Belt
1. Remove the walking belt (see “Removing the Deck Assembly from
Headframe” on page 4-22).
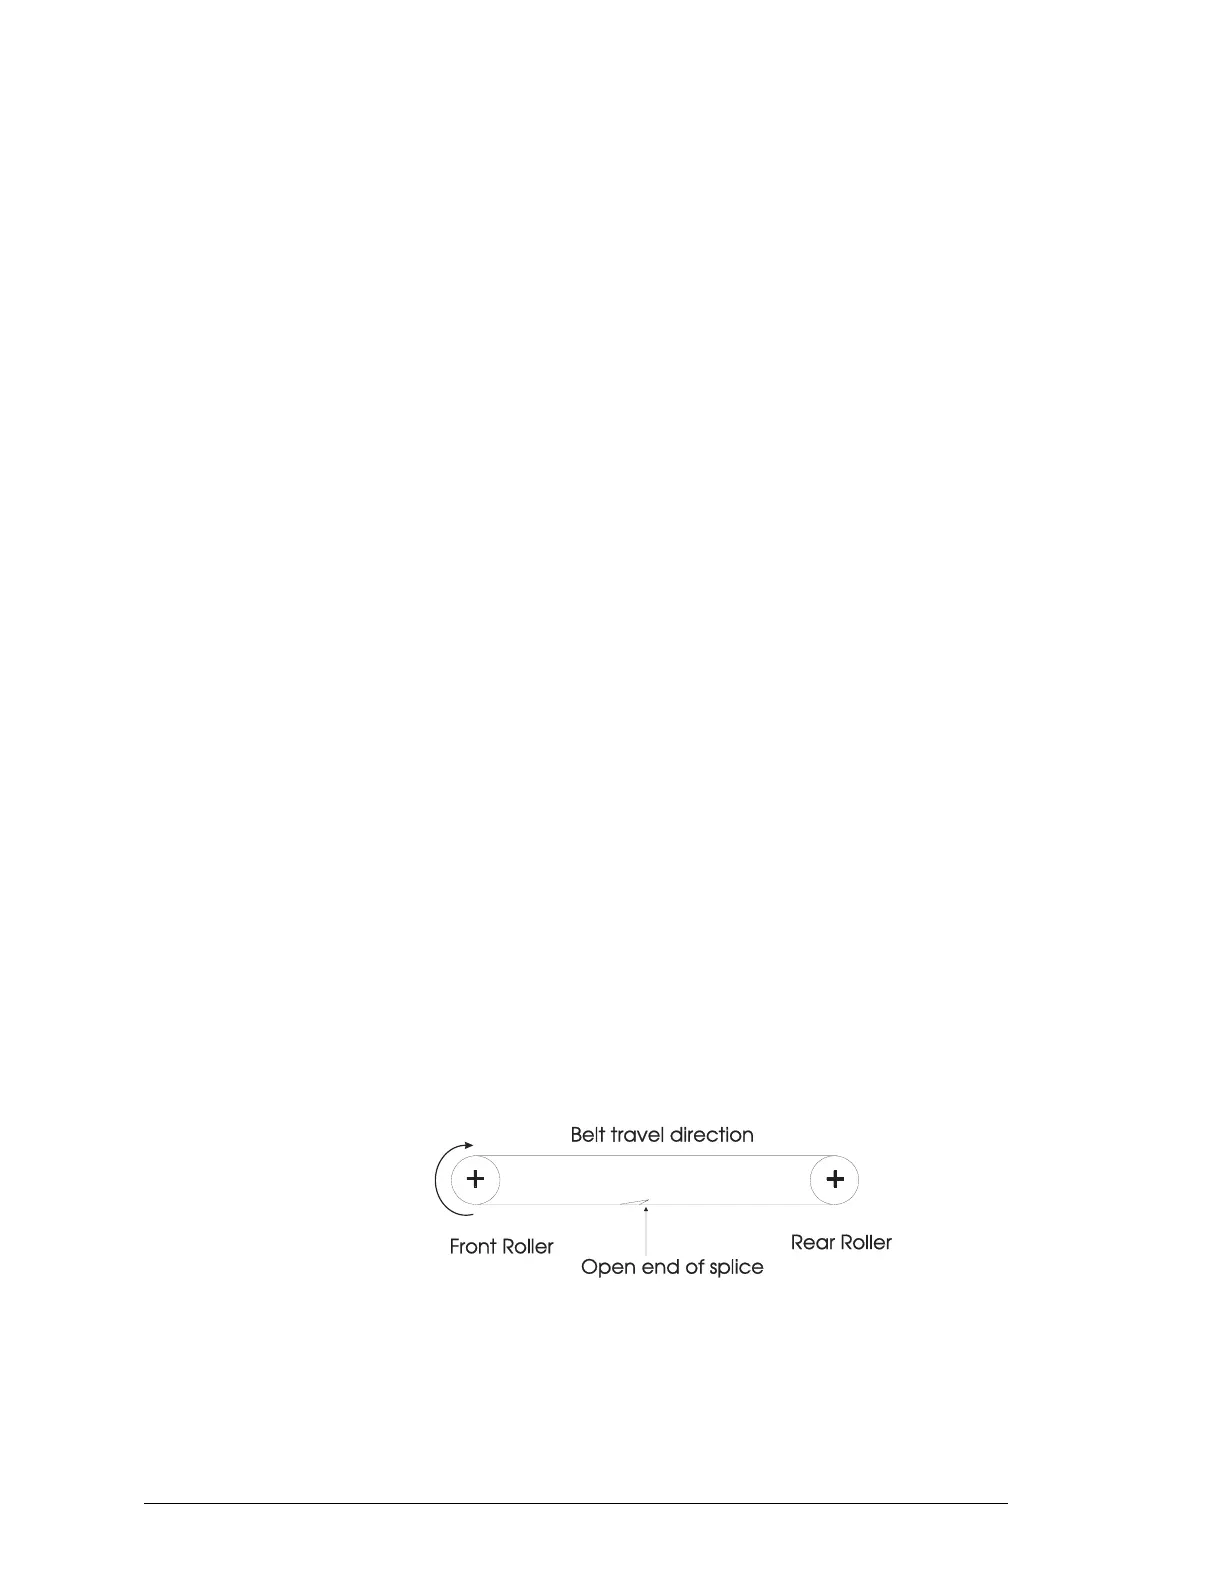
♦ When you install a new belt, verify that the closed end of the splice on the
walking belt hits the roller first as the belt rotates.
2. Install a new belt, rough side up.
♦ There is a direction arrow on the inside of the belt.
♦ To prevent scratches, use a piece of the old belt between the headframe
and the new belt.
3. Reassemble the treadmill following steps 1 and 2 in reverse order.