3 WEB AND CLIENT
3.1 Web Operation
3.1.1 Network Connection
1. Check B-Lamp on front panel, light indicates connection.
2. Set IP, subnet mask and gateway for computer and DVR. Please assign the
same segment IP address without using the router, need to set the appropriate
subnet mask and gateway with router.
3. To view the details of DVR network configuration please navigate to:
【Configuration】→【Network Setting】
4. Ensure the IP is correct and check whether the DVR is on the network by using
the Windows command “ping” in the ‘CMD’ window.
3.1.2 The control installation and the user login logout
Users can remotely access the DVR via Internet Explorer, assuming you have a
working and correct network configuration.
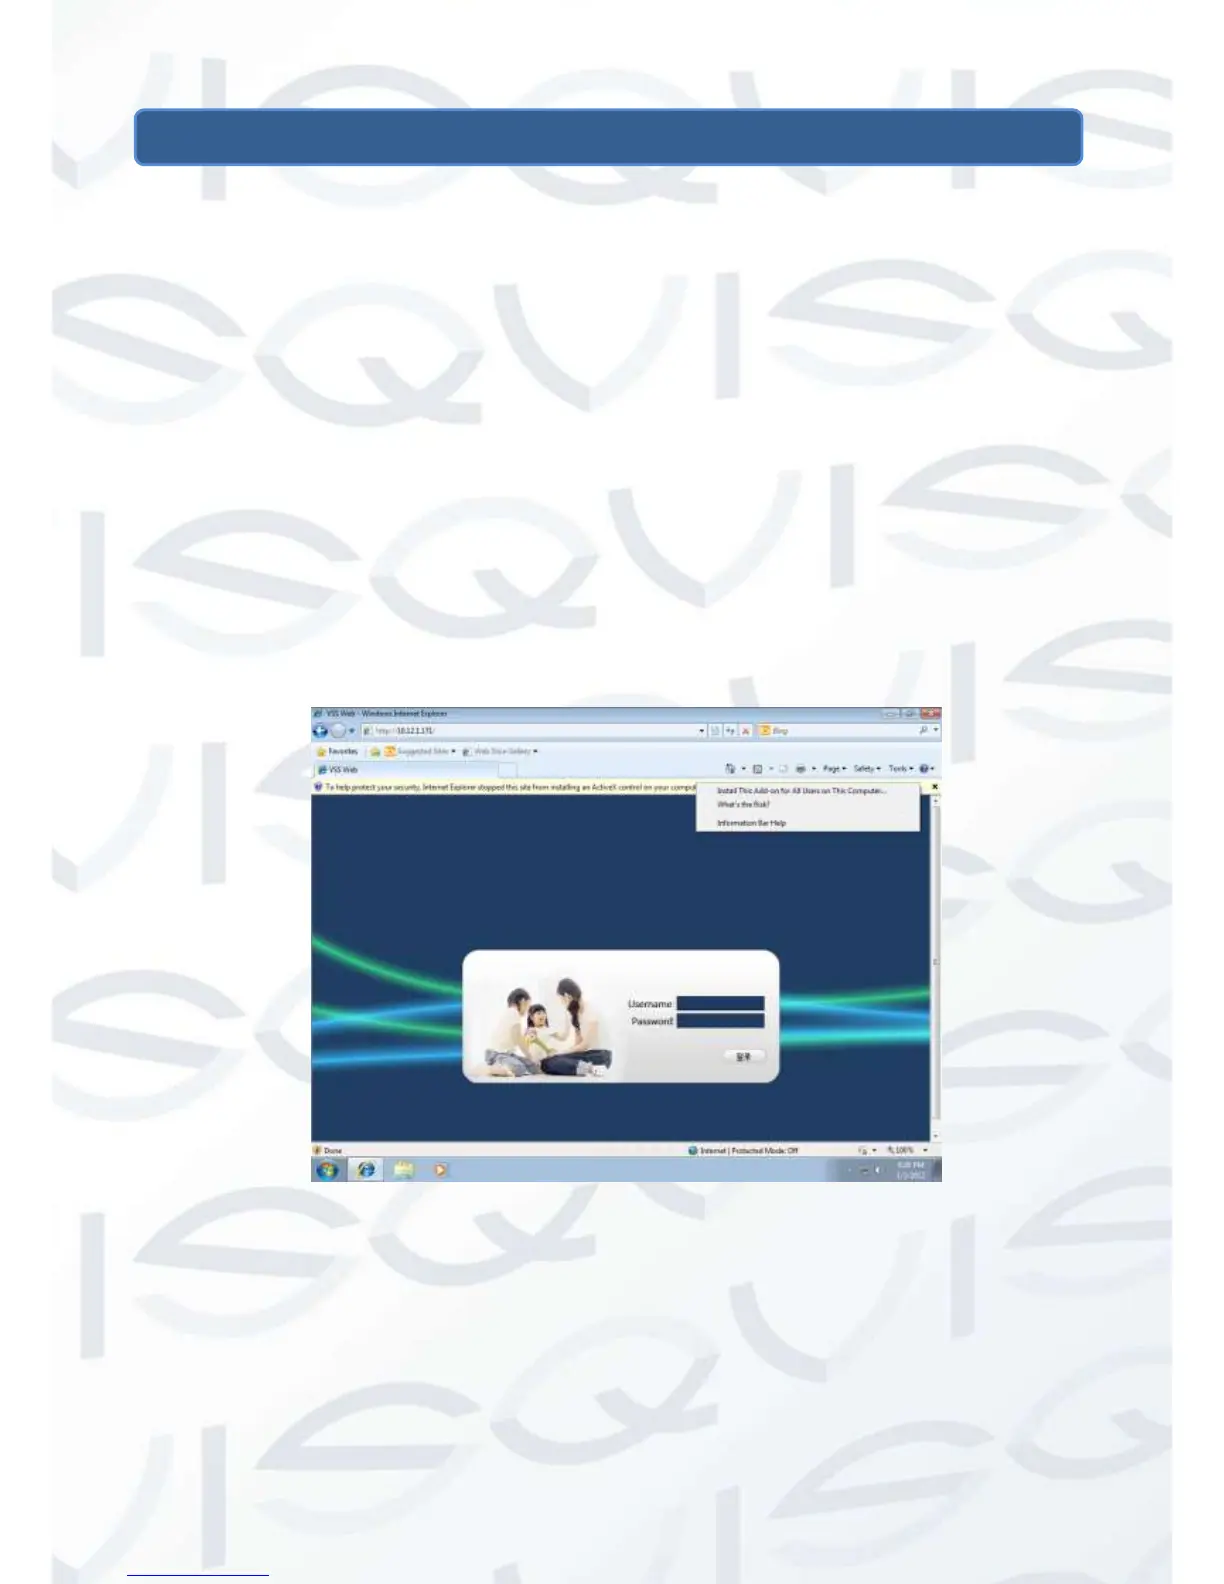
The following interface will pop up when you access the IP address in Internet Explorer.
Login screen
Install ActiveX: Right click and choose install. If installation is blocked by Windows,
please add the IP as a trusted site or lower your Internet Explorer security settings to
allow this.