1. Using the external Wifi adapter
2. Using the external ETH/USB adapter
3. Directly over the Ethernet interface
https://192.168.169.169
PC192.168.169.250
https://10.9.8.7
PCDHCP
https://10.9.8.7
PCDHCP
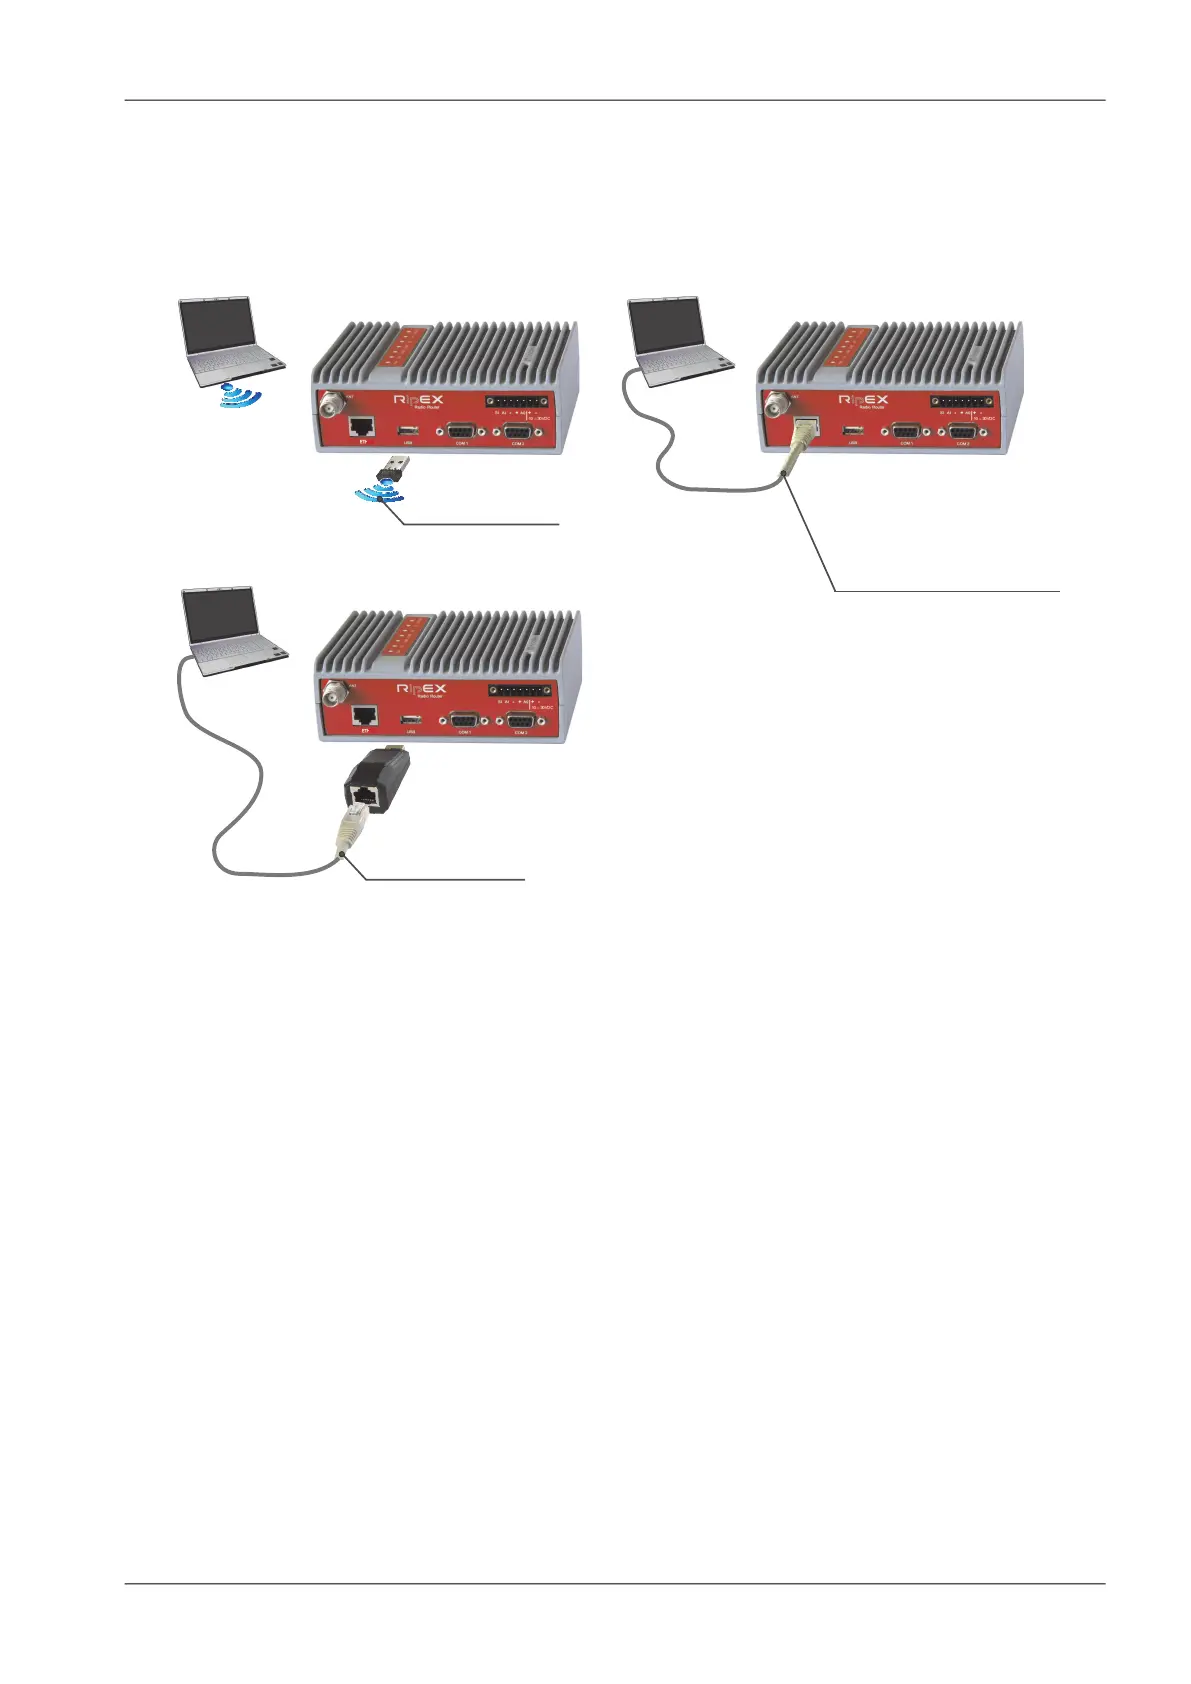
Fig. 5.2: Connecting to a PC over ETH and over WiFi or ETH/USB adapter
1. PC connected via Wifi adapter
We recommend using the "W1" - external Wifi adapter (an optional accessory of the RipEX).
Connect your PC or tablet or smart phone to RipEX Wifi AP first. Its default SSID is “RipEX + Unit
name + S/N”. The W1 contains a built-in DHCP server, so if you have a DHCP client in your PC
(as most users do), you don’t need to set anything up. The RipEX’s IP address for access over
the ETH/USB adapter is fixed: 10.9.8.7.
Go to 4 Login to RipEX
2. PC connected via ETH/USB adapter
We recommend using the "X5" - external ETH/USB adapter (an optional accessory of the RipEX).
The ETH/USB contains a built-in DHCP server, so if you have a DHCP client in your PC as most
users, you don’t need to set anything up. The RipEX’s IP address for access over the ETH/USB
adapter is fixed: 10.9.8.7.
Go to 4 Login to RipEX
3. PC connected directly to ETH port
Set a static IP address in PC, example for Windows XP:
81© RACOM s.r.o. – RipEX Radio modem & Router
Bench test