556823346-R3
ERVICE
S
FK0336.eps
Battery
Holder
Battery
Holder
Cover Plate
iFork Shoe
Capscrew
Bridge Plate
iFork Shoe Nut
iFork Shoe Nut
Cover Plate
Capscrew
Cover Plate
Capscrew
Cover Plate
Cover Spool
11
11
10
10
13
12
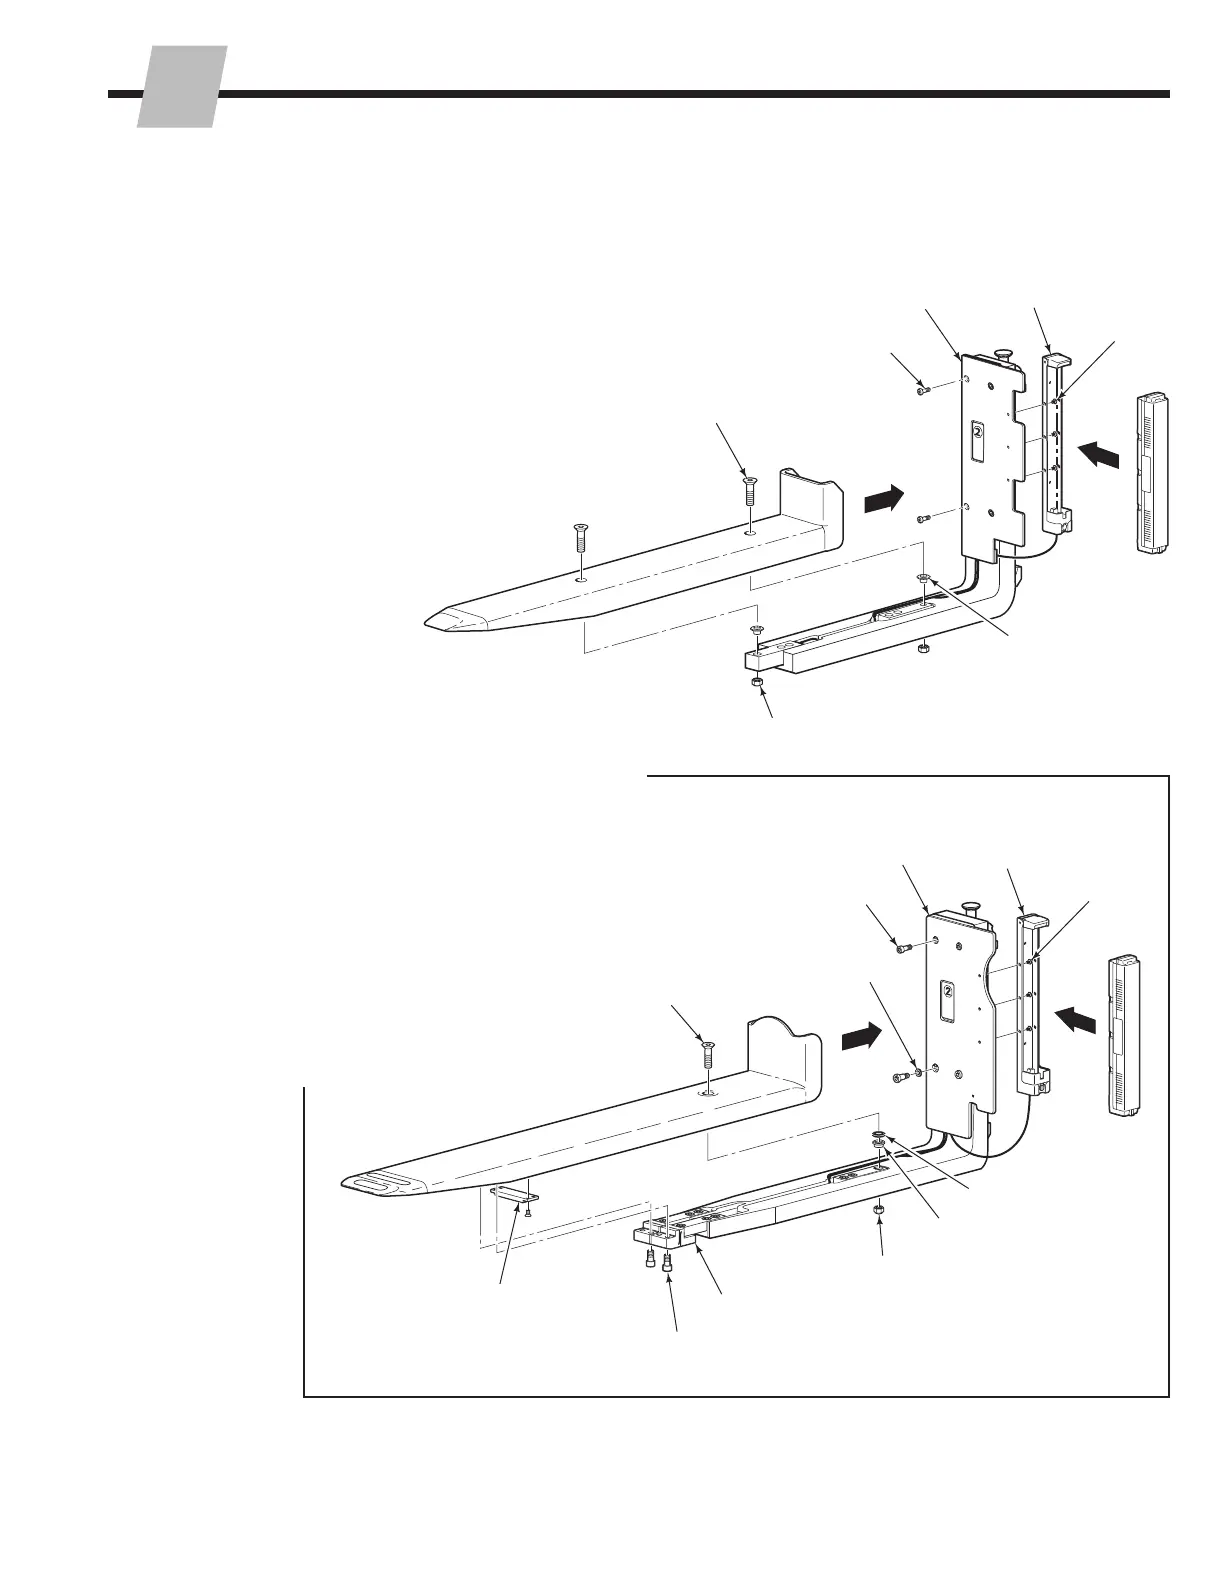
10 Install the cover plate. Tighten capscrews to 29 ft.-lbs.
(39 Nm).
CAUTION: Be very careful to not pinch wires
underneath the cover plate. This will damage the
communication of the system.
11 Mount the battery carrier to the cover plate and tighten
capscrews to 7 ft.-lbs. (9.5 Nm).
12 Standard iForks – Install cover spools to the load cells.
16 Pair Bluetooth
®
transmitter to display. Refer to Section 3.3.
17 Perform a Three Part Calibration. Refer to Section 3.2.
IMPORTANT: If the display errors, the wires may be
touching the shoe or are pinched. Check for marks
indicating a pinch point. Reposition the wires and
reinstall the fork shoe (Step 13). Repeat until the
display no longer shows an error.
Washer
(Rubber)
Shear Collar
Shims
Flex Joint
Flex Joint
Capscrew
iFork Shoe
Capscrew
13
14
15
Standard iForks
Logistic iForks
3.4-2 New Wire Harness Installation (continued)
13 Install fork shoe:
Standard iForks – Carefully slide the iForks shoe onto
the fork arm until the mounting holes line up. Install
capscrews and nuts. Tighten to 80 ft.-lbs (110 Nm).
Logistic iForks – Install shear collar and shims to
the load cell closest to the fork shank. Carefully slide
the iForks shoe onto the fork arm until the mounting
holes line up and bridge plate is in place. Install the
capscrew and nut. Tighten to 80 ft.-lbs (110 Nm).
CAUTION: Check for any indication that the shoe is
touching the wiring. This can happen especially in the
heel area of the fork.
14 Logistic iForks – Install capscrews to flex
joint's lower face. Tighten capscrews to
60 ft.-lbs. (80 Nm).
15 Logistic iForks – Install capscrews to secure
the bridge plate to the fork shoe. Tighten
capscrews to 7 ft.-lbs. (10 Nm).
 Loading...