2 -
LM800/ 8000
COMMON CALIBRATION
10
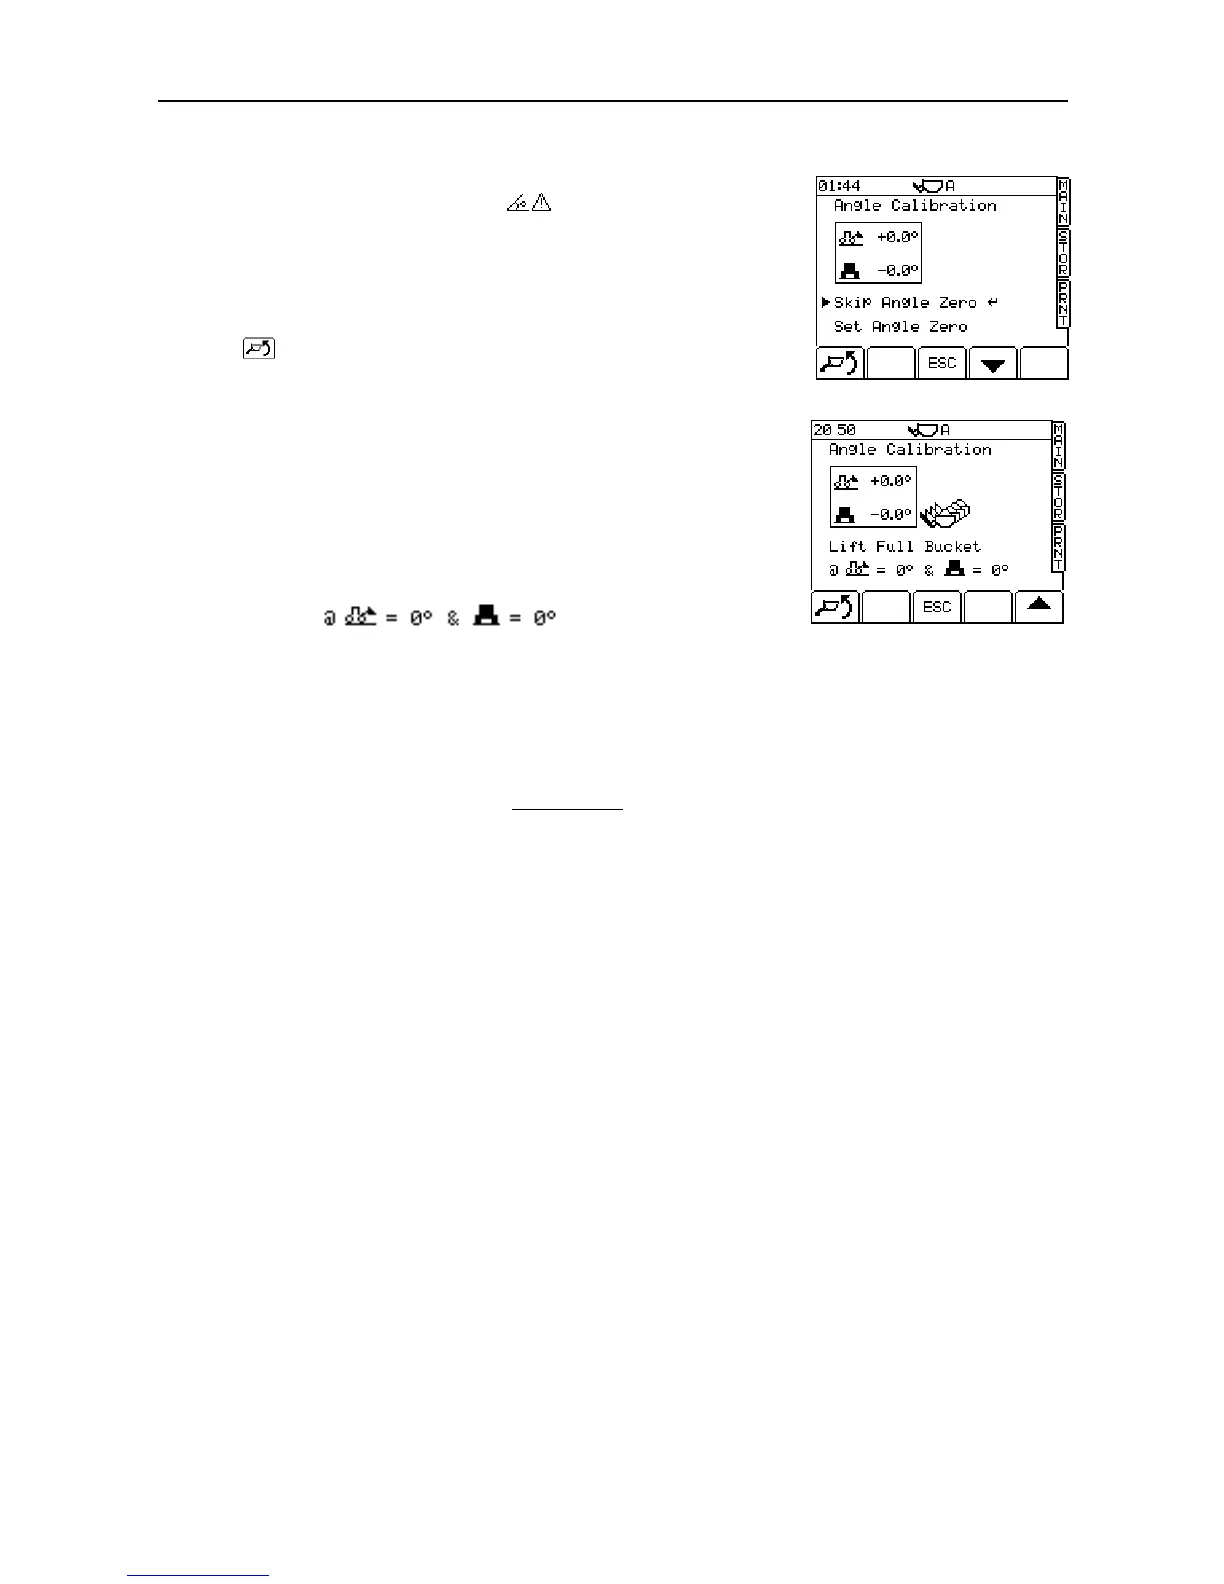
2.2.8 Angle Calibration (optional)
NOTE: All factors in the "Angle Factors" screen should be manually set to zero
(except the Alarm Threshold Angle which is 10° by default) before
carrying out the angle calibration. This is especially important if you have to
recalibrate the angle compensation, after the first attempt was incorrect.
Calibration consists of a Zero routine (you have the option to skip this
step) followed by five lift sequences. The live readings of both angles are
displayed in the box.
shows dynamic weighing mode is selected. Press and hold the
key to switch between static and dynamic weighing. Only Dynamic or
Static compensation should be carried out, not both. If mainly weighing
Dynamically, carry out this procedure dynamically, and vice versa.
Zero
1. Select "Set Angle Zero" using the down arrow key and press ENTER.
2. Park the loader on level ground. Press the ENTER key to zero both
offsets. The next screen is then displayed (fig.15).
The icons at the bottom of this and
subsequent screens indicate the required position and the present angle.
3. With the loader still on level ground, lift a
3
/
4
full bucket. A weight is
displayed. Press ENTER to confirm and move to the next screen.
NOTE: If either slope angle indicated inside the box is over 2 degrees, a warning
triangle flashes on-screen, and the appropriate icon flashes inside the
box.
4. Move the machine so that it is on a forward slope (i.e.8
0
), following the
icons on the lower part of the screen. The adjacent slope (i.e. right
hand/left hand) should be not more than 2 degrees off level. Again, the
warning triangle will flash if the angle is exceeded. Repeat the lift and
press ENTER to confirm and move to the next screen.
5. Repeat the lift sequence as prompted by the calibration screens, on a
backward slope, then a right hand slope, and finally a left-hand slope.
When the last lift is entered, the screen will display the message "Angle
Calibration Complete".
6. Press the 'ESC' key to finish AUTOCAL .
If a re-calibration is required, all factors on the ANGLE FACTORS page
must be manually set to ZERO before carrying out the procedure again