4” Standard Pump Installation, Operation & Service Manual Attaching the UMP
14
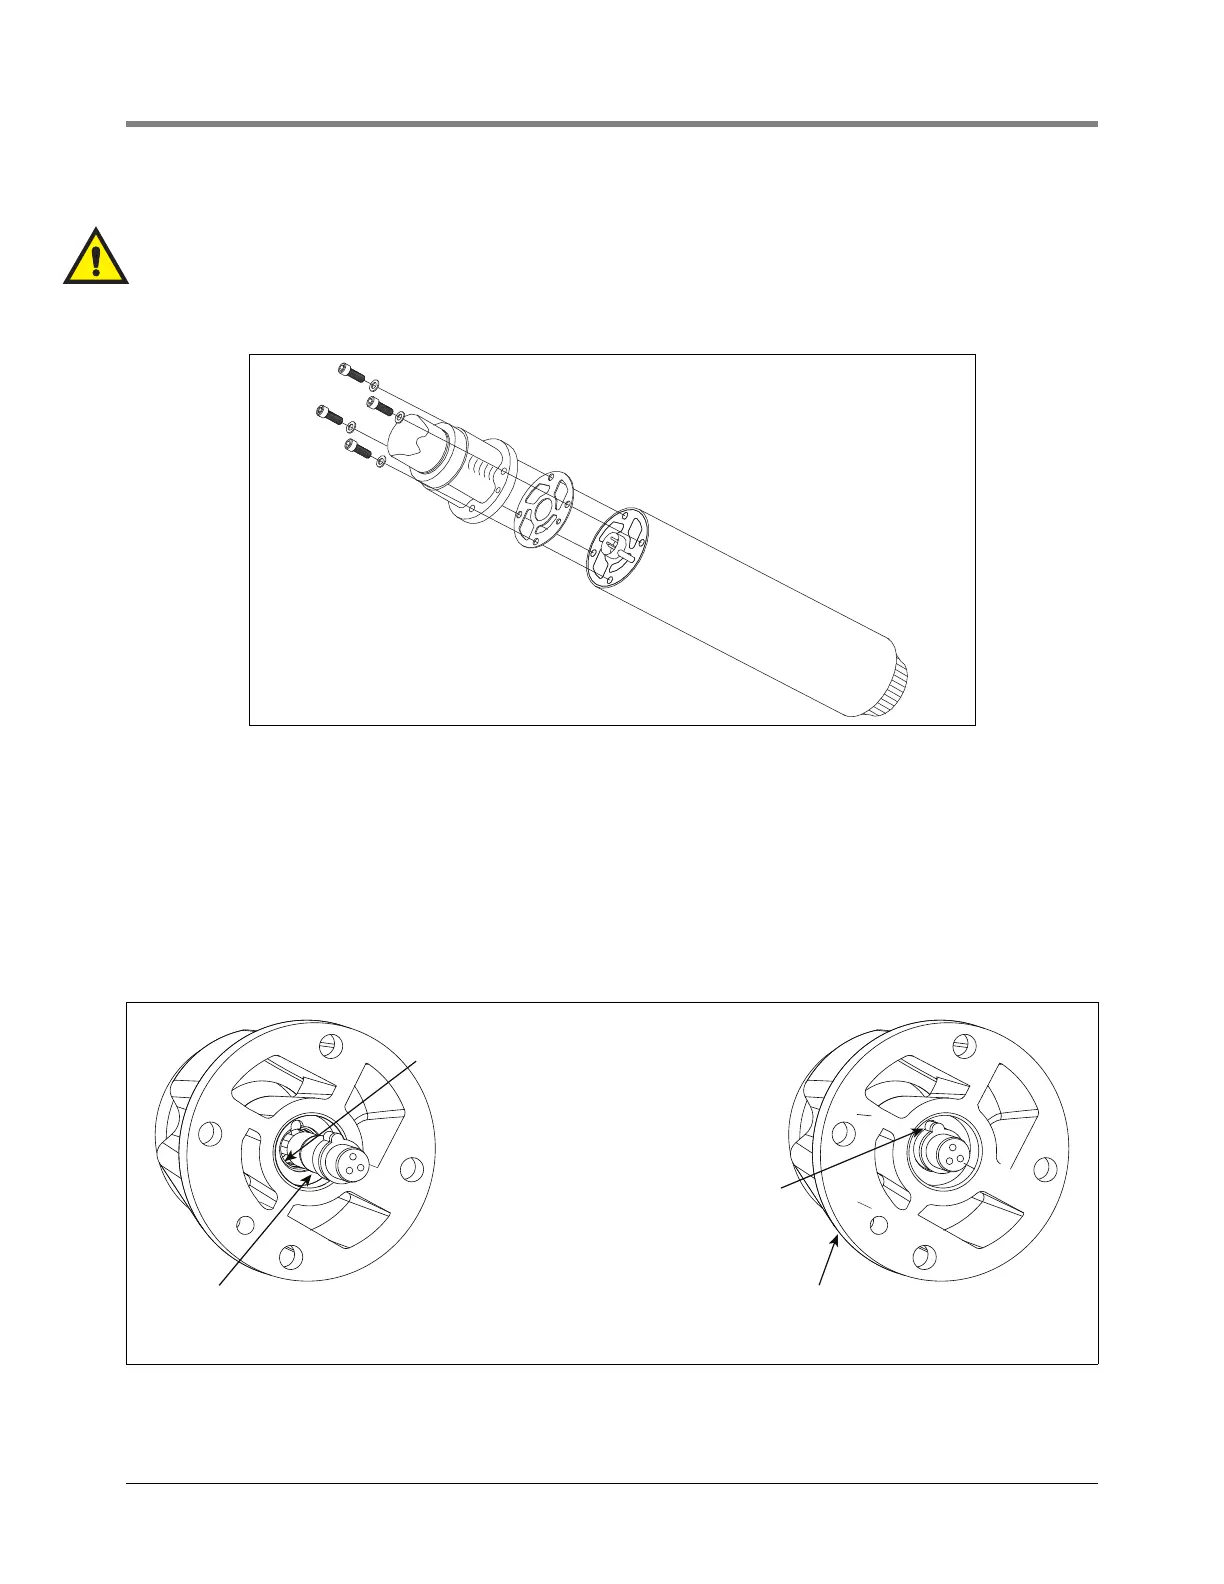
1. Place the new gasket on the new UMP so that all holes align (see Figure 7).
Gaskets from competitive UMPs will not seal properly and performance will be reduced.
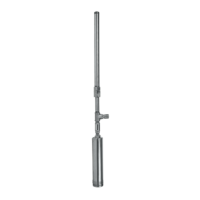
CAUTION: Visually inspect the pigtail connector in the discharge head. Replace if damaged. Be certain the in-
dexing tab of the pigtail is seated in the notch of the discharge head.
Figure 7. Aligning the UMP gasket
2. Lubricate the o-ring and pigtail with petroleum based jelly.
3. Align the UMP positioning dowel and boss with the proper holes in the discharge head and push the UMP
into position using hand force only (see Figure 8). The UMP should be snug against the discharge head prior
to installing the UMP retaining bolts.
NOTE: Use hand force to put the UMP onto the discharge head. If the UMP does not seat snug against the
discharge head, remove the UMP and correct the problem.
Figure 8. Verifying Pigtail’s Female Connector Is Seated Properly
rjpumps\042-129-1\fig6.eps
Insert the positioning dowel
on the UMP in this hole
153-17.eps
Connector's o-ring
(-015 [0.551'' ID x
0.070'' wide])
Pigtail female connector/indexing tab is out
of its socket - this is the incorrect position
when attaching the UMP!
Pigtail female connector/index-
ing tab is fitted in notch of its
socket - this is the correct
position when attaching the
UMP!