Unit Removal Procedure
To removea NEMA 4X/IP65or standardunit fromthe panel,first unscrew
and remove the panellatch screws. Insert flatblade screwdrivers between the
latch and the case on the top and bottom of the unit, so that the latches
disengage from the grooves in the case. Push the unit through the panel from
the rear.
Removing Bezel Assembly
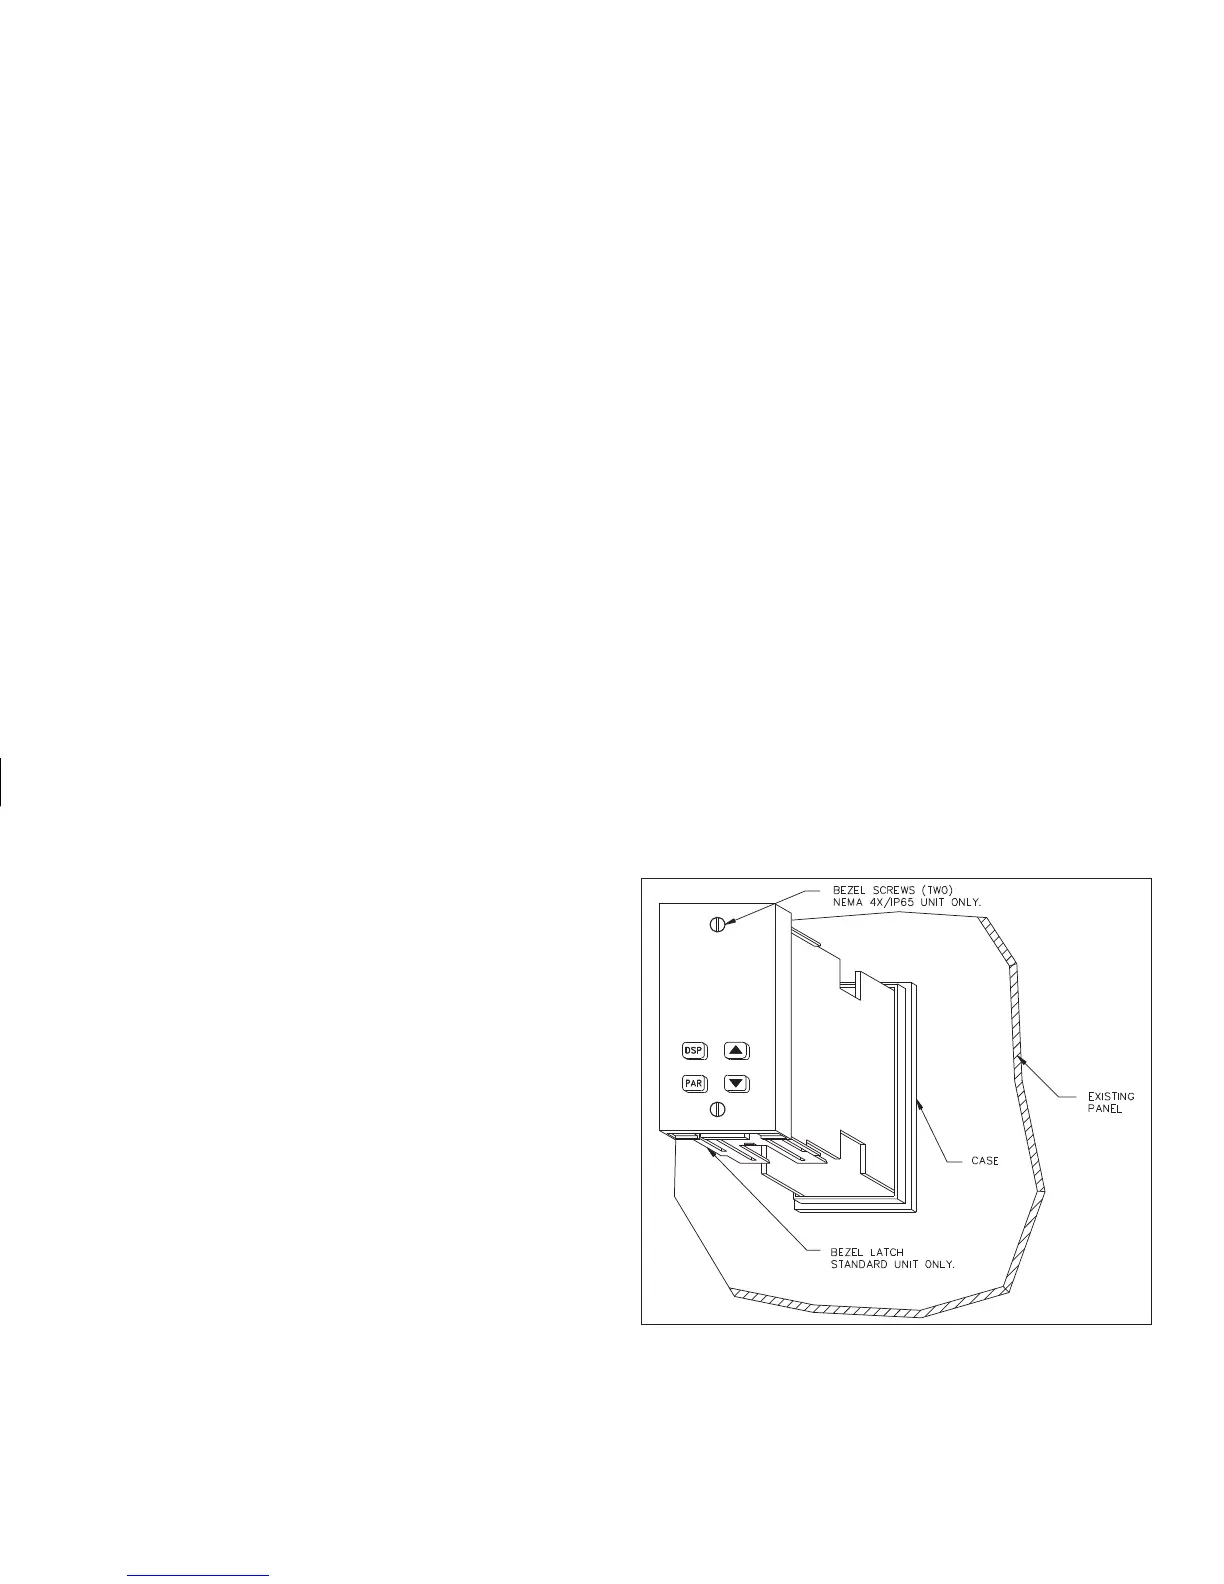
The bezel assembly, shown in Figure 2, must be removed from the case to
install or replace output modules, to select the input sensor type, or to set the
115/230 VAC selectorswitch. Disconnect power to the unit and to the output
control circuits to eliminate the potential shock hazard when removing the
bezel assembly. Toremoveastandard bezelassembly(withoutbezel securing
screws), press the latch under the lower bezel lip and withdraw the bezel
assembly. To remove the s ealed NEMA 4X/IP65 bezel assembly, loosen the
two bezelsecuring screws until aslight “click” is felt(the screws are retained
in the bezel) and withdraw the assembly.
Caution: The bezel assembly contains electronic circuits that are damaged by
static electricity. Before removing the assembly, discharge stray static
electricity on your body by touching an earth ground point. It is also
important that the bezel assembly be handled only by the bezel itself.
Additionally, if it is n ecessary to handle a circuit board, be certain that hands
are free from dirt, oil, etc., to avoid circuit contamination that may lead to
malfunction. If it becomes necessary to ship the unit for repairs, place the unit
in its case before shipping it.
Installing Bezel Assembly
To install the standard bezel assembly, insert the assembly into the case
until the b ezel latch snaps into position.
To install the NEMA 4X/IP65 bezel assembly,insert the assembly into the
case and tighten the bezel screws uniformly until the bezel contacts the case
and then turn each screw another half turn to insure a watertight seal (do not
over-tighten screws).
Caution: When substituting or replacing a bezel assembly, be certain that it is
done with the same model using the same Output Modules. Damage to the
controller may result if the unit’s output modules are not the same. A NEMA
4X/IP65 and a standard bezel assembly are NOT interchangeable.
Figure 2, Bezel Assembly
 Loading...