ASSEMBLY, INSTALLATION AND OPERATION
5
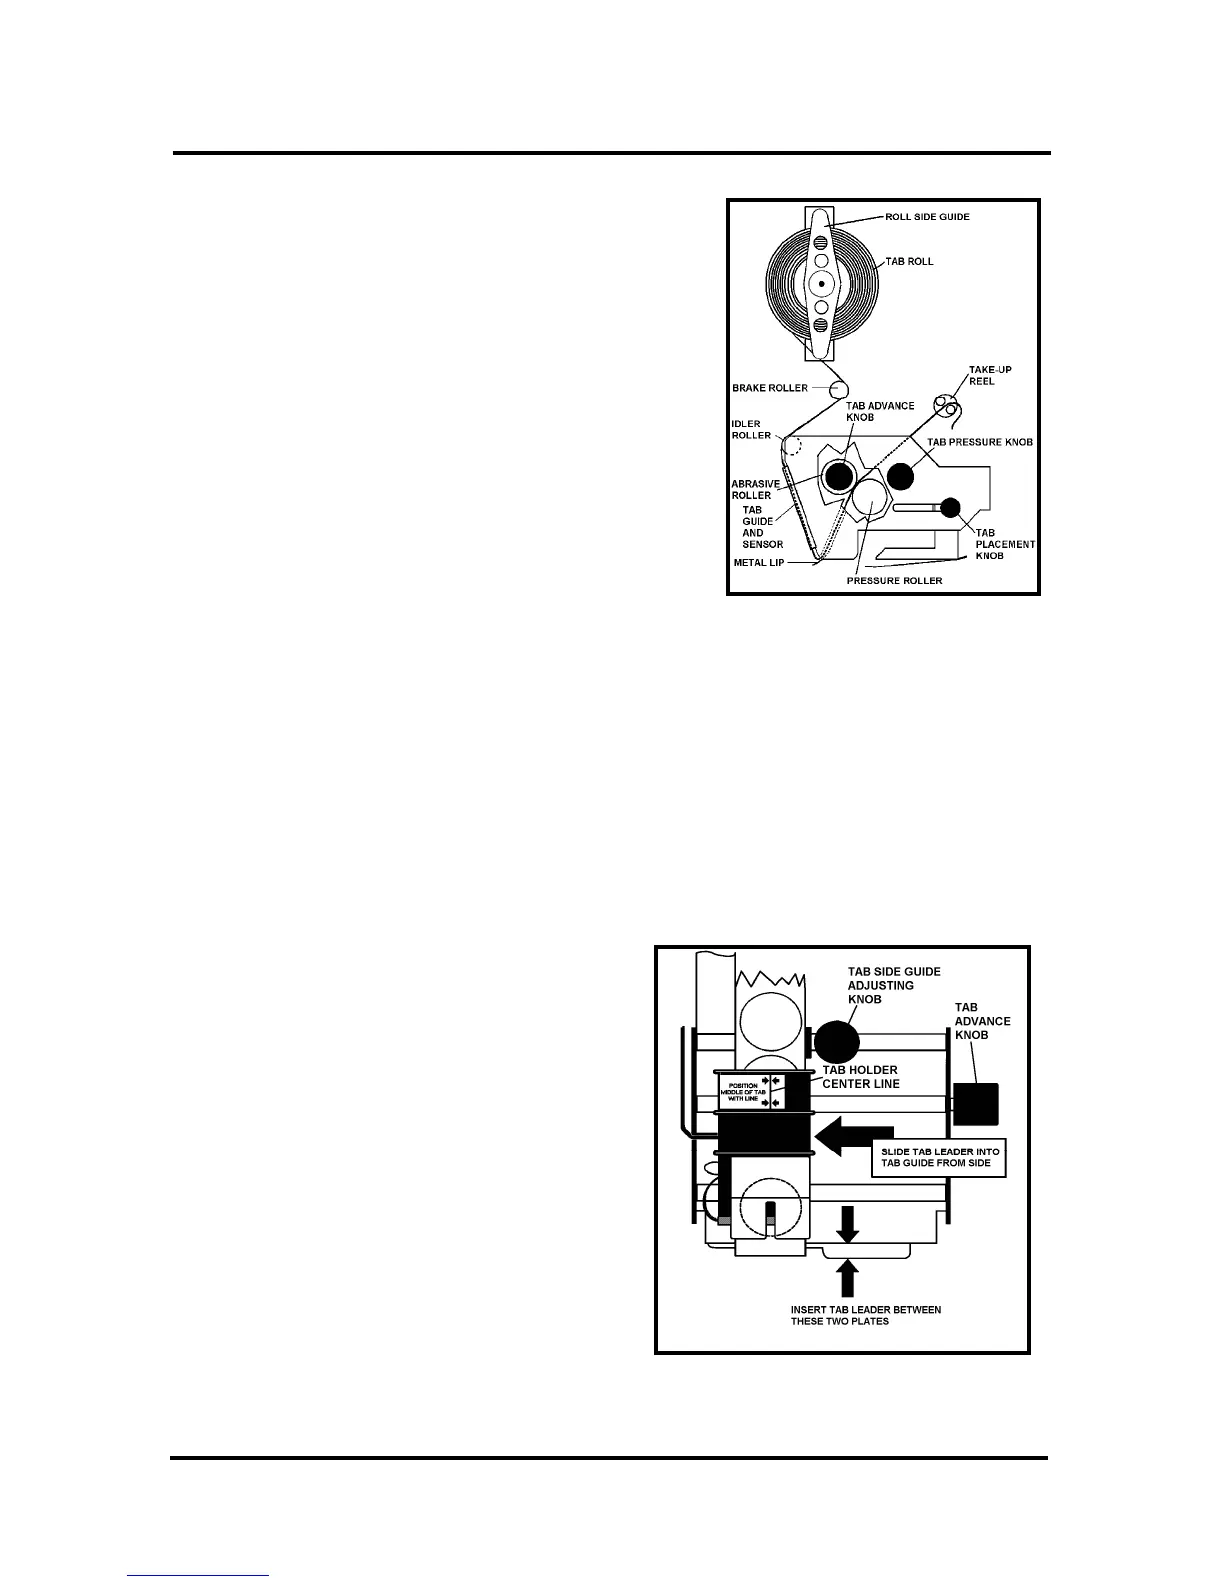
Loading Tabs:
1. Remove the Exit Roller, and then remove the
Tab Roll Side Guide by pulling it away from
the Tab Roll Support.
2. Mount the roll of tabs with the tab leader
coming off the roll on the exit side of the
tabber. Replace the Tab Roll Side Guide.
3. Unwind approximately 12 inches of tabs and
remove the first 12 tabs from the backing
material.
4. Thread the tab roll leader behind the Reel
Brake Assembly and then in front of the Idler
Roller. Then thread the leader through the Tab
Sensor Guide Assembly. This can be done by
pulling the leader down past the sensor guide assembly and then sliding the strip
into the slot on the guide from the side.
5. Thread the leader through the metal lip and up between the Abrasive Roller and
the Pressure Roller. It helps to release the pressure on the Pressure Roller during
this process. Release the Pressure Roller
6. Turn the Tab Advance Knob counterclockwise and feed 2” to 3” through the
center of the Tab Take-up Reel pins.
7. Center the paper backing in the black plastic Tab Guide and Sensor Assembly.
Note: Turning the Tab Pressure knob to OFF helps with the alignment. Return
the pressure knob to the ON position
after centering.
8. Set the Tab Side Guide to confine, but
not bind the tab backing. Adjust the
Tab Guide and Sensor Assembly so that
the Red centerline is in the approximate
center of the tab.
9. Replace the Exit Roller by pushing it
back into its holder.