en
Fixscreen
®
100 Slim (F)
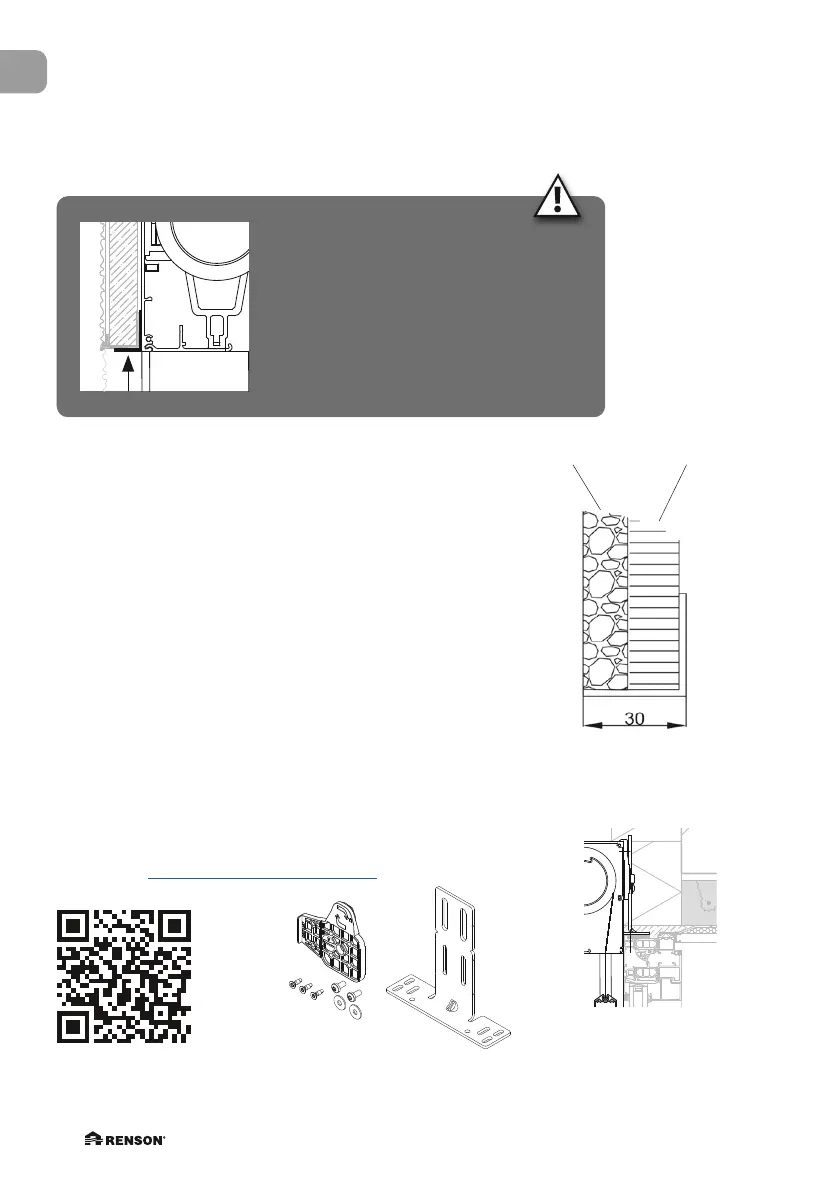
30
In case of finishing the facade with plaster, you will
need to use the RENSON plasterprofile (30mm
x 20mm of 30 mm x 30 mm). Never secure the
plaster profile directly on the front cover of the head
box. RENSON obliges to always use a plaster
profile, regardless of the width of the screen.
Processing instructions for plaster profile
• Never directly plaster unto the removable profile of the head
box! We oblige to always use a plaster plate, regardless
of the width of the screen. Otherwise the risk of cracks in
the plaster is too large. If you do not use an extra L-profile
in combination with a plaster plate, Renson
®
is not taken
responsible for eventual cracking in the plaster.
• Renson
®
is not liable for any damage/cracks that could be
the result of expansion of the aluminium head box (L-profile)
or as a result of poor placement of the plaster.
• We strongly advise the installer to use waffled plasterboard,
for example polystyrene plate (primer inclusive)
PlasterboardPlaster
110
150
110
150
Connect
&
Go
A3
Industriezone "Flanders field"
8790 Waregem (Belgium)
Tel. 056/62.71.11 Fax. 056/60.28.51
Einbauweise 7A - vor/oben auf dem Rahmen
Montagesituatie 7A - voor/boven het raam
Installation method 7A - in front/above the window
Montage 7A - devant/dessus le châssis
Tipo de montaje 7A - delnate/encima la ventana
46
48
35
35
110
30
58
48
2.2.4 • Options
2.2.4.1 • Plaster profile
2.2.4.2 • Fixation bracket
Preferably use the Renson
®
fixation bracket (S6021033) for
securing to the window.
More info at www.renson.eu/fixation-brackets
Bracket height
min. 80 mm - max. 185 mm
46
48
35
35
110
30
58
48
Min 80 mm - Max 185 mm
35
Connect
&
Go
Formaat
A3
Industriezone "Flanders field"
8790 Waregem (Belgium)
Tel. 056/62.71.11 Fax. 056/60.28.51
1/2
3D aanzicht
Vue en 3D
3D-View
3D-Ansicht
Vista 3D
Zij aanzicht
Vue de côté
Side view
Seitenansicht
Vista lateral
Doorsnede
Section
Cross section
Section
Secciòn
Verticale snede
Section verticale
Vertical cross section
Vertikaler Schnitt
Sección transversal vertical
Horizontale snede
Section horizontale
Horizontal cross section
Horizontaler Schnitt
Sección horizontal
Diepe zijgeleider 3 delen Standaard
Coulisse profonde 3 parties Standard
Deep side channel 3 parts Standard
Ziefe seitenführung 3 Teile Standard
Profundidad guía lateral 3 partes Estándar
Zijgeleider 3 delen
Coulisse 3 parties
Side channel 3 parts
Seitenführung 3 Teile
Guía lateral 3 partes
Koppel zijgeleider (K)
Coulisse d'accouplement (K)
Coupling side channel (K)
Koppel- Führung 3
Guía lateral de acoplamiento (K)
Onderlat
Barre de charge
Bottom rail
Die Endschiene
Perfil contrapeso
Bevestigingsbeugel
Équerre de fixation
Fixation bracket
Montagekonsole
Soporte de montaje
Einbauweise 7A - vor dem rahmenn
Montagesituatie 7A - voor het raam
Installation method 7A - in front of the window
Montage 7A - avant le châssis
Tipo de montaje 7A - delante la ventana
Afgewerkte hoogte
Hauteur finie
Finished height
Fertige Höhe
Altura acbada