en
Fixscreen
®
100 Slim (F)
41
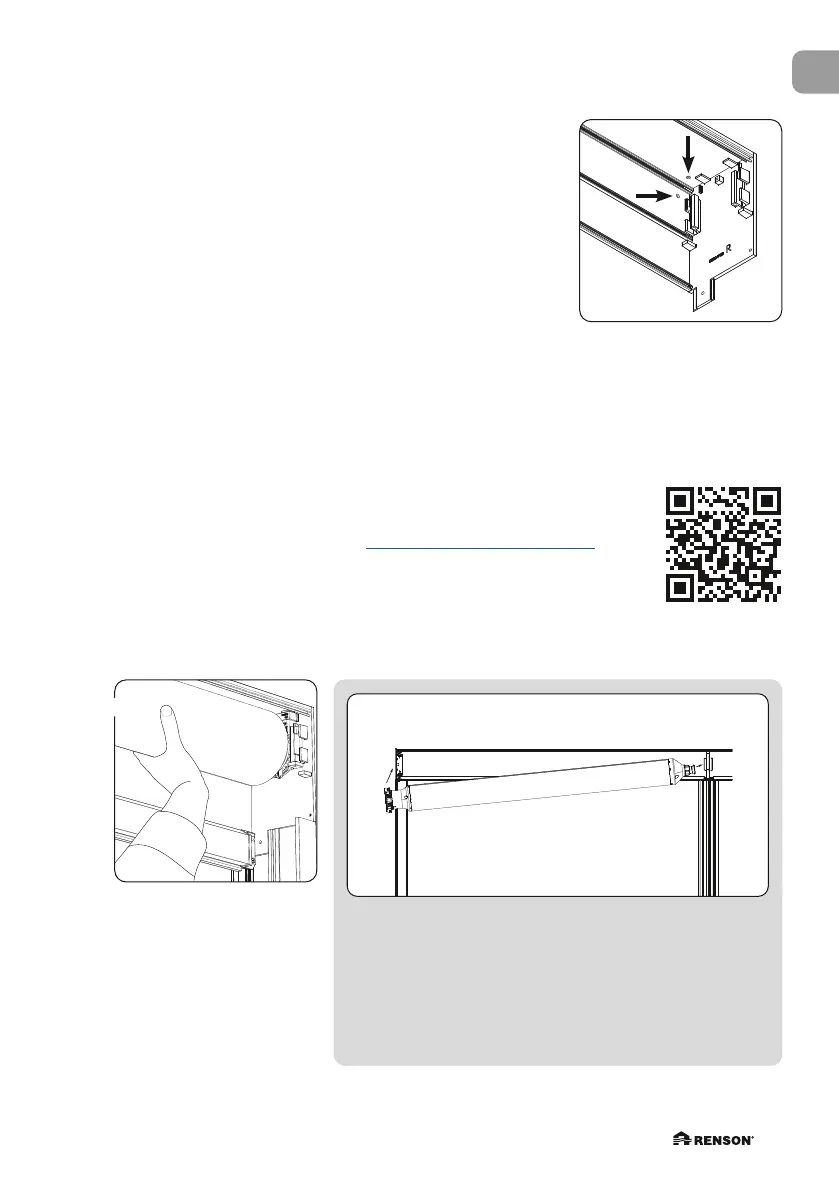
Slide the fabric set back into
its original position, with the
screen downward. Support
the bottom bar while doing
this. Thanks to Connect&Go
this handling goes smoothly.
➊
Drawn :
Date Saved :
Scale :
Size :
www.renson.eu - 8790 Waregem (Belgium)
A3
Use. :
FE100 SLIM 2.0
R
R E N S O N
Creating healthy spaces
Sheet :
Description :
Part. nr. :
Doc. nr.:
State :
Mat. : Finish : Weight : Volum e : Base part : Tol. :
clipp
1 /1
borging
13/12/2022
N/A 3715,737 cm³
Fixscreen 100 evo Slim
1 : 2
This drawing is owned by RENS ON and may not be copied
or shown to third parties without written permission.
units in mm
Area :
-
Revision
-
3.3.3 • Fabric set installation
The head box must always be fixed as shown on the drawing.
Securing instructions:
To avoid the head box coming loose from the side guiding
channels during transport or after installation:
• Always secure at the ends of the head box, as close as
possible to the side supporting end caps (see drawing).
Note that:
• the screws are placed as close as possible to the corner of
the head box, to avoid any contact between the rolled-up
fabric and the screw head.
• the cable does not get stuck.
For securing to the window: preferably use the Renson fixation bracket (S6021033).
For securing to the underlying structure: use carrosserie washers.
To prevent sagging of the head box:
• If the width is greater than 3 m, additional securing at the middle
of the head box is necessary. Preferably use the Renson fixation
bracket (S6021033) for securing this to the window.
More info on the fixation bracket at www.renson.eu/fixation-brackets
With a coupling side guiding channel, first fit the fabric
set into the coupling piece (A). Then slide the fabric set
into the insert (B) and fix the UPVC slide against the side
supporting end caps.
Start by inserting the part that houses the motor; next,
insert the part with the bearing (for safer installation).
When doing so, support the bottom bar. This will go
smoothly with the Connect&Go technology.
B
A