en
Fixscreen
®
100 Slim (F)
31
Direction removable fabric set
110
150
110
150
Connect
&
Go
A3
Industriezone "Flanders field"
8790 Waregem (Belgium)
Tel. 056/62.71.11 Fax. 056/60.28.51
Montagesituatie 7B - voor/boven het raam (met omgekeerde kast en zijgeleiders)
Einbauweise 7B- vor/oben auf dem Rahmen (mit umgedrehter Kassette und Seitenführung)
Installation method 7B - in front/above the window (with reversed box and side channels)
Montage 7B - devant/dessus le châssis (avec caisson inversé et coulisses inversées)
Tipo de montaje 7B - delnate/encima la ventana (con cajón y guías laterales invertidos)
46
48
35
35
110
30
110
150
110
150
46
48
35
35
110
30
Connect
&
Go
A3
Industriezone "Flanders field"
8790 Waregem (Belgium)
Tel. 056/62.71.11 Fax. 056/60.28.51
Montagesituatie 7B - voor/boven het raam (met omgekeerde kast en zijgeleiders)
Einbauweise 7B- Vor/oben auf dem rahmen (mit umgedrehter kasette und seitenführung)
Installation method 7 - in front/above the window (with reversed box and side channels)
Montage 7B - Avant/dessus le châssis (avec caisson inversé et coulisses inversées)
Tipo de montaje 7B - Delnate/encima la ventana (con cajón y guías laterales invertidos)
Finished height
Finished height
CF1
CF1
CF2
CF2
Finished height
CF1 CF2
110
150
110
150
Connect
&
Go
A3
Industriezone "Flanders field"
8790 Waregem (Belgium)
Tel. 056/62.71.11 Fax. 056/60.28.51
Einbauweise 7A - vor/oben auf dem Rahmen
Montagesituatie 7A - voor/boven het raam
Installation method 7A - in front/above the window
Montage 7A - devant/dessus le châssis
Tipo de montaje 7A - delnate/encima la ventana
46
48
35
35
110
30
58
48
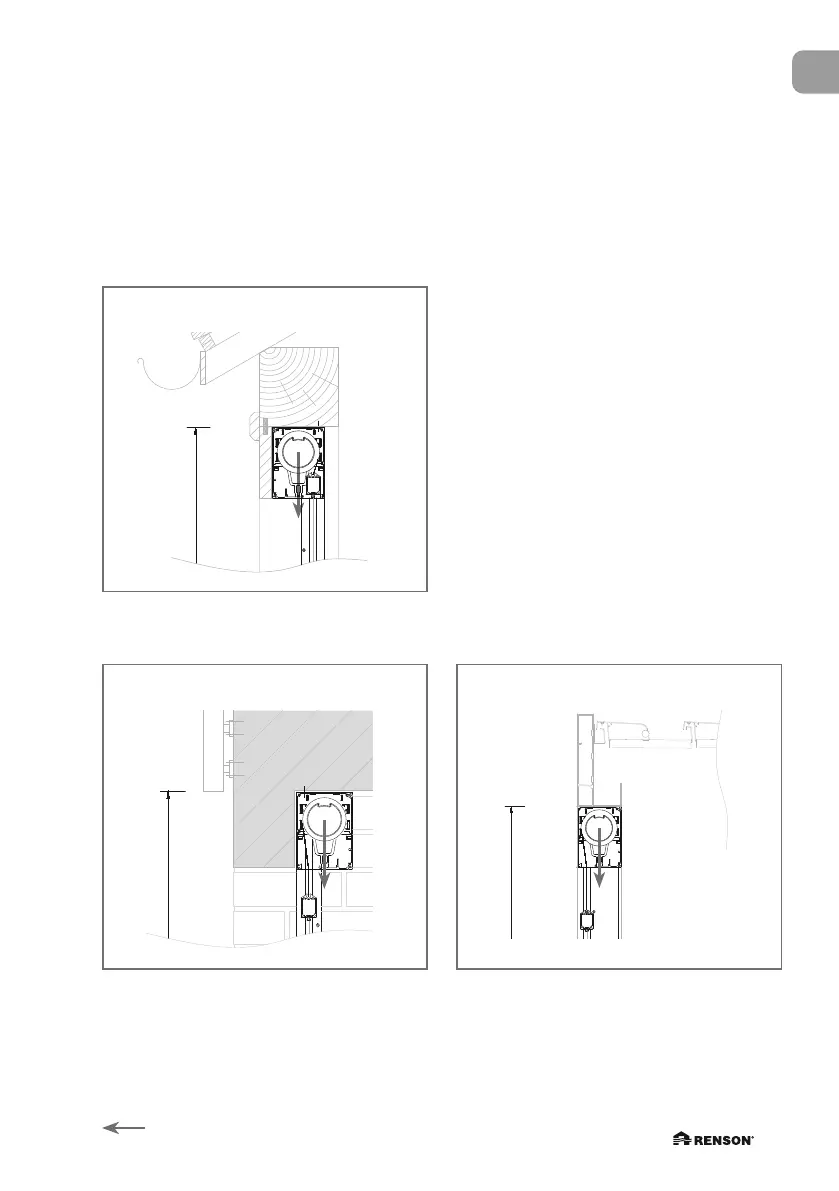
2.3 • Freestanding, installation without any construction behind
Fixscreen 100 Slim F is mounted, in freestanding position, in combination with an existing terrace
covering, balcony or Algarve (extra fixation of the head box is obligatory, see page 41 for
securing instructions).
2.3.1 • Installation method 7A F
2.3.2 • Installation method 7B F
Wooden terrace covering
Balcony Algarve