37
38
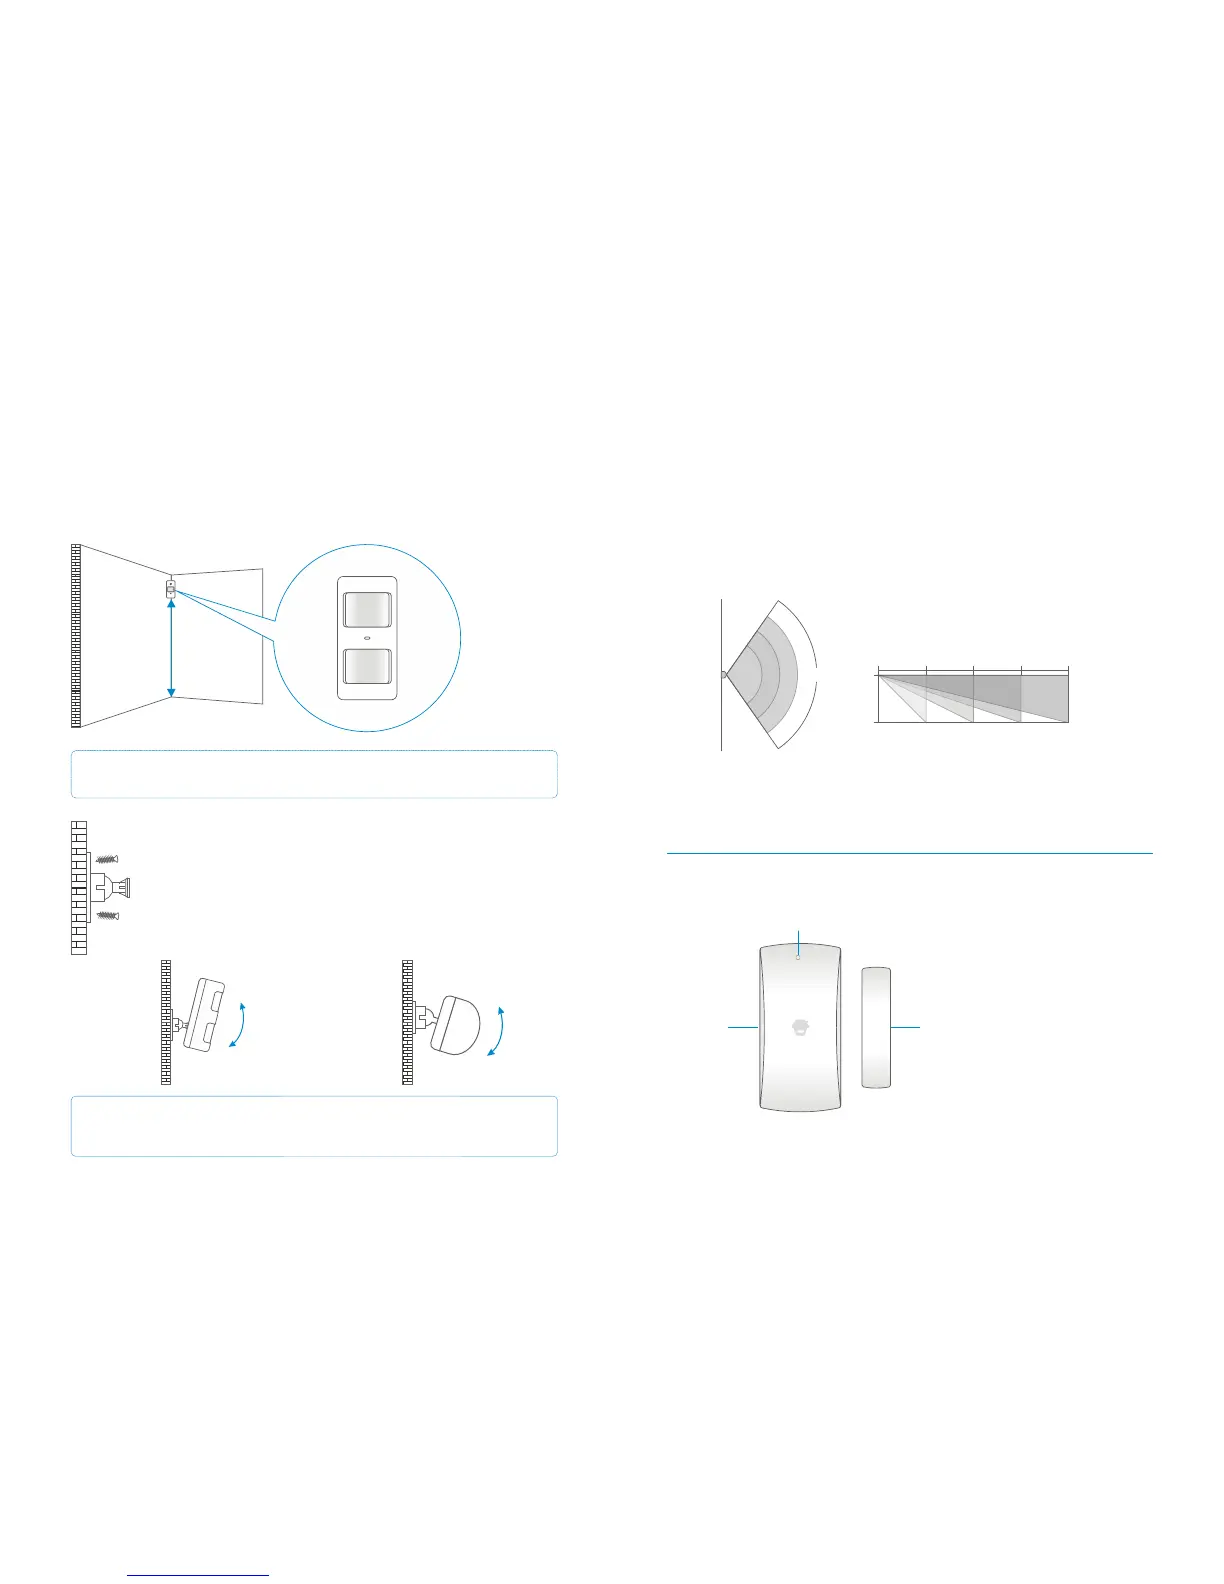
PIR Sensor Test Mode
1. Once the Sensor is fully installed and active it can be tested. Press the test button
once and walk from left to right or right to left in the room. The LED indicator will
flash once when motion is detected.
2. Adjust the angle of the Sensor if needed to obtain the best results.
3. Repeat step 1 and 2 to test the new angle.
2m
4m
6m 8m0m
0m
2m
110°
Top view
Side view
Door/Window Sensor (front)
Wireless Door/Window Magnetic Sensor
LED Status Indicator
Transmitter
Magnet
Floor
Installing a PIR Sensor
Avoid installing the Sensor directly facing a window, near air conditioning, heating, a
refrigerator, oven, in direct sunlight and places where the temperature fluctuates.
Also avoid placing two Sensors opposite each other; or within each others detection
range.
Mount the bracket using the screws supplied as shown in the figure on
the left. Then place the Sensor in the bracket. Position the PIR to cover
the required detection range. Test the operation of the PIR by putting it
into test mode, as described on page 36.
Side view
Top view
IMPORTANT: If the PIR Sensor is used in a room where pets are permitted fit the
Sensor vertical to the wall and do not tilt it downwards.
Note: The ideal mounting height of the Sensor is 2.2 metres from the floor.
2.2m