© Xiamen RGBlink Science & Technology Co., Ltd.
Ph: +86 592 5771197
| support@rgblink.com | www.rgblink.com
Chapter 2 Install Your Product
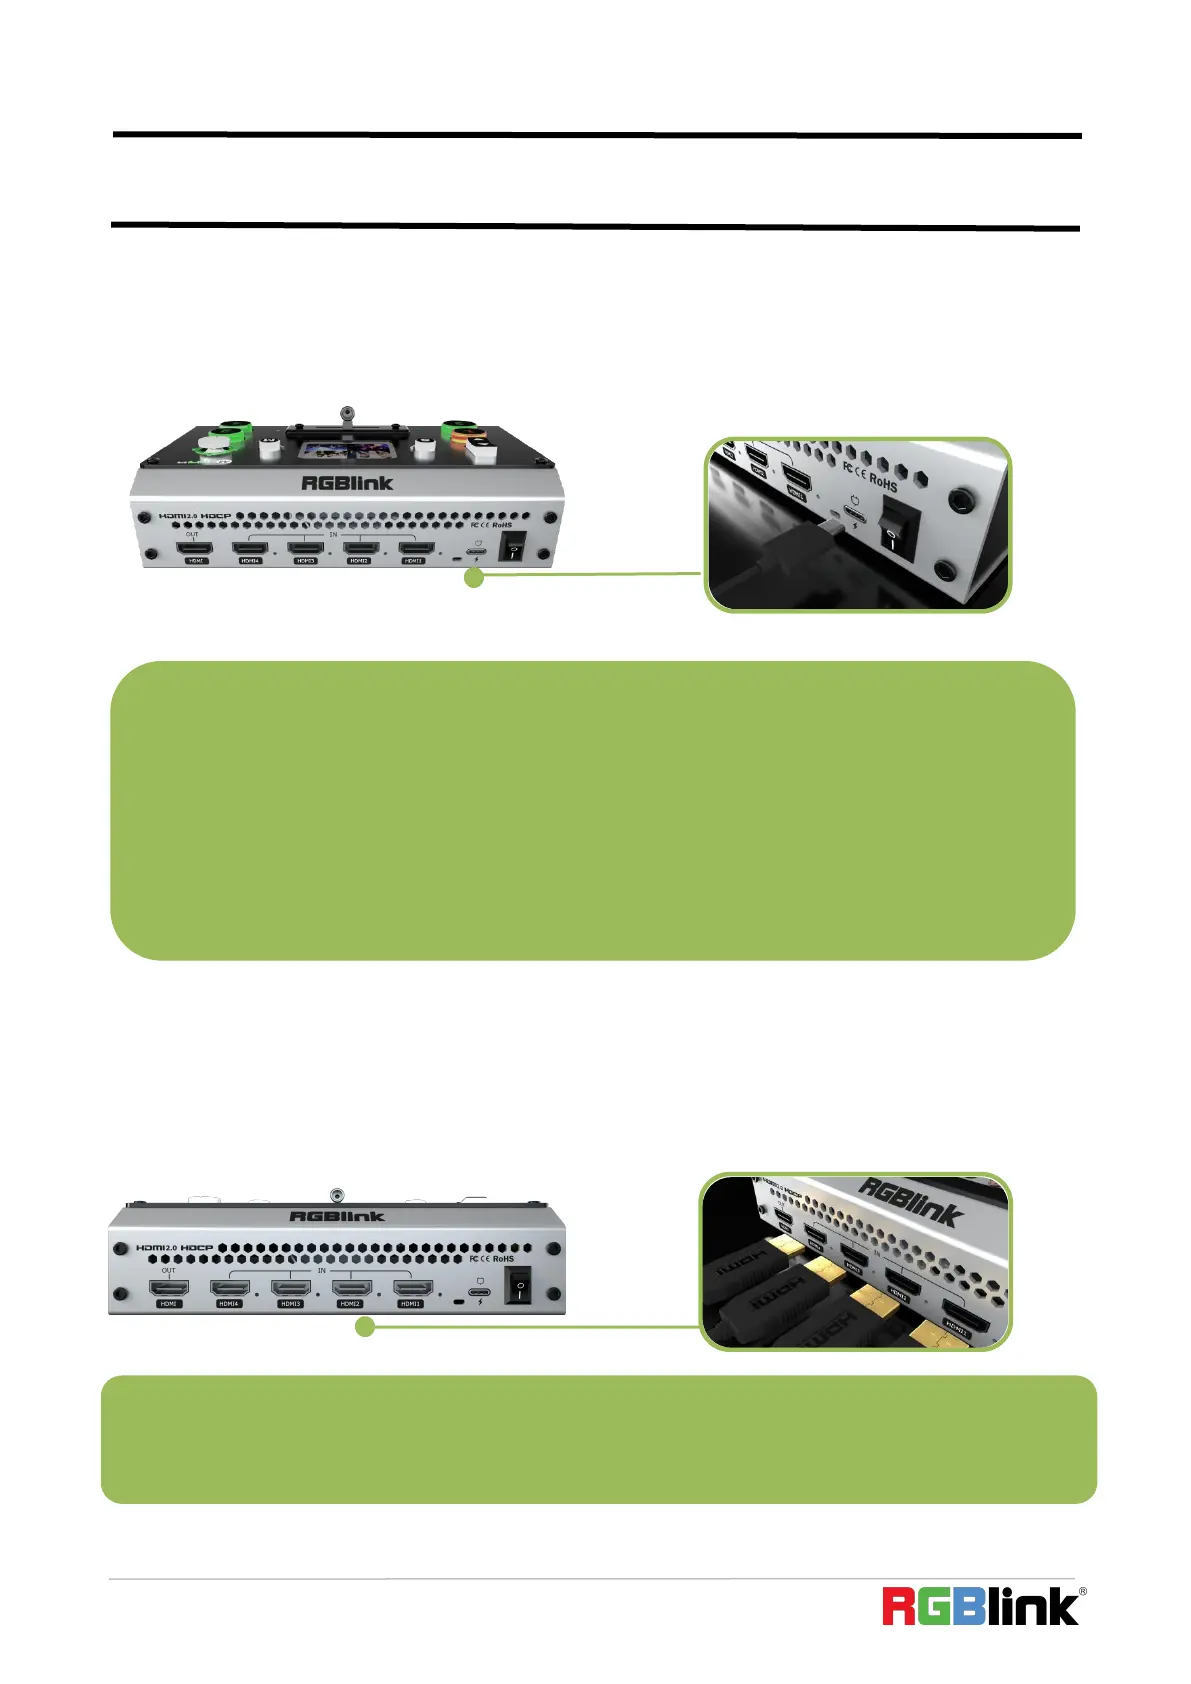
2.1 Plug in Power
RGBlink mini-pro is packaged with a 12V power link cable and Type C power Adapter.
When linking the power supply, please check the power supply standard used in your
country/region.
2.2 Input HDMI Signal Source
You can use any camera, computer or other HDMI device as the input source of the mini-pro. It
supports up to 4 sources of different formats and resolutions at the same time via 4 HDMI ports,
and 4 HDMI inputs support up to 4K@60Hz. If you are using interlaced signal, mini-pro supports
de-interlacement through HDMI 1 automatically. You can see the resolution of the input signal on
the mini-pro screen when there is active signal plug in.
2.3 Connecting HDMI Output
Connect mini-pro to power plug by the link cable
Note: The HDMI cable is not included in the mini-pro package and needs to be purchased separately. Some
camcorders use a mini HDMI port, you need to buy a mini HDMI-HDMI cable separately when you use these
camcorders.
Note:
The Power Supply included with mini-pro is the recommended power supply for use with the device.In the
event the power supply is mislaid or otherwise not available, a USB-C power supply may be used provided
that the power supply :
1. meet s the USB Power Delivery (PD3.0) specification
2.has a "Fast Charge" capability
3.is rated for a minimum of 20W
and if a replacement USB-C cable is also needed,
4.a only a certified PD aware USB cable should be used