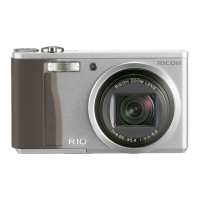
If you are using the camera for the first time, read this section.
55
1
Press the 6 (Playback) button.
• The last file recorded is displayed.
2
Press the ADJ./OK button !"#$ to display the still
image you want to enlarge.
3
Turn the zoom lever toward 8 (Enlarged View).
• The still image is enlarged.
Note ---------------------------------------------------------------------------------------------------
• When [LCD Confirm.] is set to [Hold] on the setup menu (GP.168), the image
displayed on the screen after being taken can be enlarged.
• Movies cannot be enlarged.
Enlarging Images
You can enlarge a still image displayed on the picture display.
Image Size Enlarged View (maximum magnification)
640 × 480 3.4×
1280 × 960 6.7×
Image sizes other than those above 16×
In Enlarged View
8 on the
Zoom Lever
Enlarges the displayed still image.
9 on the
Zoom Lever
Returns the enlarged still image to its original size.
ADJ./OK
Button
If the image size is 2048 × 1536 or larger:
In enlarged view at magnifications of less than 8×, pressing the
ADJ./OK button increases the magnification to 8×. In enlarged
view at magnifications of 8× or more, pressing the ADJ./OK
button increases the magnification to 16×.
If the image size is 1280 × 960 or less:
Pressing the ADJ./OK button in enlarged view increases the
magnification to the maximum level.
Regardless of the image size, pressing the ADJ./OK button when
an image is displayed at the maximum magnification returns the
image to its original size. You can move the area displayed in
enlarged view by pressing the ADJ./OK button !"#$.

 Loading...