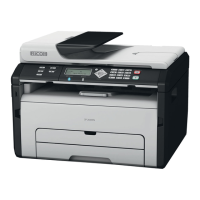
5. Bypass Tray
This tray can hold one sheet of plain paper.
6. Tray 1
This tray can hold up to 150 sheets of plain paper.
7. USB Flash Disk Port
Insert a USB flash disk to store scanned files using the Scan to USB function.
8. Power Switch
Use this switch to turn the power on or off.
9. Power Connector
Connect the power cord to the machine here. Insert the other end of the cable into a nearby wall outlet.
10. Auto Document Feeder (Exposure Glass Cover)
The ADF is integrated with the exposure glass cover. Open this cover to place documents on the exposure
glass.
11. Input Tray for the ADF
Place stacks of originals here. They will feed in automatically. This tray can hold up to 15 sheets of plain
paper.
12. ADF Cover
Open this cover to remove originals jammed in the ADF.
13. Rear Cover
Open this cover to deliver sheets face up or remove jammed paper.
14. Line and TEL Port
• Upper port: Port for external telephone connection.
• Lower port: G3 (analog) line Interface port for telephone line connection.
15. USB Port
Use this port to connect the machine to a computer using a USB cable.
16. Ethernet Port
Use this port to connect the machine to network using an Ethernet cable.
17. Tray Cover
Attach this cover when you extend the tray.
1. Guide to the Machine
16

 Loading...