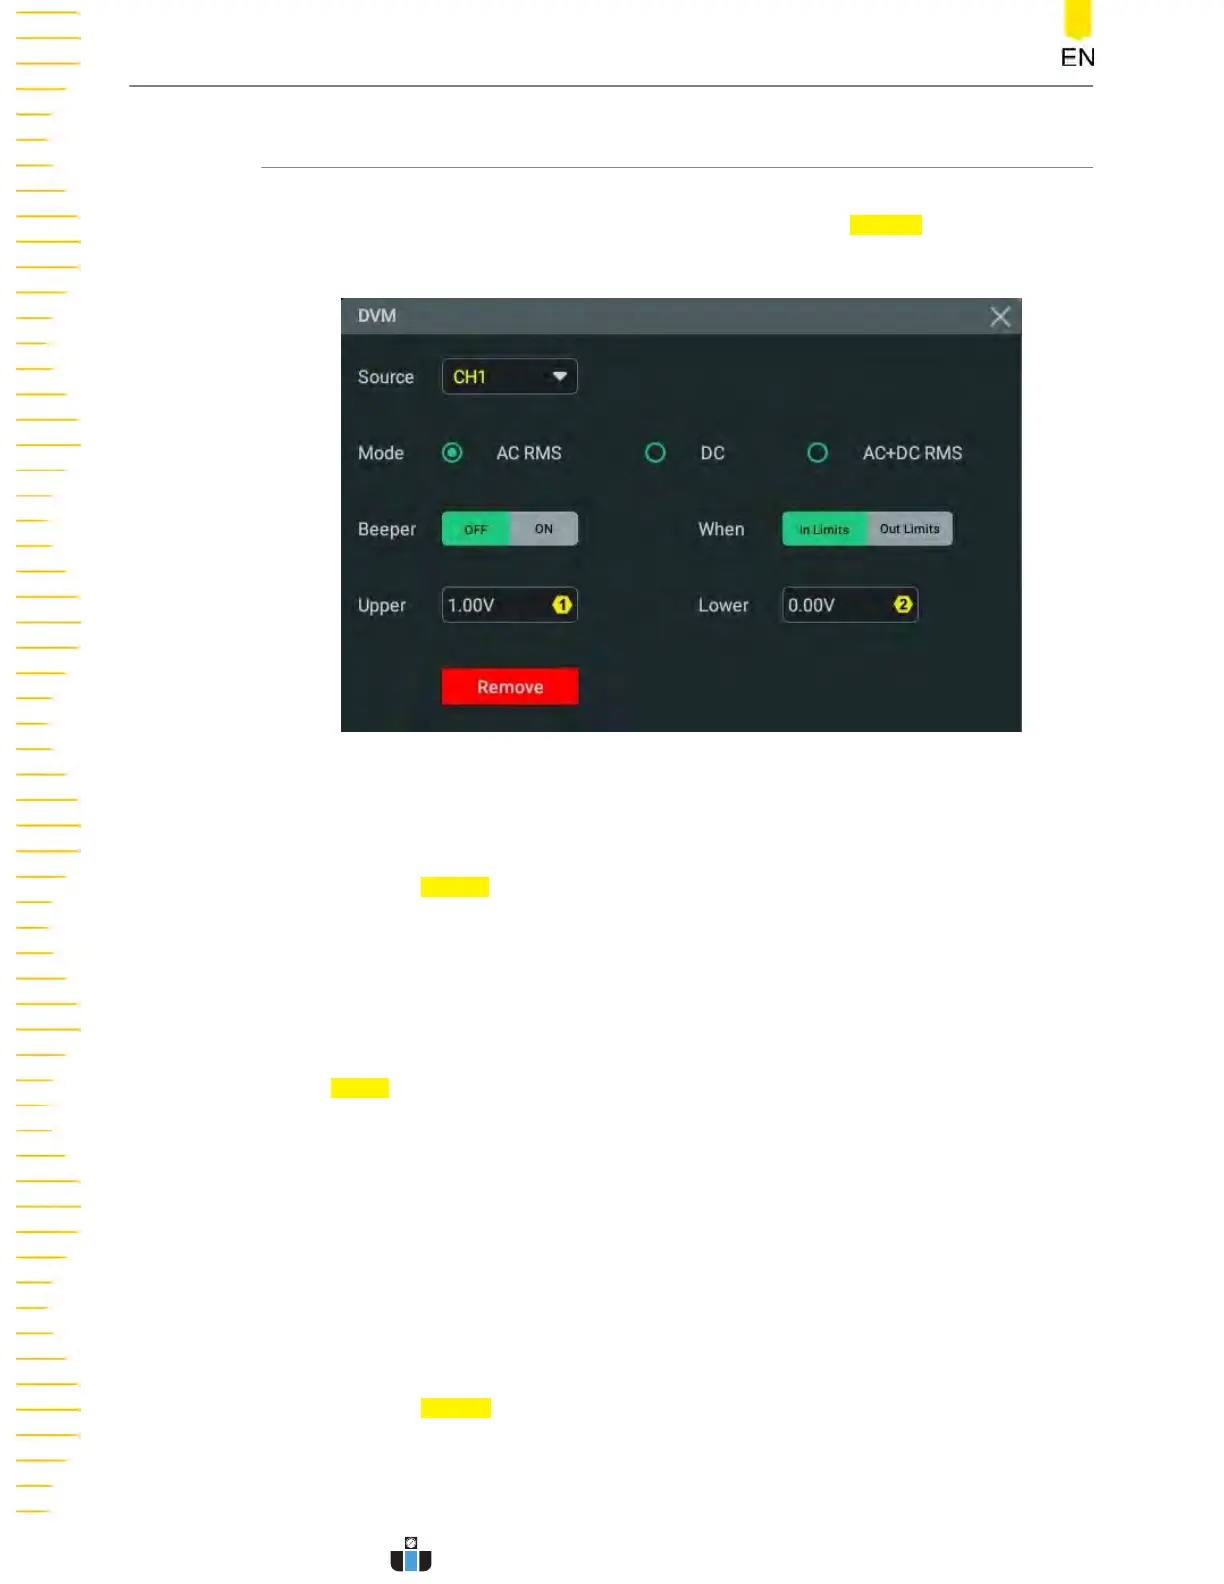
11.1.1 Measurement Settings
After the DVM is enabled, click or tap the "DVM" label in the "Result" bar at the right
section of the scr
een and a window is displayed. Click or tap
Setting in the window to
enter the DVM setting menu, as shown in the figure below.
Figure 11.1 DVM Setting Menu
Select the Measurement Source
Click or tap the Source drop-down button to select the desired source. The analog
channel (CH1-CH4) can be selected to be the measurement source.
Even if the analog channel (CH1-CH4) is not enabled, you can still perform the DVM
measurements.
Select the Measurement Mode
In the Mode item, you can select the DVM mode. The DVM measurement modes
include A
C RMS, DC, and AC+DC RMS.
• AC RMS: displays the root-mean-square value of the acquired data, with the DC
component removed.
• DC: displays the average value of the acquired data.
• AC+DC RMS: displays the root-mean-square value of the acquired data.
Set the Limits
Click or tap the
Beeper on/off swit
ch to turn on or off the beeper. When the beeper is
turned on, you can enable the beeper to sound an alarm when the voltage value is
inside or outside the limited range.
Digital Voltmeter (DVM) and Frequency Counter
DHO1000 User Guide
162
Copyright ©RIGOL TECHNOLOGIES CO., LTD. All rights reserved.
www.calcert.com sales@calcert.com1.888.610.7664
0
5
10
15
20
25
30
 Loading...