EasyManuals Logo

Risco LightSYS 2 Series User Manual

Risco LightSYS 2 Series
256 pages
To Next Page IconTo Next Page
To Previous Page IconTo Previous Page
Page #23 background imageLoading...
Page #23 background image
MountingandWiring
Page 23
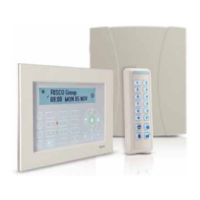
Wall Mounting the LightSYS2 Box
TheLightSYS2ishousedinastateoftheartplasticenclosement,consistingofbackandfront
panelsandfeaturingaplasticclickmountingforallinternalcomponents.
Topreparethewallforboxmounting
1. Separatethesubassembliesbypressingthecircularlockingplasticbrackets
oneitherside
toreleasethefrontcover.
Figure 2-1 Box clip release
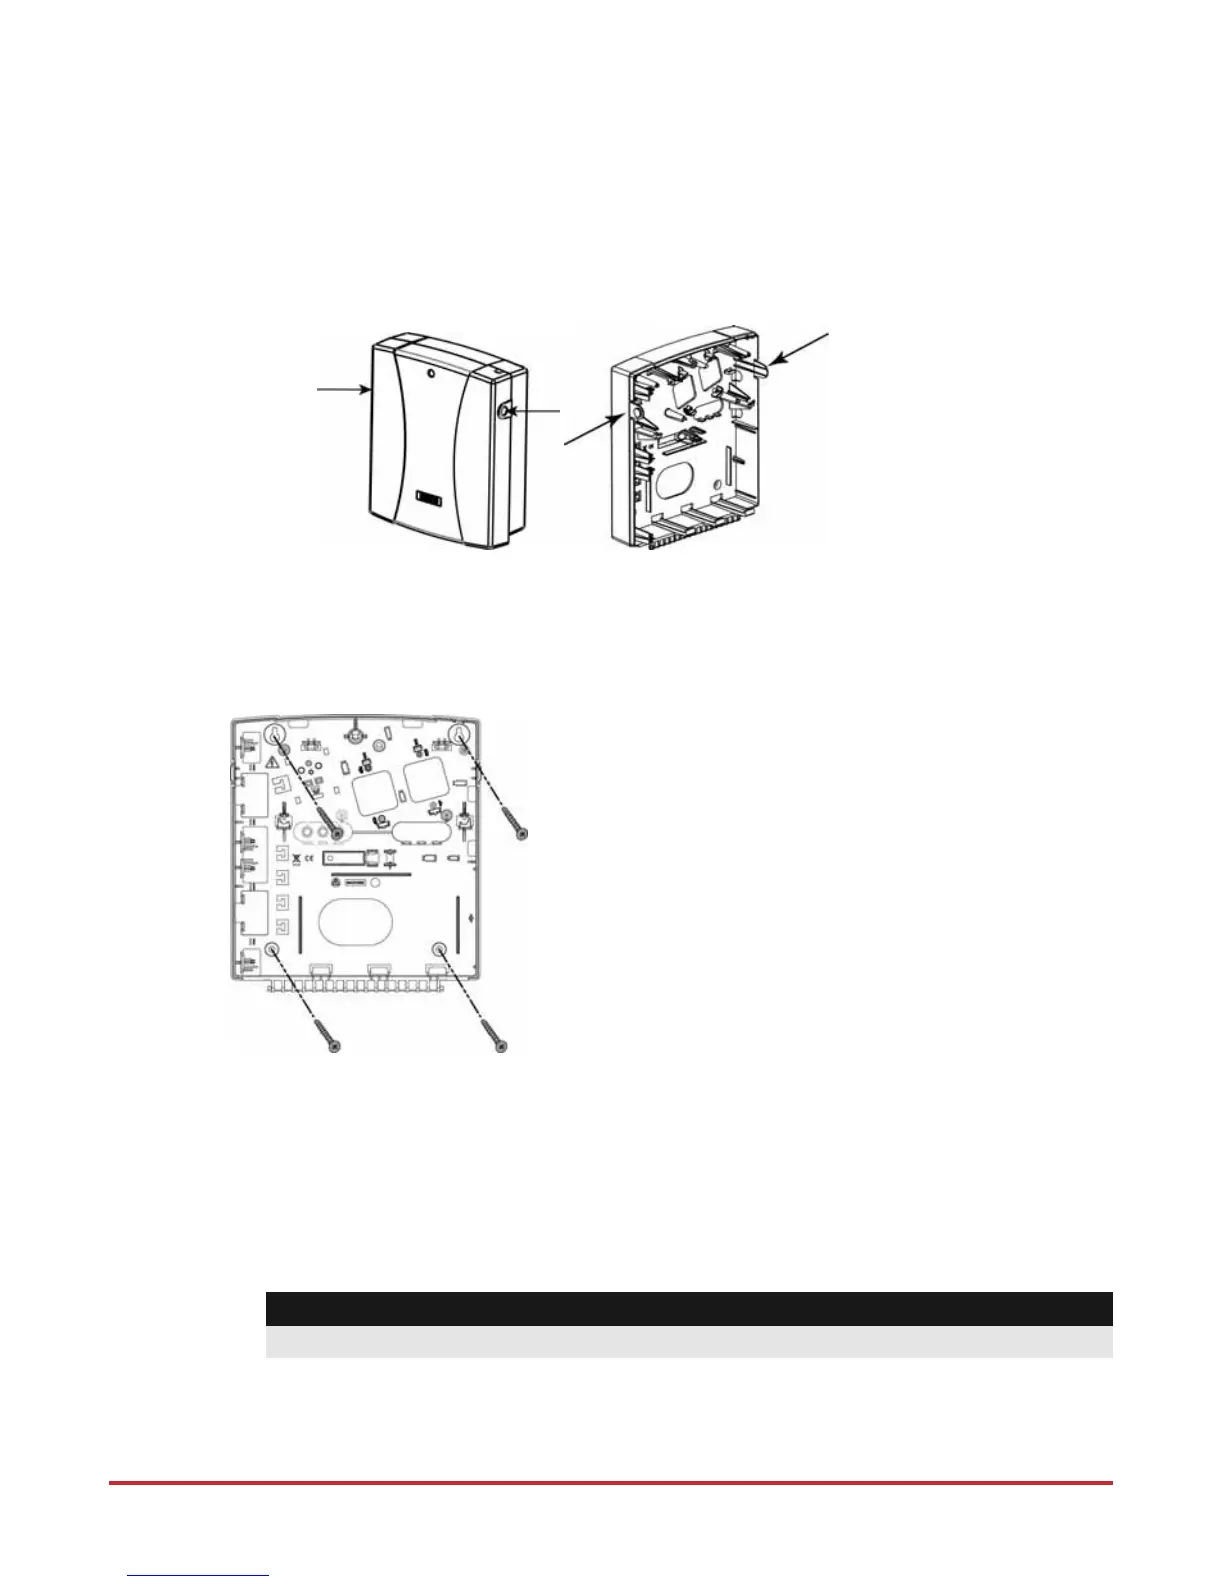
2. Holdthemountingbracketagainstthewallasatemplateandmarkthe
locationsforthemountingholes(4mountingholesandanadditional
optionalholeforsecuringthetamperprotectionbracketitem).
Figure 2-2 Mounting screw template
3. Drillthedesiredmountingholesandplace
thescrewanchors.
AC adaptor and main board
TheLightSYS2ispoweredbyanAC/DCAdaptor100240V50/60Hz14.4V—
1.5A.
Caution:
ACwiringshouldbedonebyacertifiedelectrician
N
ote:FormountingtheLightSYS
i
nsideametalenclosure(RP432BM,
R
P432BM1)refertotheinstructions
s
uppliedwiththebox.

Table of Contents

Questions and Answers:

Question and Answer IconNeed help?

Do you have a question about the Risco LightSYS 2 Series and is the answer not in the manual?

Risco LightSYS 2 Series Specifications

General IconGeneral
Control Panel TypeHybrid
Operating Temperature-10°C to 55°C
Outputs4
CommunicationPSTN, GSM, IP
Wireless Frequency868MHz
ProgrammingVia keypad
Backup Battery12V, 7Ah
Remote ManagementYes
HumidityUp to 93% non-condensing

Related product manuals