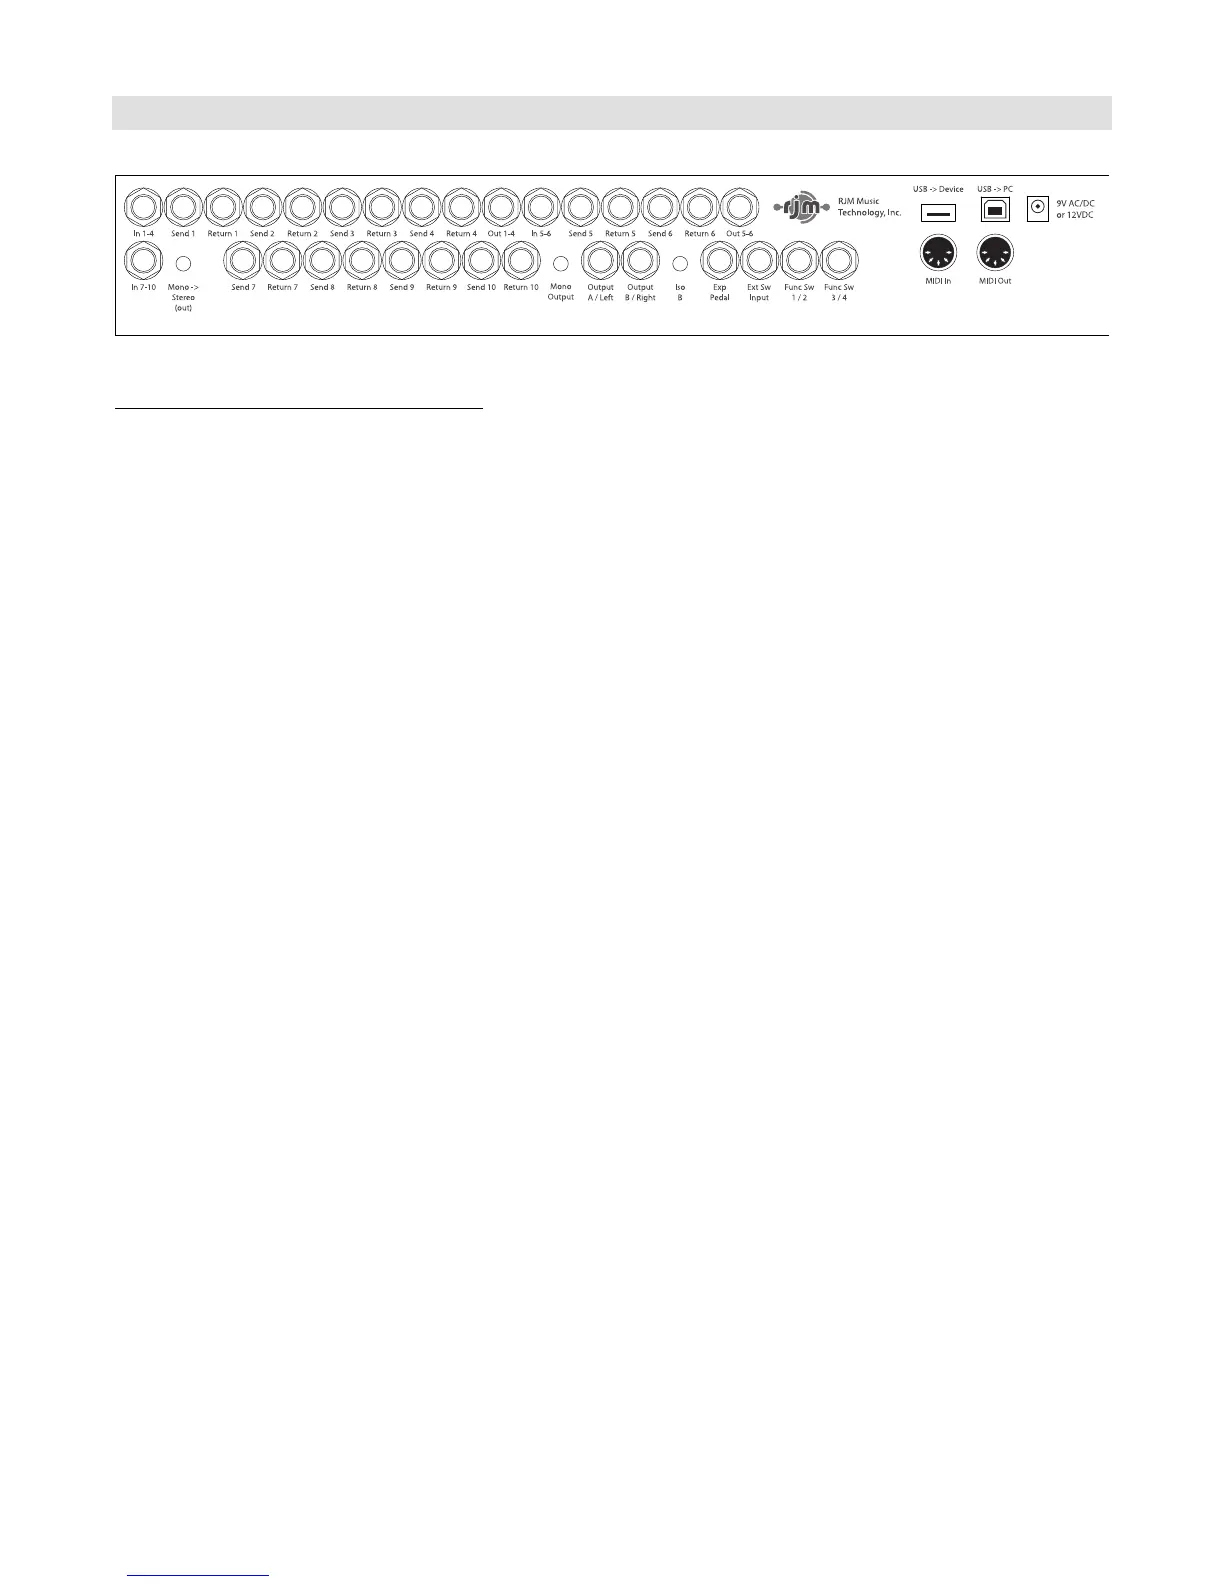
Rear Panel
Rear Panel Connections and Switches
In 1-4 – This is the main input where your guitar plugs in.
Send 1-4 and Return 1-4 – Connect your first four effects here. The send jack connects to the input on your effect, the
return jack connects to the output on your effect.
Out 1-4 and Input 5-6 – This is an insert point that allows you to connect something between loops 4 and 5. This
allows you split out loops 5 and 6 and use them in a different location. If you don’t plug anything into Out 1-4 and
Input 5-6, the signal from loop 4 will continue on to loop 5, placing loops 1-6 in series with each other.
Send 5-6 and Return 5-6 – Connect your next two effects here. The send jack connects to the input on your effect, the
return jack connects to the output on your effect.
Out 5-6 – This is the output from loop 6. If you’re using loops 7-10 in your amp’s effects loop, this jack should connect
to your amp’s input. If you’re using all 10 loops in front of your amp, don’t connect anything to this jack.
In 7-10 – This is the input to loop 7. If you’re using loops 7-10 in your amp’s effects loop, connect this jack to your amp’s
effects loop send. If you’re using all 10 loops in front of your amp, don’t connect anything to this jack. If nothing is
plugged into this jack, the signal from loop 6 will be sent to the input of loop 7.
Mono->Stereo button – If this button is pressed in, the signal coming from In 7-10 is passed unchanged to loop 7. If
the button is in the out position, the signal is converted to stereo before going to loop 7. This is done by connecting the
tip of the In 7-10 jack to the tip and ring of loop 7. Keep this button pressed in if you’re using a mono output, or the
signal coming into In 7-10 is stereo and you’re using stereo outputs.
Send 7-10 and Return 7-10 – Connect your last four effects here. The send jack connects to the input on your effect,
the return jack connects to the output on your effect. These loops are stereo capable using TRS connectors.
Mono Output button – If this button is pressed in, the left (mono) side of the signal coming from Loop 10 is passed to
both the A and B outputs. This allows you to use the outputs as an A/B/Y switch. If this button is not pressed in, the
output jacks are wired in stereo (left and right).
Iso B – Pressing this button activates an isolation transformer on the B output. This is useful when using more than one
amp – the isolation transformer may help reduce hum due to ground loops between the amps. It’s important to have
one or more of the audio buffers turned on when using the isolation transformer to prevent tone loss.
Exp Pedal – An expression pedals can be connected to this port using a ¼” TRS cable. Refer to the Expression Pedal
section for more details.
Ext Sw Input – An external footswitch can be connected to this port to add two more switches to the system. The port
can take a single or double footswitch connected with a ¼” TRS (tip-ring-sleeve) cable. These switches are fully
configurable using the Mastermind PBC editor software and can perform all of the operations the on-board switches
can. Refer to the External Switch section for more details.