Other Special Features
Built-in Tuner
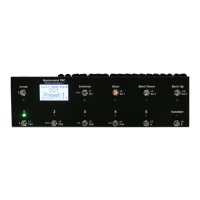
The Mastermind PBC features a built-in digital chromatic tuner. To use it, simply press the Mute button while in the
normal preset mode. The screen will change to show the tuner status. The closest note name is displayed in the center,
and arrows can appear on the left side (indicating the note is flat) or the right side (indicating the note is sharp). When
the note is close to the target note, both arrows will appear.
There is also a bar graph at the bottom of the screen. It’s not visible when perfectly tuned, but moves to the left as your
note gets more flat, and moves to the right as your note gets more sharp. This example shows a note that’s close to E,
but a bit flat.
Press the Mute button again to exit the tuner.
As of the 2.0 firmware release, you can configure the reference frequency for the tuner, and it will be displayed on the
tuner display.
Function Button
The Function button is a multi-purpose button that has several things it can do in the preset mode. By default, it recalls
the global preset (see below).
Using the setup menu, you can also set it to be a tap tempo button that sends MIDI clock (see below).
A third option is to have the Function button control a Mini Effect Gizmo that’s connected to the Mastermind PBC. This
allows you to add five more loops to your pedalboard. Simply connect the MIDI output jack of the Mastermind PBC to
the MIDI input of the Mini Effect Gizmo. Now make the audio connections from the Mini Effect Gizmo to the
Mastermind PBC. Typical connections are:
In between loops 4 and 5 – Connect Out 4-5 on the PBC to Buf In on the Mini Effect Gizmo. Connect In 5-6 on the PBC
to CS Out on the Mini Effect Gizmo.
After loop 6 – Connect Out 5-6 on the PBC to Buf In on the Mini Effect Gizmo. Connect CS Out on the Mini Effect
Gizmo to your amp’s input (if you’re using loops 7-10 in the amps effects loop), or connect CS Out on the Mini Effect
Gizmo to Input 7-10 on the PBC if you’re using all of your effects in front of the amp’s input.
Now, enter the setup menu, select Function Button, then select Mini Effect Gizmo. Press Exit to leave setup mode.
When you press the Function button, you enter a mode where buttons 1-5 will control the loops on the Mini Effect
Gizmo, similar to how they control the loops on the PBC in loop selection mode. You can hold the Function button to
store the Mini Effect Gizmo loop settings to the current preset.
This mode assumes that the Mini Effect Gizmo is in its factory default state. To factory reset the Mini Effect Gizmo,
power It up while holding the 1 and 4 buttons (on the Mini Effect Gizmo). The lights will all turn on briefly, then turn off.
That’s the only indication you’ll receive. The Mini Effect Gizmo is now reset and ready to go.