Robotiq Hand-E C10 Gripper Instruction Manual
l
Interaction with operated parts (sharp or rough)
l
Dynamics of the operation (accelerations)
6.1. Gripper cleaning
Maintenance Interval Tools You Need Parts You Need
Weekly or daily in dirty operating
conditions
l
4 mm hex key
l
2.5 mm hex key
l
Dry tissue or towel
l
Low strength thread locker
None (unless damage is detected)
CAUTION
Always turn off the robot and the gripper power supply before performing any maintenance operations.
The maintenance operator must be grounded to prevent electrostatic discharge that could damage the
gripper electronics.
1. Remove the gripper from its coupling using the 4 mm hex key to unscrew the four (4) M5-0.8 x 25 mm socket head cap
screws. Note that each screw uses a tooth lock washer, do not lose them.
2. Remove the stop plate from the gripper using the 2.5 mm hex key.
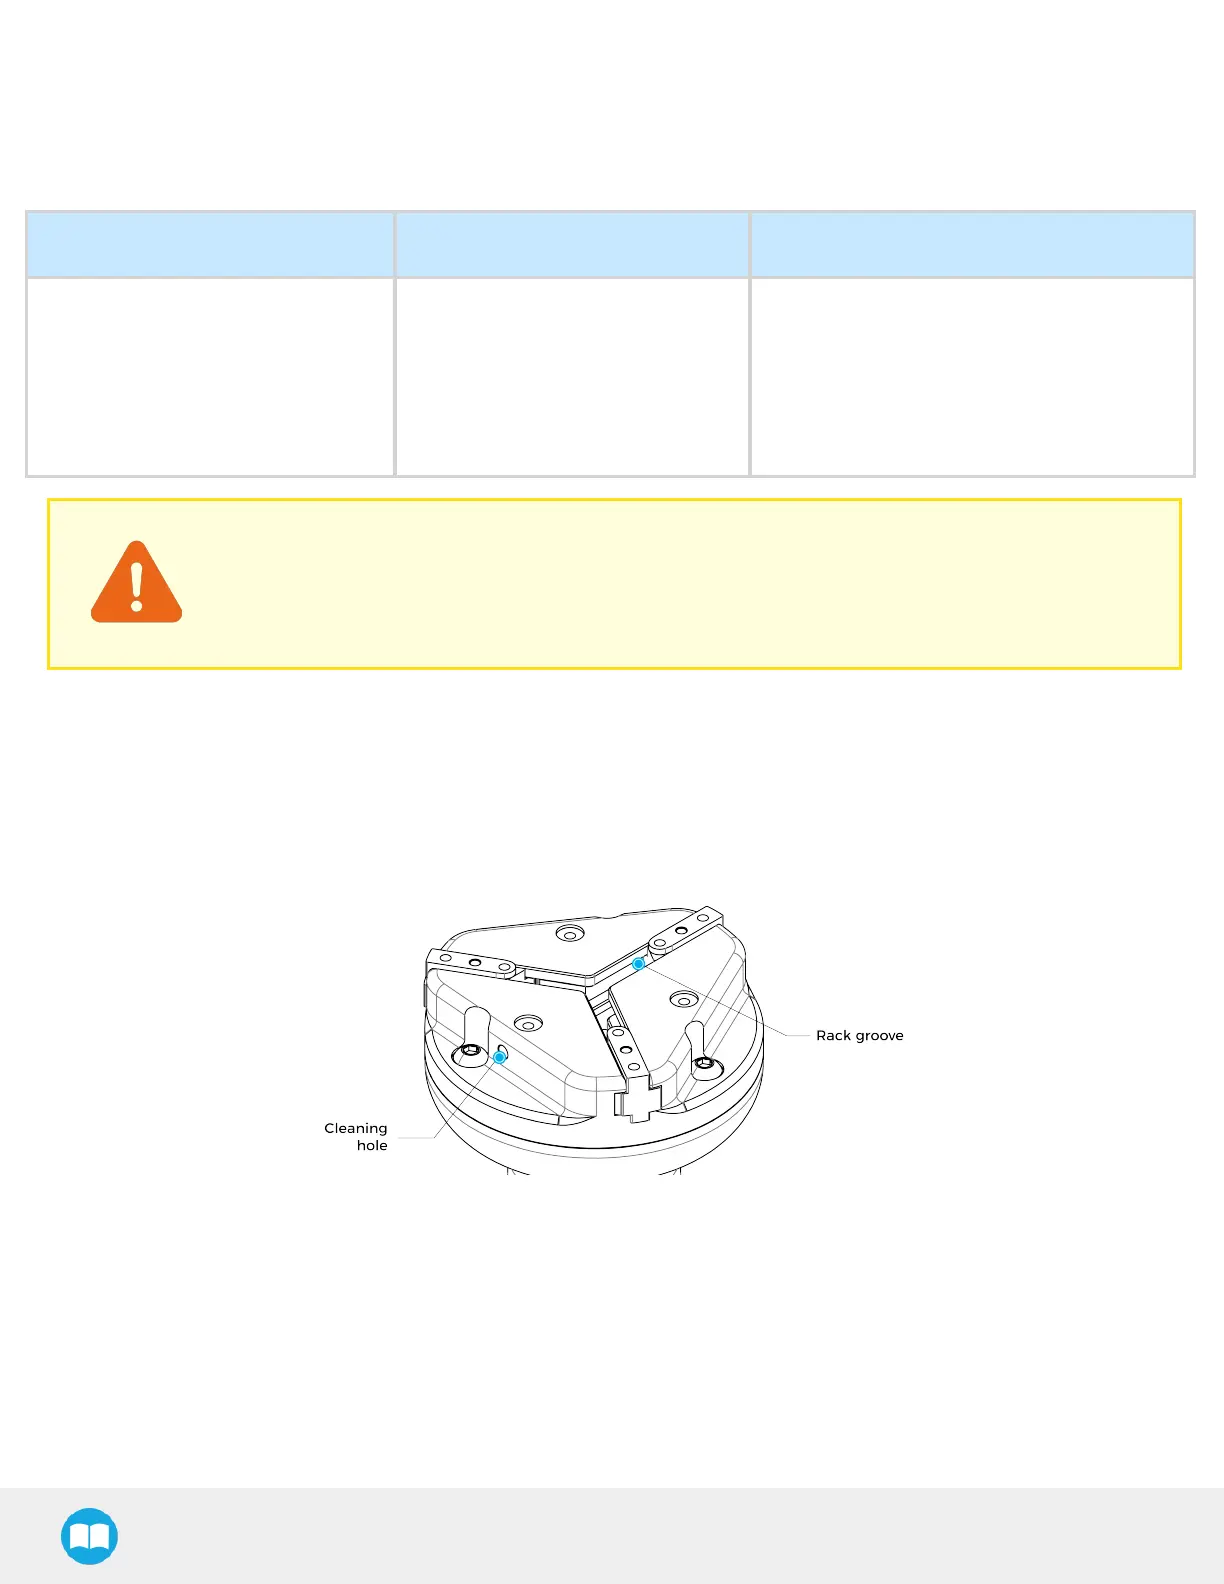
3. Clean the gripper with a dry towel. Remove all debris, dirt, and dust from the surface of the gripper. Clean all pads, dry
thoroughly. If debris are still present, blowing clean and dry air into the rack groove or into cleaning hole can help remove
the remaining dirt.
Fig. 6-1: Hand-E C10 Gripper Cleaning
4. Clean the coupling with a dry towel. Pay particular attention to the electrical contact.
5. Visually inspect the gripper and pay attention to any visible damage.
6. Install the stop plate back on the gripper with the three (3) M4. Apply low strenght threadlocker and tighten the screws to 2
Nm.
7. Put the gripper back on and secure it with the four (4) M5-0.8 x 25 mm socket head cap screws and tooth lock washers. Apply
low strength threadlocker and tighten the screws to 3 Nm.
112