Robotiq Hand-E Gripper Instruction Manual
4.9.3. Gripper Dashboard
Overview
Single Gripper for e-Series
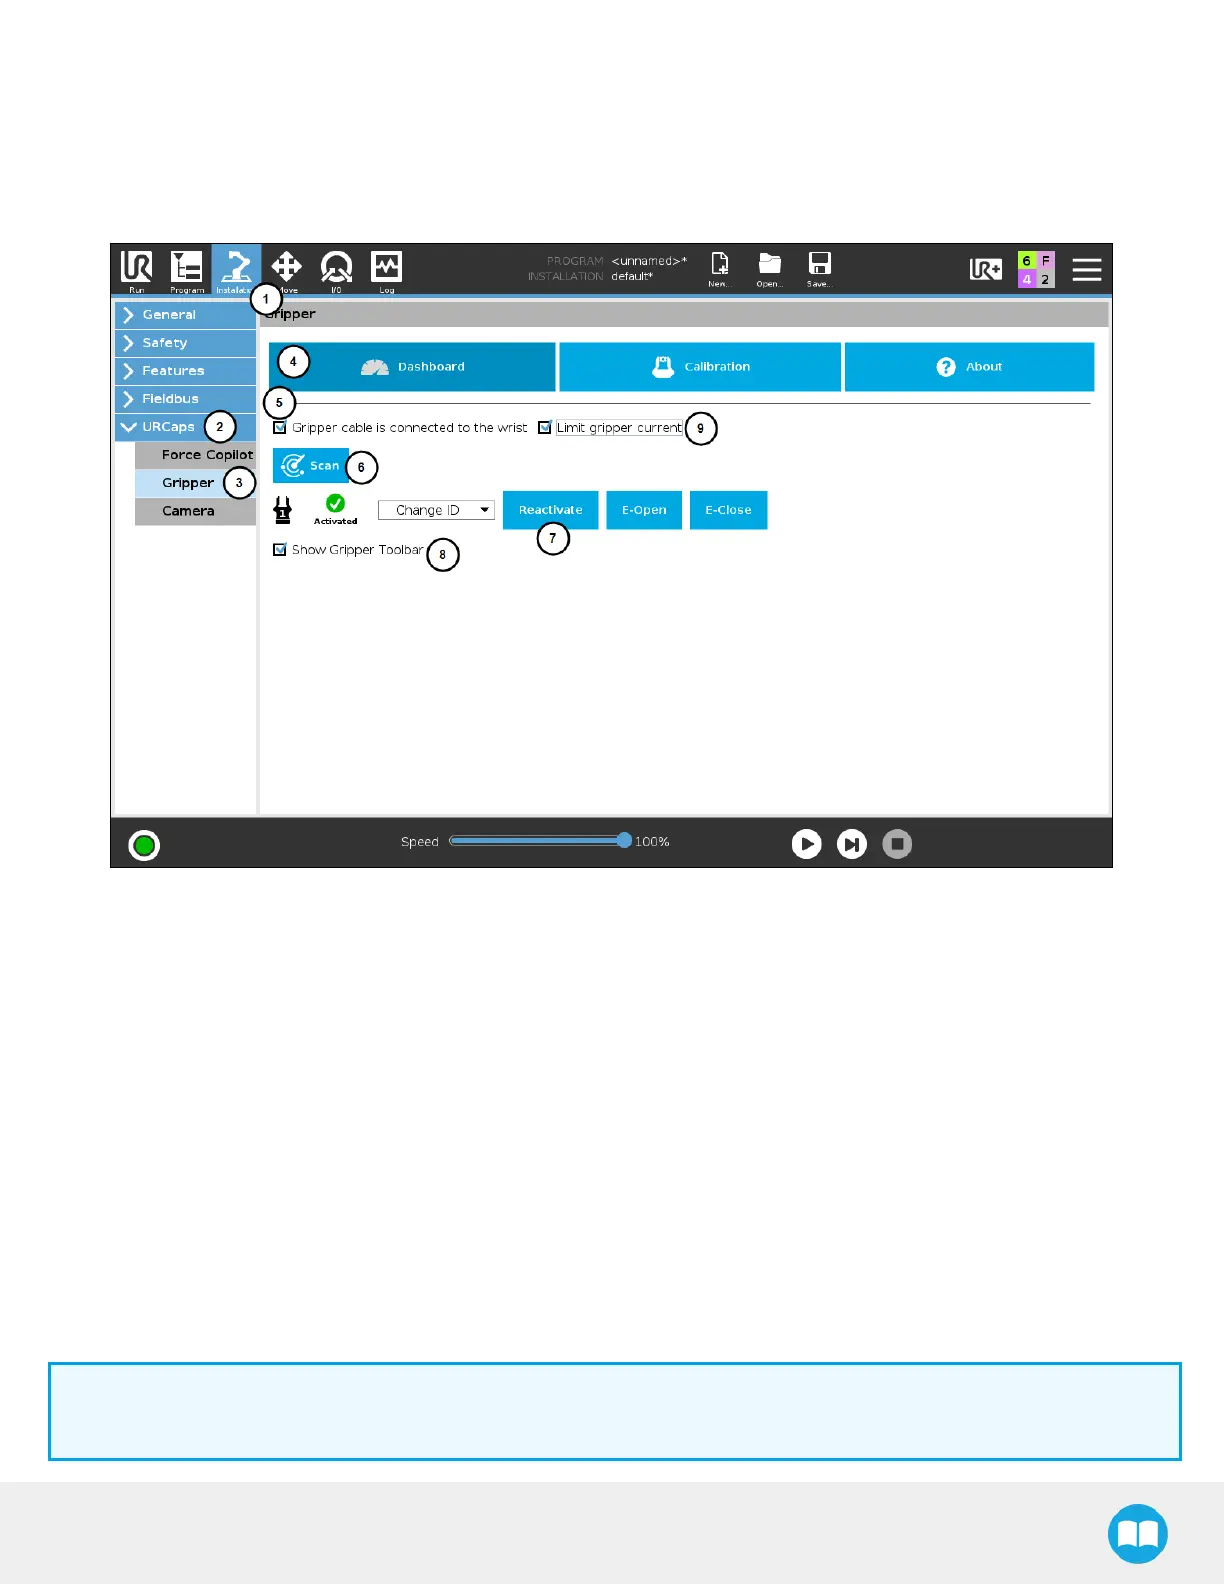
Fig. 4-8: Gripper Dashboard (steps highlighted)
1
On the teach pendant, tap the Installation button.
2
Select URCaps in the navigation pane on the left.
3
Tap the Gripper button.
4
Select the Dashboard tab.
5
If the gripper is connected to the robot wrist (and not to the robot controller or via a Robotiq Wrist Camera), tick the "Gripper
cable is connected to the wrist box.
6
If no gripper is found, tap the Scan button to detect any gripper that might be connected to the robot
7
Tap the Activate/Reactivate button.
8
In order to display the Gripper Toolbar in the UR+ menu of the top ribbon of PolyScope, tick the Show Gripper Toolbar box.
9
In order to prevent overcurrent conditions (for instance when grasping soft objects or using multiple grippers at the same time),
tick the Limit gripper current box.
a
Limits the current at 600 mA for a single gripper
b
Limits the current at 450 mA for each gripper connected in a multiple gripper configuration
Info
The default gripper IDallocated to the first device connected is 1.
73