Publication IASIMP-QS003B-EN-P - October 2009 83
Prepare the Kinetix 6000 Multi-axis Servo Drive System Chapter 6
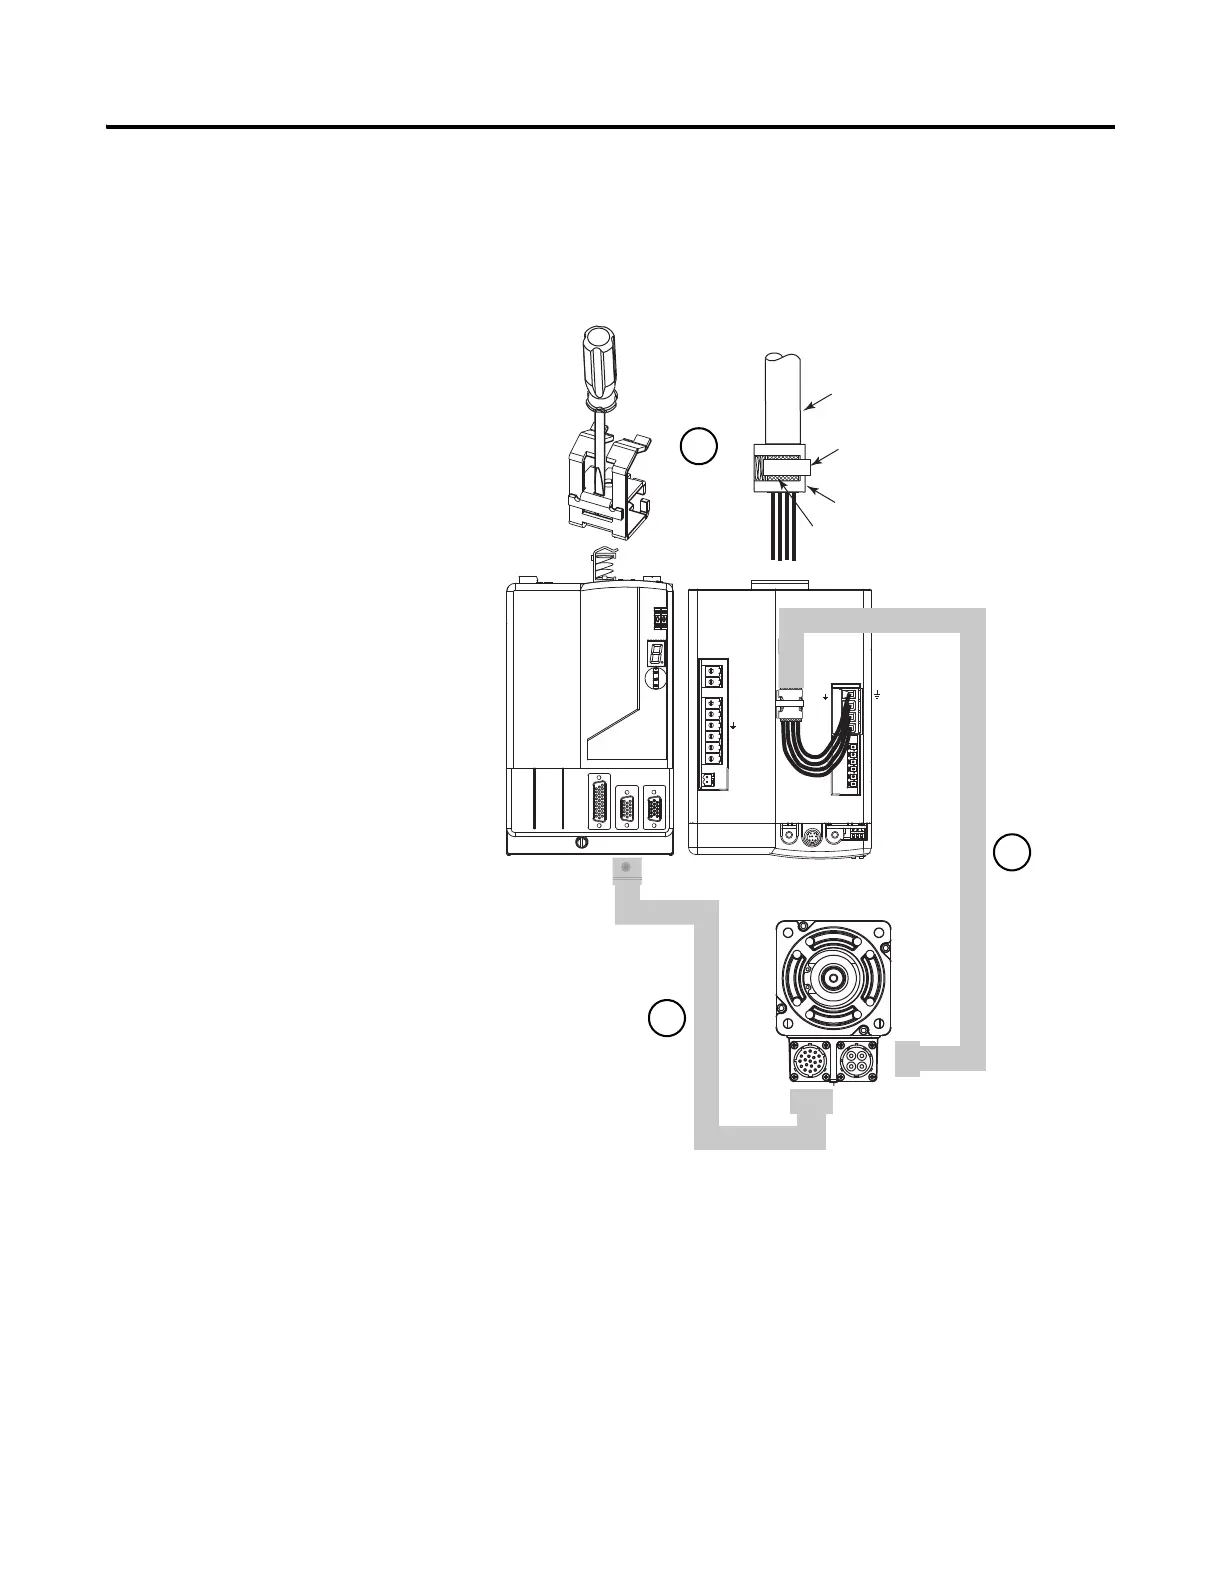
Wire Servo Motors to Integrated Axis and Axis Modules
2094-AC09-M02, 2094-AM01, MPL-A310P-MK22AA, 2090-XXNPMP-16S03, 2090-UXNFBMP-S03
1. Attach motor power
cable to shield clamp.
a. Use a small flatblade
screwdriver to depress
the spring loaded
clamp plate.
b. Position the exposed
braid of the motor
power cable in line with
the clamp.
c. Release the spring,
making sure the cable
and braid are secured
by clamp.
d. Attach the tie wrap
around cable and
clamp if you need more
strain relief.
2. Connect the motor power
cable between the Motor
Power (MP) Connector
on the IAM or AM
module and the power
connector on the motor.
3. Connect the feedback
cable between the Motor
Feedback (MF) connector
on the IAM or AM
module and the feedback
connector on the motor.
4. Repeat steps 1 through 3
for all servo motors and
AM modules.
U-Brown
V-Black
W-Blue
Green/Yellow
BAUD
RATE
TX
RX
DPI
DC-
DC+
L3
L2
L1
CONT EN-
CONT EN+
CTRL 2
CTRL 1
W
V
U
MBRK -
MBRK +
COM
PWR
DBRK -
DBRK +
1 2 3 4
MP
MF
Cable
Tie Wrap
Cable Clamp
Exposed Braid
under Clamp
Top View
Front View
Integrated Axis Module or Axis Module
MPL Motor
Motor Feedback Cable
2090-UXNFBMP-S03
Motor Power Cable
2090-XXNPMP-16S03
1
2
3
 Loading...