Do you have a question about the Rockwell Automation Allen-Bradley Guard master 442G-MAB Series and is the answer not in the manual?
| Manufacturer | Rockwell Automation Allen-Bradley |
|---|---|
| Operating Voltage | 24V DC |
| Product Series | Guardmaster 442G-MAB |
| Contact Configuration | 2 N.C. Safety, 1 N.O. Auxiliary |
| Safety Category | Category 4 |
| Standards Compliance | EN/ISO 13849-1 |
| Detection Capability | Not Applicable |
| Resolution | Not Applicable |
| Protective Height | Not Applicable |
| Response Time | ≤ 20ms |
| Number of Beams | Not Applicable |
| Outputs | 2 N.C. Safety, 1 N.O. Auxiliary |
| Number of Inputs | Not Applicable |
Identifies the intended audience for this manual.
Explains the manual's objective and scope for the product.
Details the formatting and symbols used throughout the document.
Lists related Rockwell Automation publications and websites for more information.
Provides a general overview of the Guardmaster Multifunctional Access Box system.
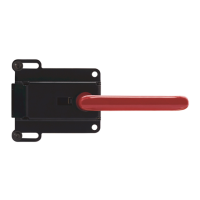
Details the physical components and layout of the lock module and handle assembly.
Lists the standards the Access Box complies with for safety.
Details the safety certifications and performance levels achieved by the device.
Provides essential guidelines and prerequisites before installing the Access Box.
Explains the process of assigning a unique-coded handle assembly to the lock module.
Details how to physically install the Access Box on hinged or sliding doors.
Provides diagrams and tables for connecting the Access Box to control systems.
Details the wiring for external push buttons and status indicators.
Instructions for installing and removing indicator lens covers.
Describes how to use the escape release for manual unlocking of the guard.
Covers power supply requirements, connections, and warnings for electrical installation.
Defines symbols used in status indicators and diagrams.
Explains the meaning of different LED states for diagnostics and operation.
Details LED states for various operating modes in standalone configuration.
Details LED states for various operating modes in series configuration.
Guidance on integrating the Access Box with control systems, including pulsing tolerance.
Wiring examples for implementing guard locking control.
Steps to verify the fundamental guard locking functionality.
Instructions for configuring the device operation using DIP switches.
Explains the specific functions assigned to each DIP switch.
Procedure to enable or disable guard lock monitoring via DIP switches.
Procedure to activate or deactivate release monitoring using DIP switches.
Steps to change the direction of the handle assembly's actuation.
Instructions on how to reset the device after a fault condition.
Details the use of the manual release for unlocking the guard door.
Describes the emergency release mechanism for opening a locked safety guard.
Explains the two mechanisms used to lock the bolt actuator.
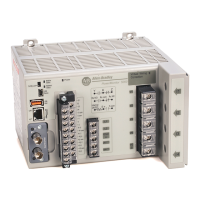
Example wiring for a Category 1 stop with Kinetix 300 and GLT safety relay.
Example wiring for a Category 0 stop with GLT Time Delay Safety Relay.
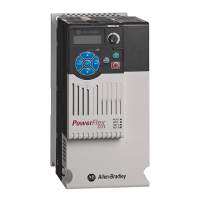
Example wiring for a Category 1 stop with PowerFlex 525 and GLT safety relay.
Example wiring for a Category 1 stop with SMC-50 and GLT safety relay.
Example wiring for Cat 0 stop with speed monitored lock using GSR-DI and GLP.
Example wiring for Cat 0 stop with speed monitored lock using GSR-SI and GLP.
Example wiring for Cat 1 stop with PowerFlex 525, GSR-SI, and GLP.
Example wiring for Cat 1 stop with SMC-50 and GLP.
Example wiring for Cat 1 stop with Kinetix 300 and GLP.
Example wiring for Cat 1 stop with PowerFlex 70 and GLP.
Details safety classifications, standards, and functional safety data.
Lists operational parameters like voltage, current, and response times.
Provides detailed physical dimensions of the MAB unit.
Guidance on protecting the device from environmental factors.
Lists part numbers for handle assemblies, lock modules, and accessories.
Identifies available replacement parts for the Access Box and its modules.
Interprets LED status patterns to diagnose faults and operational issues.
Diagnoses internal faults based on specific LED indicator states.
Diagnoses handle configuration or DIP switch errors.
Diagnoses input errors in standalone mode.
Diagnoses input errors in series connection mode.
Diagnoses handle assembly read errors.
Diagnoses output faults.
Diagnoses signal sequence errors.
Diagnoses issues related to handle configuration or DIP switch settings.
Indicates readiness to learn a new handle assembly.
Indicates normal operation with door open, or blocked handle.