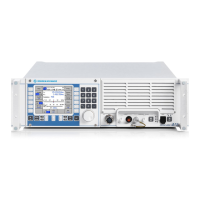
R&S M3SR Series 4100 HF Transceivers Test of Specification
6124.9007.82.01 3.14
11 X10 External Synchronization Mode
11.1 By using the signal generator, apply HF
signal of 10 MHz sinus and 0 dBm to X10.
Choose External Sync Mode (OSC-Button)
via remote interface. Press PTT.
Repeat test with 1 MHz and 5 MHz sinus.
Change back to Internal Sync Mode.
RF-TX-signal is present.
No External Sync Error
12 Fill Gun and Erase-Function
12.1 Connect Fill Gun to the transceiver and press
"Fill Gun" on MMI, choose configuration with
"RGA" Button.
Press "Load" button. Verify load on MMI.
Command J3E+, 28.123 MHz to transceiver
and read back these parameters to confirm.
Download 100 %, no Download Error
Parameters confirmed
12.2 On front panel press Erase button for 1 s.
Verify erase.
MMI shows default FF RX-state in F3E
25.250 MHz
13 X21 RCB Serial (Fibre Optic) / Remote
Power On Function
13.1 Connect Optical to Coaxial Converter Box to
RCB Serial Connector X21 and switch
transceiver remotely on and off.
Transceiver on and off
14 DC Voltages
14.1 By using the digital multimeter, verify DC
voltages at X 26.
contact 1: 12 VDC ±10 %
contact 2: -12 VDC ±10 %
contact 31: 5 VDC ±10 %
15 X24 Serial Connection REMOTE
15.1 Set X24 Serial Connection for serial remote
control to parameters 19200 Baud, 8N1,
COM1.
Before the transceiver can be controlled via
serial interface, the interface has to be
initialized, i.e. opened using the opening
request O, <LF(Ctrl j)>O<CR>.
The transceiver confirms the opening by an-
swering with opening confirmation "o".
No. Activity Nominal Value

 Loading...