5
3 Basic Operation
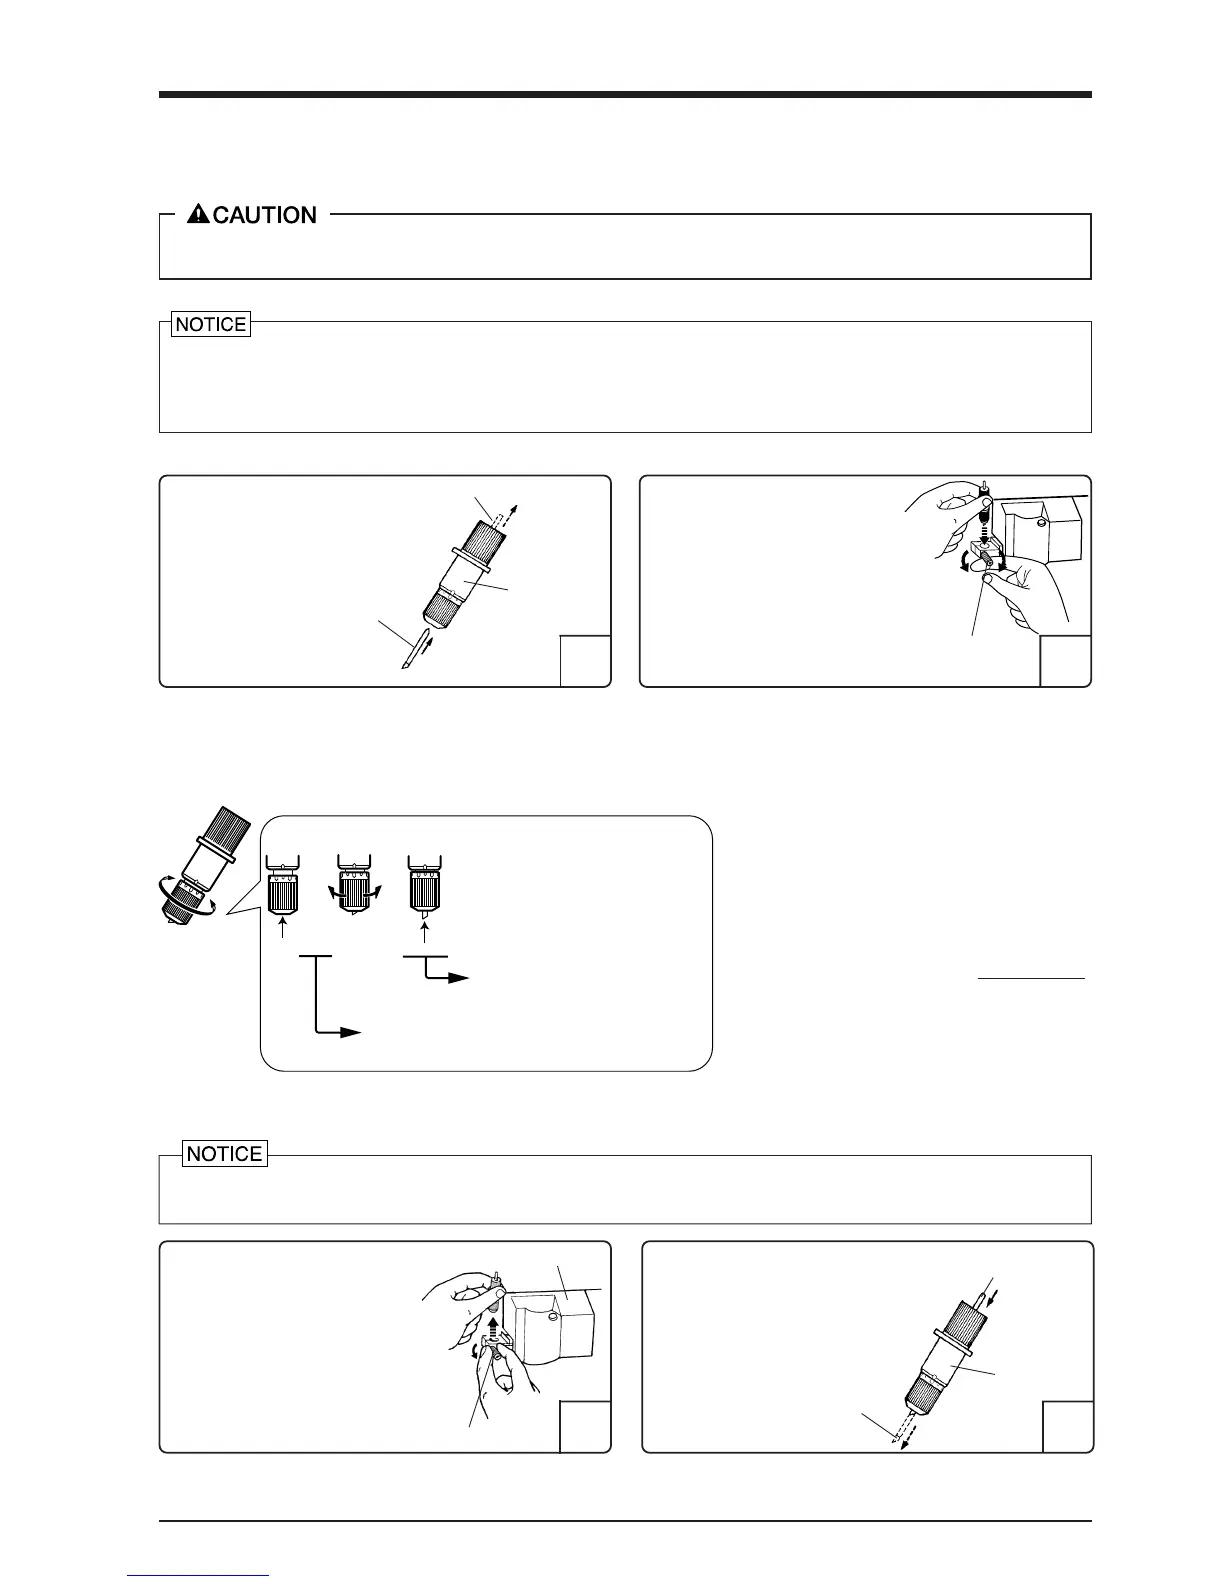
3-3 Installing/Removing a Blade
Always make sure the power switch is OFF before installing (or removing) the cutter.
- Do not touch the tip of the blade with your fingers, as the cutting performance of the blade will be impaired.
- Be sure to support the tool mounting screw from below when installing the blade holder.
Cutting quality may become poor if installed without supporting the screw in this way.
Installing the Blade
2
22
1
11
Push-pin
Blade holder
Insert a blade into the blade
holder until it snaps into place
with an audible click.
(1) Loosen the tool securing screw
on the tool carriage. Support the
tool-securing screw from below
and install the blade holder.
Insert the blade holder until the
collar is flush with the carriage.
(2) Tighten the tool securing screw
until the blade holder is secured
in place.
Adjusting the Cutter Blade
The amount of cutter blade extension can be adjusted by rotating the cap. Refer to the figure below to adjust the blade before
installing it on the tool carriage.
Amount of
cutter blade
extension
[When the Tip of the Blade Is Set to 0 mm]
Perform a cutting test and gradually extend the blade.
Take care to ensure that the amount of blade exten-
sion does not exceed the thickness of the material
portion plus the thickness of the base paper.
If the blade leaves a faint mark on the base paper, the
amount of blade extension is optimal.
=
Thickness of
the material
portion
+
2
Thickness of
the base paper
Tool securing screw
Blade holder
Blade
Do not leave the tool mounting screws tightened. Tightening the screw makes it more difficult to install the blade holder.
Removing the Blade
2
22
1
11
Push-pin
Tool carriage
(1) Loosen the tool securing
screw on the tool carriage.
(2) Remove the blade holder from
the tool carriage.
Press the push-pin and remove the
blade from the blade holder.
Tool securing screw
Blade
For a material included with the unit,
or a general type of equivalent material
For materials where the base paper is thin with respect
to the material (material thickness), and cutting is carried out
without fine adjustment of blade force
For cases where material thickness is not accurately known
Each indicator tick corresponds to 0.1 mm, and adjustment
for 0.5 mm can be made by rotating the cap one full turn
Amount of cutter
Blade extension
Max. :2.5 mm
Min. :0 mm
 Loading...