11
3-6 Cutting Test to Check Blade Force — , , , , and TEST Keys
Before carrying out actual cutting, you may wish to perform a "cutting test" to check whether the unit produces the cutout
satisfactorily.
This "cutting test" allows you to determine whether the settings you have for the blade force are appropriate. See below for a
detailed explanation of blade force.
* If a material has not yet been loaded, then refer to "3-4 Loading/Removing the Material" to load the material
correctly.
To start with, move the pen force control to the left-most indicator mark (minimum blade force).
Increase blade force gradually, until cut quality is satisfactory.
1
11
3
33
Origin
Peel off first
Then peel this off
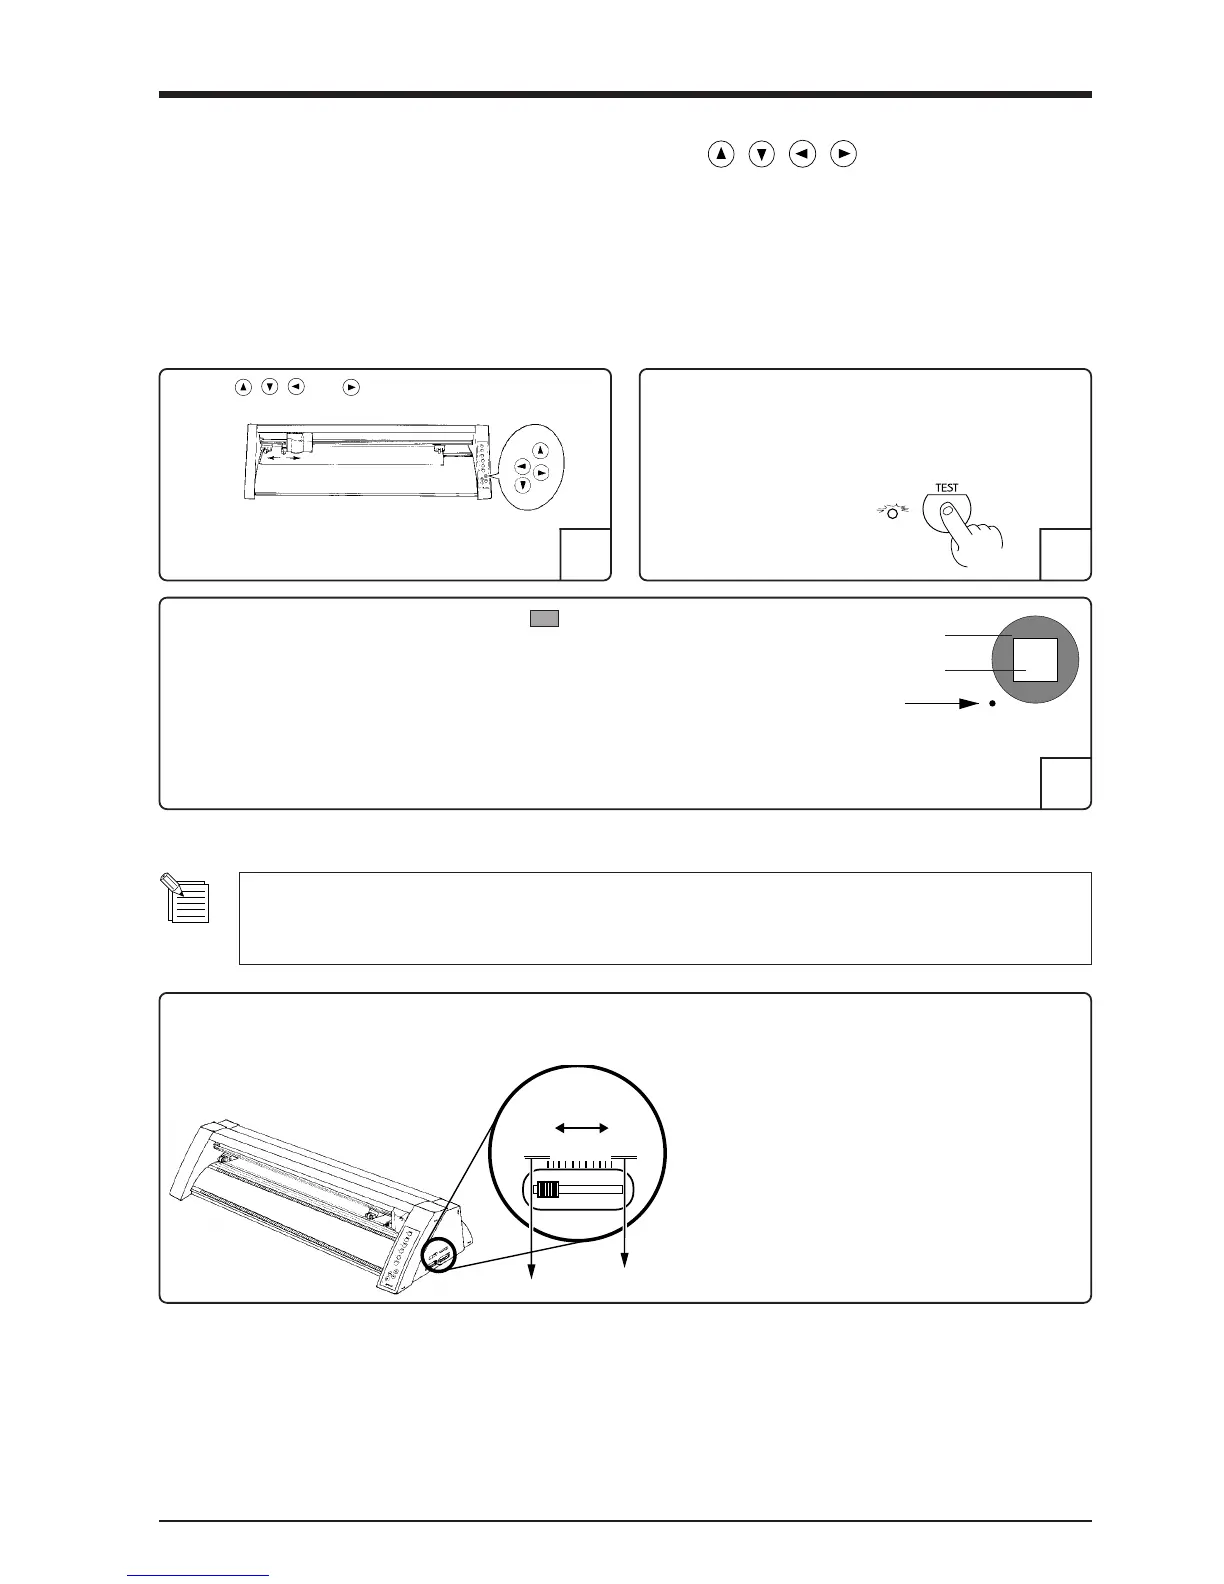
Press the , , , and keys to move the tool carriage.
Move to the position where the cutting test is to be performed.
(1) First peel off the round section (shaded as shown
).
- When it can be peeled off by itself, without disturbing the square, the blade force is set
appropriately.
(2) Next, peel off the square, and look at the backing behind it.
- The optimum blade pressure is correct if you can clearly make out the lines left by the
blade.
How to Adjust Blade Force
When making the blade force setting, it is important to take into consideration the hardness of the blade as well as the
thickness and type of the material to be cut, and adjust blade force accordingly. If the blade force is weak, the material
may not be cut satisfactorily. If the blade force is too strong, blade life will be shortened and cutting may be impaired.
The pen force control slider is located on the right
side of the unit. Move the blade force control slider
sideways to alter the blade force.
The pen force control slider can be positioned at
marks indicating the 11 levels available.
* Note that an area of approximately 2 square centime-
ters (a little less than a square inch) is required to make
a test cutout (given that the tip of cutter after it has
moved is at the origin at lower-left).
2
22
The TEST LED
lights up
Press the TEST key.
Cutting test starts.
* Adjust the pen force control slider until results as shown above are obtained.
(Gradually increase the cutter force until you reach the optimum level.)
Additionally, be aware that problems such as the follow-
ing may occur.
- The material may be torn
- The blade may pierce the material and backing
- Cutter blade extends through the base paper, and normal
advancing of the material becomes impossible
- The unit may suffer damage
3 Basic Operation
PEN FORCE
MIN 2 4 6 8 MAX
Max. Blade For
 Loading...