EasyManua.ls Logo

Roland GR-540 User Manual

Roland GR-540
465 pages
To Next Page IconTo Next Page
Page #1 background imageLoading...
Page #1 background image
Selectthemanualthatyouwanttoread.
Usethismanualifyouarejuststartingtousethemachine. BasicEdition
Ifyouhavealreadymasteredthebasicoperation,usethis
manualforanintroductiontomoreadvancedoperations.
ApplicationEdition
Windowsversion
Macintoshversion
http://www.rolanddg.com/
Copyright (C) 2017 Roland DG Corporation
R1-170216
FA01088

Table of Contents

Question and Answer IconNeed help?

Do you have a question about the Roland GR-540 and is the answer not in the manual?

Roland GR-540 Specifications

General IconGeneral
Max Media Width610 mm
Supported OSWindows, Mac
Power SupplyAC 100-240V, 50/60Hz
Blade HolderStandard
InterfaceUSB
Cutting Width540 mm

Summary

About the User's Manuals

Setup Guide (Paper Manual)

Provides instructions for machine setup and software installation.

User's Manual, Basic Edition (Electronic-format Manual)

Provides instructions for basic machine operation and maintenance.

User's Manual, Application Edition—Windows Version (Electronic-format Manual)

Instructions and tips for using the machine and its software on Windows.

User's Manual, Application Edition—Macintosh Version (Electronic-format Manual)

Instructions and tips for using the machine and its software on Macintosh.

CutStudio Help (Electronic-format Manual)

Detailed explanation of CutStudio software functions.

Getting Started

Important Notes on Handling and Use

Precautions for handling the precision device and installation site.

Storing Important Data

Information on liability and backup procedures for important data.

Support

Information on obtaining support via the Roland DG Corp. website.

Trademark Notice

Information on company and product names as trademarks.

What Is the GR-640/GR-540/GR-420?

What the GR-640/GR-540/GR-420 Can Be Used For

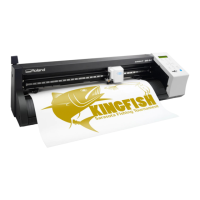
Overview of the machine's capabilities and applications.

Loadable Materials/Cuttable Area

Details on compatible material sizes and cutting dimensions.

Part Names

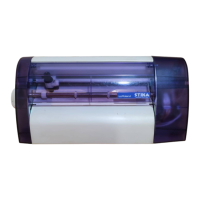
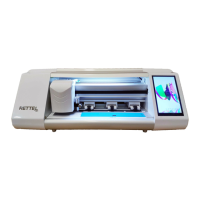
Identification of the main unit's components.

Carriage LED Lamp

Explanation of the carriage LED lamp status indicators.

Simple! Basic Cutting

Performing Cutting

Procedure for basic cutting operations to create stickers.

Items Required Other Than the Machine

List of necessary items for cutting operations besides the main machine.

CutStudio

Instructions for installing and using the CutStudio software.

Material

Information on material compatibility and specifications.

Installing the Cutting Tool

Adjusting the Amount of Blade Extension

Guidance on adjusting the blade extension for optimal cutting.

Performing a Cutting Test

Setting the Origin

Creating Cutting Data (1)

(1) Start CutStudio

Procedure for launching the CutStudio software.

(2) Set the Model

Steps to configure the cutting machine model in CutStudio.

Creating Cutting Data (2)

Set Material Size

Procedure to set the material dimensions within the software.

Entering Characters and Shapes

Saving Cutting Data

Performing Cutting

Removing the Material

Sending Data from Illustrator/CorelDRAW

When Using Illustrator

Instructions for sending data from Adobe Illustrator.

When Using CorelDRAW

Instructions for sending data from CorelDRAW.

Installing Plug-in for Illustrator

Outputting Data Created in Illustrator

Installing Plug-in for CorelDRAW

Outputting Data Created in CorelDRAW

Printing and Cutting

Printing and Cutting Overview

Overview of the printing and cutting process for creating stickers.

Flow Diagram

Visual representation of the printing and cutting workflow.

Materials That Can Be Used for Printing and Cutting

Information on compatible materials for printing and cutting.

Printing and Cutting with CutStudio

Procedure for printing and cutting using CutStudio.

Printing and Cutting with Plug-ins

Instructions for printing and cutting using software plug-ins.

Printing and Cutting with a Roland DG Corp. Printer

Guidance on using Roland DG Corp. printers for combined operations.

Preparations for Printing and Cutting (When Using CutStudio)

Printing and Cutting Procedure (CutStudio)

Crop Marks/Tool Marks

Crop Marks

Explanation of crop marks used for alignment in cutting.

When to Use 4 Crop Marks vs 3 Crop Marks

Guidance on selecting the appropriate number of crop marks.

Readable Crop Marks

Details on the machine's sensor capabilities for reading crop marks.

Cutting in Tool Mode (1)

When to Use Tool Mode

Conditions under which Tool Mode alignment is necessary.

Required Items

List of necessary tools for cutting in Tool Mode.

(1) Load the Material

Procedure for loading material when using Tool Mode.

Cutting in Tool Mode (2)

Send Cutting Data and Perform Alignment

Steps to send data and perform manual alignment in Tool Mode.

Materials That Can Be Used for Printing and Cutting

Preparations for Printing and Cutting (When Using Illustrator)

Printing and Cutting Procedure (Illustrator)

Preparations for Printing and Cutting (When Using CorelDRAW)

Printing and Cutting Procedure (CorelDRAW)

Preparations for Printing and Cutting (Manual Mode)

Printing and Cutting Procedure (Manual Mode)

Cutting Perforated Lines

Overview of Cutting Perforated Lines

Introduction to cutting material without carrier paper for various applications.

Cutting Perforated Lines with CutStudio

Procedure for cutting perforated lines using CutStudio.

Cutting Perforated Lines with Illustrator

Procedure for cutting perforated lines using Adobe Illustrator.

Cutting Perforated Lines with CorelDRAW

Procedure for cutting perforated lines using CorelDRAW.

Outputting Perforated Line Data from Illustrator

Outputting Perforated Line Data from CorelDraw

Tiled Output

Overview of Tiled Output

Splitting large data into multiple sheets for cutting.

Inner Margin Function

Explanation of the inner margin setting for tiled output.

Changing the Language Used for the Display

Setting the Displayed Unit

Initializing All Settings to Their Default Values

Checking the Machine Status <Self Test>

Changing the Contrast of the Display Screen

Frequently Using Perforated Cutting

Moving the Cutting Carriage at High Speed

Optimizing the Cutting Quality for the Material/Preventing Misaligned Cutting

Optimizing the Cutting Quality for the Material

Tips and settings to improve the quality of cuts on materials.

Preventing and Correcting Misaligned Cutting

Methods to prevent and fix issues with misaligned cuts.

General Guide Regarding Cutting Conditions

Saving the Cutting Conditions

Loading Cutting Conditions

Cutting Detailed Characters and Complex Shapes (SMOOTHING)

Cutting in the Same Position Repetitively <OVERLAP>

Cutting Corners Cleanly <Over Cut>

Setting Cutting Quality <QUALITY>

Setting the Amount of Offset for the Tip of the Blade <OFFSET>

Setting the Direction of the Coordinate Axis for Cutting <ROTATE>

Extending the Cutting Area <EXTEND>

Setting the Speed of the Blade During Cutting <UPSPEED>

Changing the Blade Force

Using Various Material Widths (Loading Position of Material)

Using Thinner or Harder Material than Normal

Preventing Misaligned Cutting

Adjusting the Cutting Position

Changing the Cutting Speed

Adjusting the Cutting-in Amount

Cutting the Same Object Repetitively

Using the Material with Minimal Waste

Setting the Origin

Procedure for setting the origin to minimize material waste.

Using Narrow Material/Preventing Marking Made by the Middle Pinch Rollers

Reducing the Force of the Middle Pinch Rollers

Adjusting the force of middle pinch rollers for sensitive materials.

Maintenance/Replacement

Cleaning

Instructions for periodic cleaning of the machine for optimal cutting.

Replacing the Blade and the Separating Knife

Procedure for replacing the blade and separating knife.

Consumable Items

Information on purchasing replacement parts like blades and holders.

Troubleshooting

The Machine Doesn't Run

Steps to resolve issues when the machine does not operate.

The Material Is Jammed

Solutions for issues related to material jams.

Flat Material Cannot Be Set Up Using "PIECE" (Length Is Not Displayed)

Troubleshooting for flat material setup when length is not displayed.

Creating or Importing Data

Troubleshooting for issues with creating or importing design data.

The Material Slips Away from the Pinch Rollers during Cutting

Solutions for material slipping from pinch rollers during operation.

Crop Marks Cannot Be Read

Steps to resolve issues where crop marks are not detected.

Cutting Results Are Not Clean

Troubleshooting for poor cutting quality or unclean edges.

Installing and Uninstalling Software

Procedures for installing and uninstalling machine software and drivers.

Frequently Asked Questions

Answers to common questions regarding machine usage and software.

Error Message List

Menu Flow Chart

Specifications

Creating Cutting Data

Performing Cutting

Configuring Cut Settings from a Computer

Sending Data from Illustrator

Outputting Data Created in Illustrator

Printing and Cutting

Printing and Cutting Overview

Overview of the printing and cutting process for creating stickers.

Materials That Can Be Used for Printing and Cutting

Information on compatible materials for printing and cutting.

Printing and Cutting with Illustrator

Procedure for printing and cutting using Adobe Illustrator.

Switching between 3 and 4 Crop Marks

Switching to 3 Crop Marks

Procedure to switch from 4 crop marks to 3 crop marks in CutStudio.

Preparations for Printing and Cutting (When Using Illustrator)

Printing and Cutting Procedure (Illustrator)

Cutting Perforated Lines

Overview of Cutting Perforated Lines

Introduction to cutting material without carrier paper for various applications.

Cutting Perforated Lines with CutStudio

Procedure for cutting perforated lines using CutStudio.

Cutting Perforated Lines with Illustrator

Procedure for cutting perforated lines using Adobe Illustrator.

Cutting Perforated Lines with CorelDRAW

Procedure for cutting perforated lines using CorelDRAW.

Other Things That You Can Do

Changing or Checking the Machine's Operation

Settings related to machine operation, language, and display.

Minimizing Wasted Material

Techniques and settings to reduce material waste during cutting.

Cutting More Cleanly

Methods for achieving cleaner cuts, especially for detailed shapes.

Dealing with Material Thickness/Hardness (Softness)

Adjusting settings for different material thicknesses and hardness.

Preventing and Correcting Misaligned Cutting

Strategies for preventing and fixing misaligned cuts.

The Results of Cutting Are Displaced When Using the Printing and Cutting Function

The Machine Cuts the Same Area Twice

Troubleshooting

Crop Marks Cannot Be Read

Steps to resolve issues where crop marks are not detected.

Cutting Results Are Not Clean

Troubleshooting for poor cutting quality or unclean edges.

Frequently Asked Questions

Answers to common questions regarding machine usage and software.

Related product manuals