Maintenance
4-14
HP6A Manual
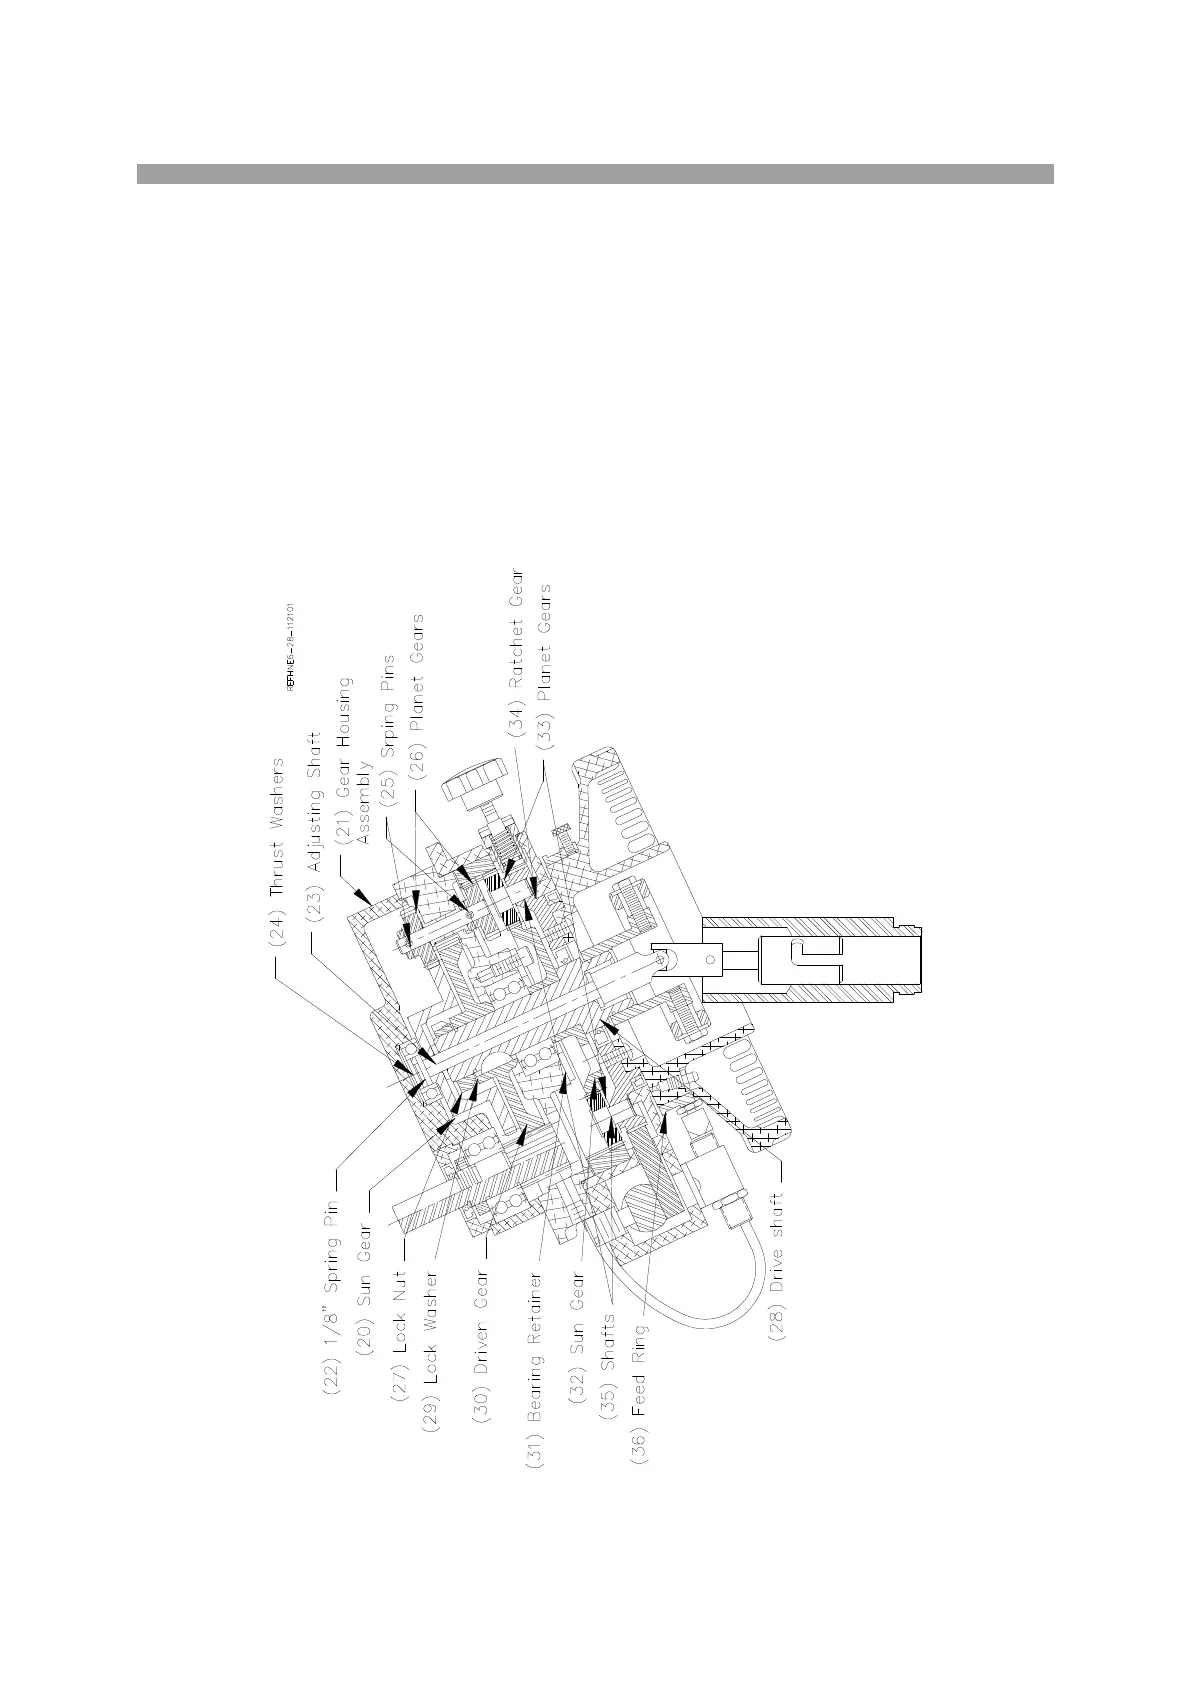
Remove sun gear (20) (514-6-35), from the gear housing assembly (21). Press out the 1/8” spring pin
(22). The adjusting shaft (23) (514-6-43) and the thrust washers (24) can be removed by sliding down.
Press out the spring pins (25) securing, the driven planet gears (26) (514-6-32A), remove the gears.
Locate the lock nut (27) on top of the driven shaft (28) (514-6-36). Bend the tabs of the lock washer (29)
out of the way. Remove the lock washer. Pull the driven gear (30) (514-6-28) off of the driven shaft.
Remove the three screws in the bearing retainer (31) (514-2-3C). You must align the access holes in the
sun gear (32) (514-6-29) in order to get an Allen wrench on the screws. Press the shaft and bearing out
of the upper housing. Press the bearing and the sun gear off of the driven shaft.
To remove the planet gears (33) from the ratchet gear (34), press the shafts (35) (700-6-5) out of the
ratchet gear.
Remove the feed ring (36) (514-6-80C) by pulling it off of handwheel.
Remove ratchet feed assembly from cage by removing one 1/4” socket head mounting cap screw. Note
O-Ring seal around Hub.