37/74
7.1. Performing Optical measurements
From the HOME page, the user should touch the screen over the OPTIC icon to access
the optical Measurement interface. Once connected the Meter to the optical source to
be measured, ensure that the RF input is set to OPTICAL in the Meter’s basic
configuration menu (press VOLUME on the keyboard and check the value of RF IN; toggle it to
optical if necessary). The optical input converts the injected signal into RF prior to start the
measurement.
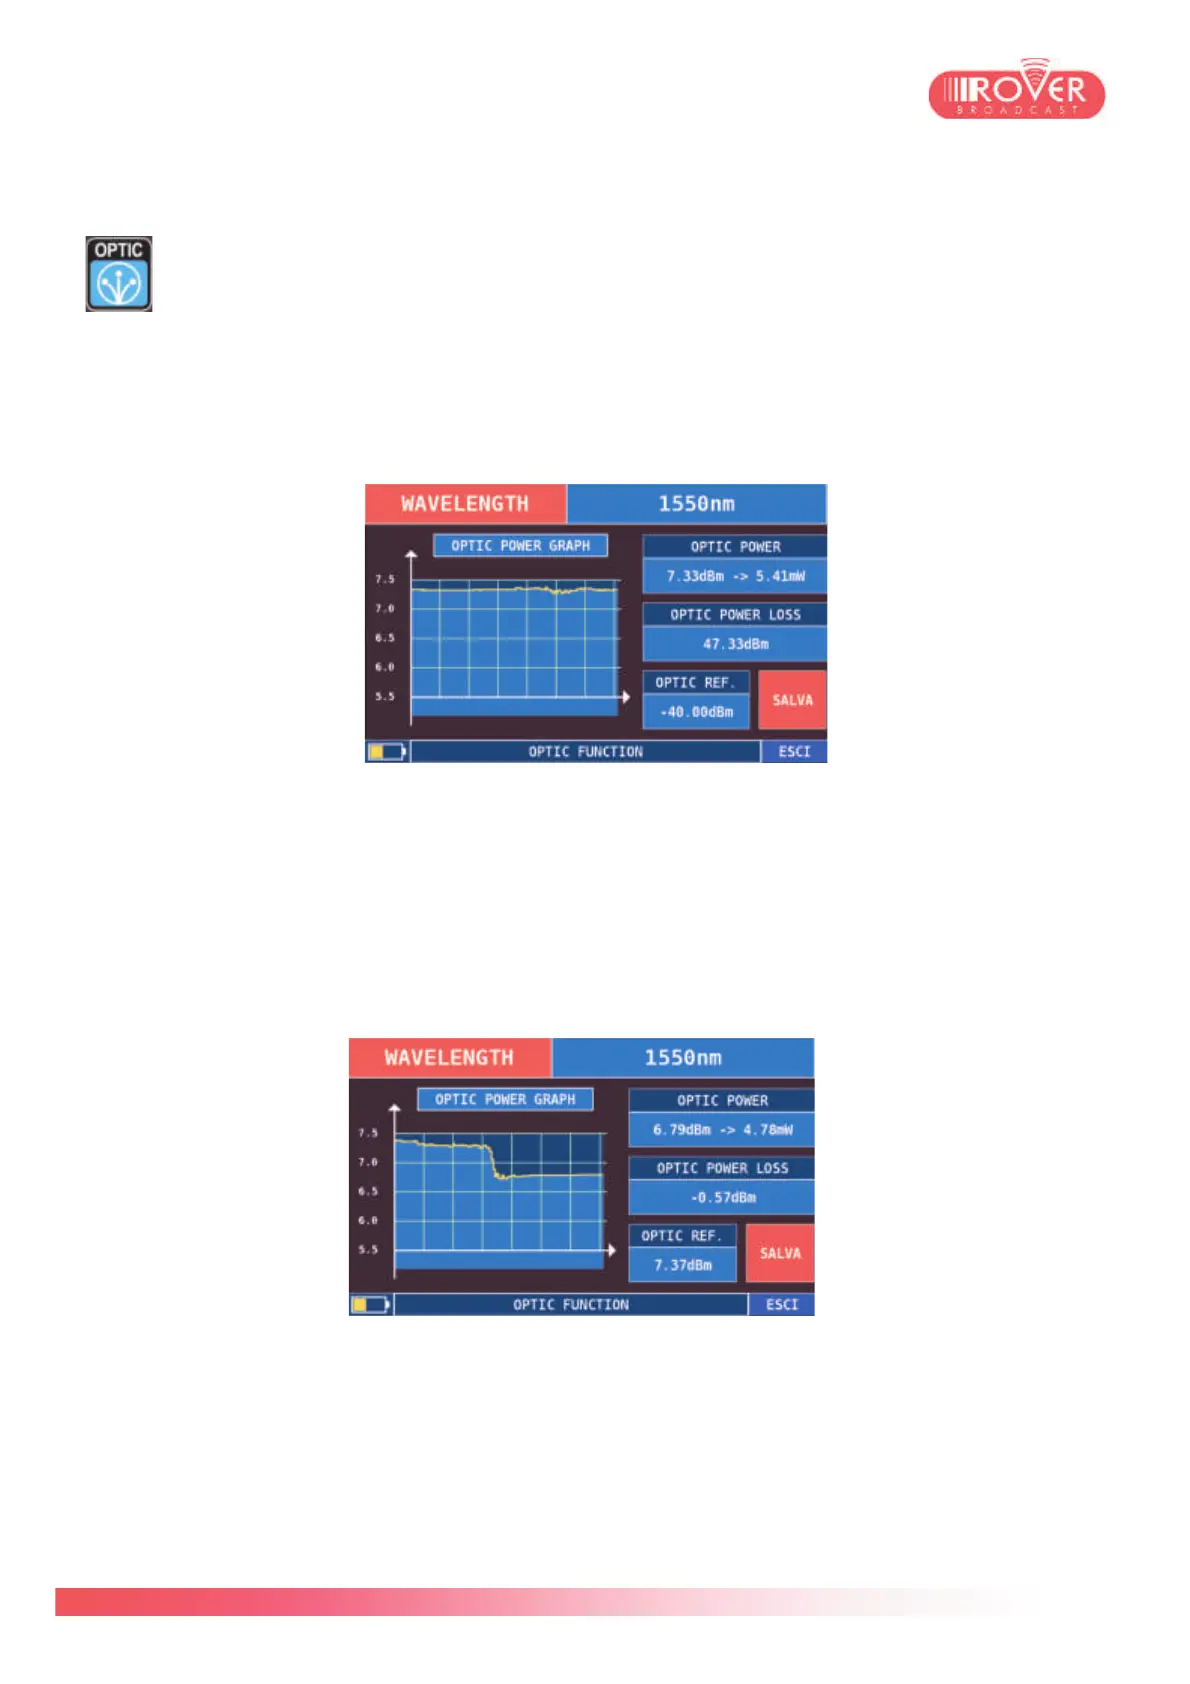
Entering the optical measurement interface will automatically toggle the view to the following:
Moving the selector over WAVELENGTH will let the user modify the value of the selected
wavelength on which the meter will perform the measurement. HD PROTAB is capable to
receive the following wavelengths: 1310nm, 1490nm and 1550nm.
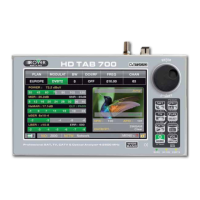
The power level provided by the meter can be stored as a reference touching the screen over
the “SAVE” button (bottom-right corner of the view). Once done, the meter will start evaluating
the difference between the stored value and the actual optical power value, giving the user a
feedback on the line attenuation. This value is displayed as OPTICAL POWER LOSS.