7 SERVICE
12
NOTE: Inside surface of bushings has a special coating.
DO NOT ream or sand inside surface.
Guide Repair:
• Remove seal and bushings.
• Press in new bushings and check passage with slide.
• Install seal flush with guide surface.
NOTE: Inside surface of bushings has a special coating.
DO NOT ream or sand inside surface.
Apply H.D. 85–140W oil to lip of seal, bushings and
black surface of slide assembly prior to installing
slide into guide.
12. Reassemble slide, slide guide and spring. Compress
spring and install spring retainer, roller, screw and
nut. Torque nut to 26 ft. lbs. (35 N·m) and apply Loc-
tite #290 or equivalent where threads make contact
with nut.
13. Compress spring and replace 1/2”(13mm) wood
block previously removed.
14. Apply 3M Sealer #EC847 or equivalent to slide guide
and screws before installing slide guide to cam case.
NOTE: When installing slide guides, make sure the slot
in guide is on top. (See FIGURE 11.)
3
4
3786
2
1
5
6
7
FIGURE 11
1. Slot
2. Slide Guide
3. Slide
4. Wood Block
5. Spring
6. Roller
7. Screw and Nut
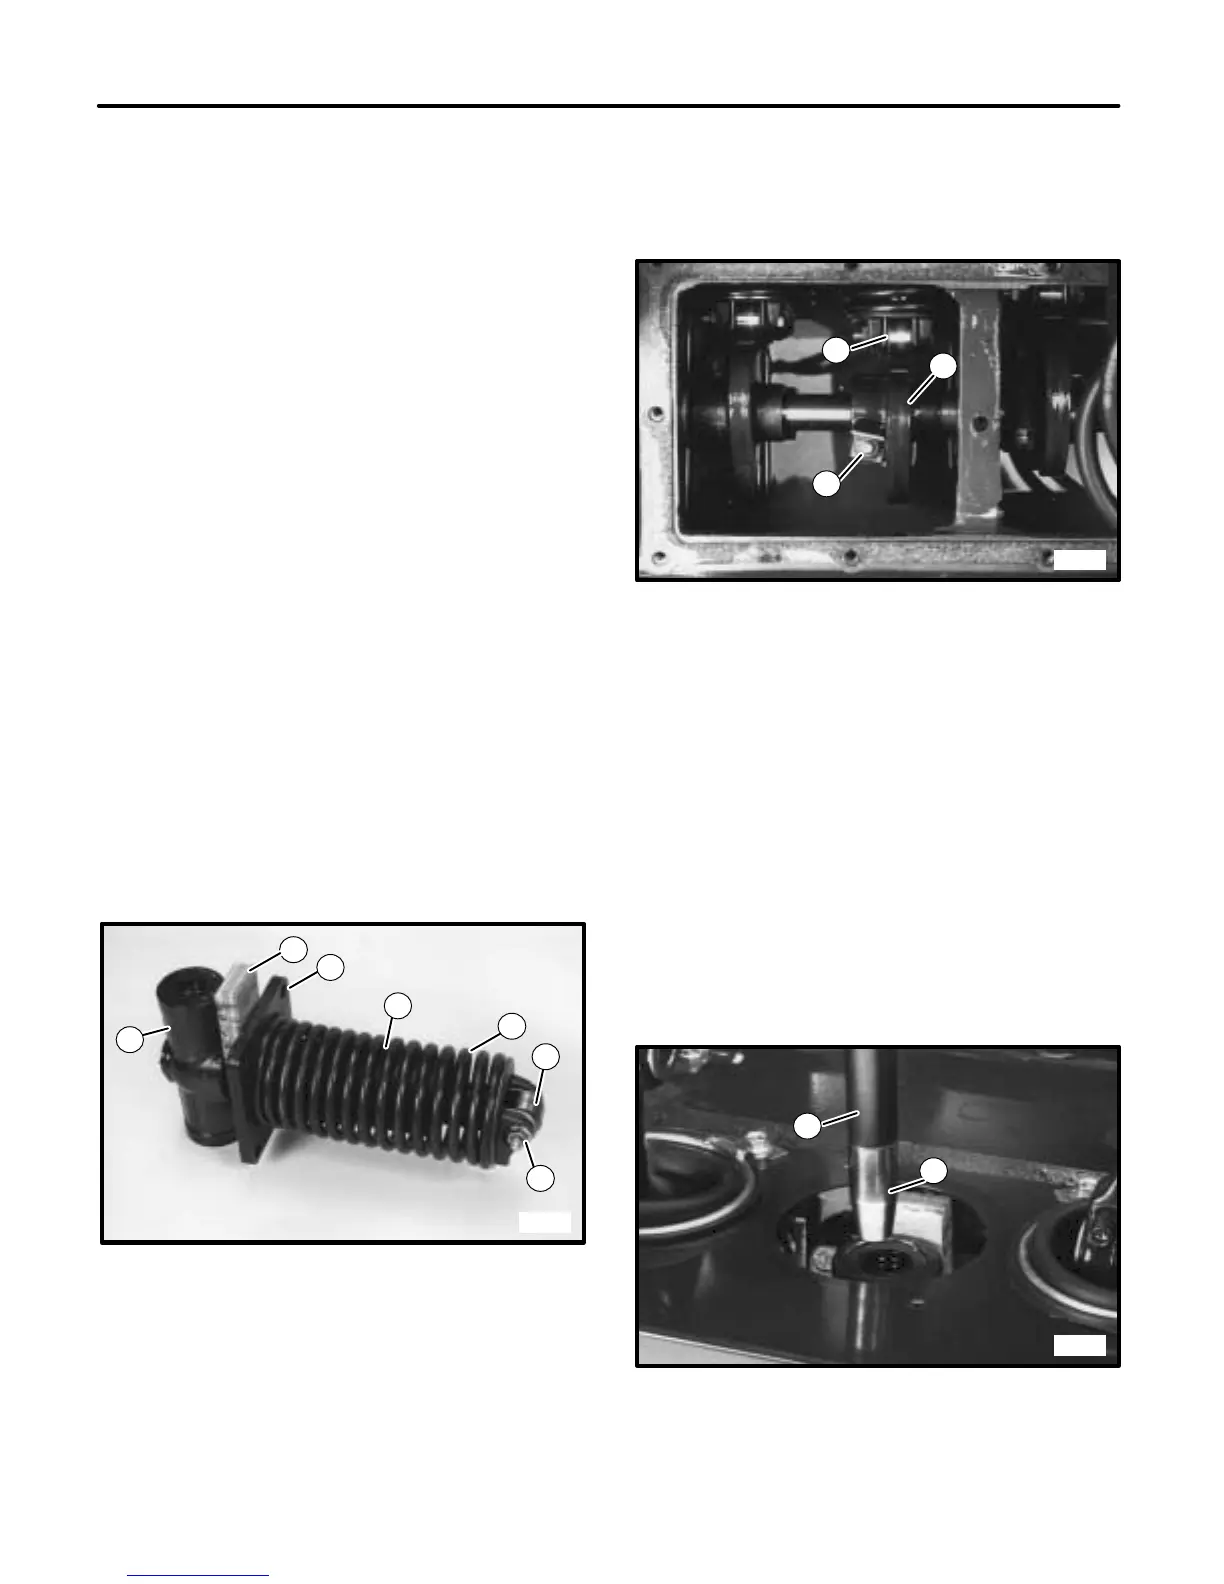
15. Check to make sure cam and roller of slide are
aligned properly. To align, loosen cam screw and
slide cam on shaft until it is centered on roller.
Tighten cam screw. (See FIGURE 12.)
3787
2
1
3
FIGURE 12
1. Slide Roller
2. Cam
3. Cam Screw
16. Rotate cam so that slide is pushed out and remove
wood block.
17. Reinstall cam case cover. Replace gasket if broken
or damaged.
18. Refill cam case with oil (see lubrication section for
recommended type). Check level with unit in raised
position.
NOTE: To reinstall push rods to slides, a seal protector
tool (P.N. 517693) is required to prevent damage to
triple lip seals. (See FIGURE 13.)
3789
2
1
FIGURE 13
1. Push Rod
2. Seal Protector Tool