SERVICE 7
25
7.15 MASTER CLUTCH
A complete breakdown of clutch parts can be found in the
parts diagram on page 32.
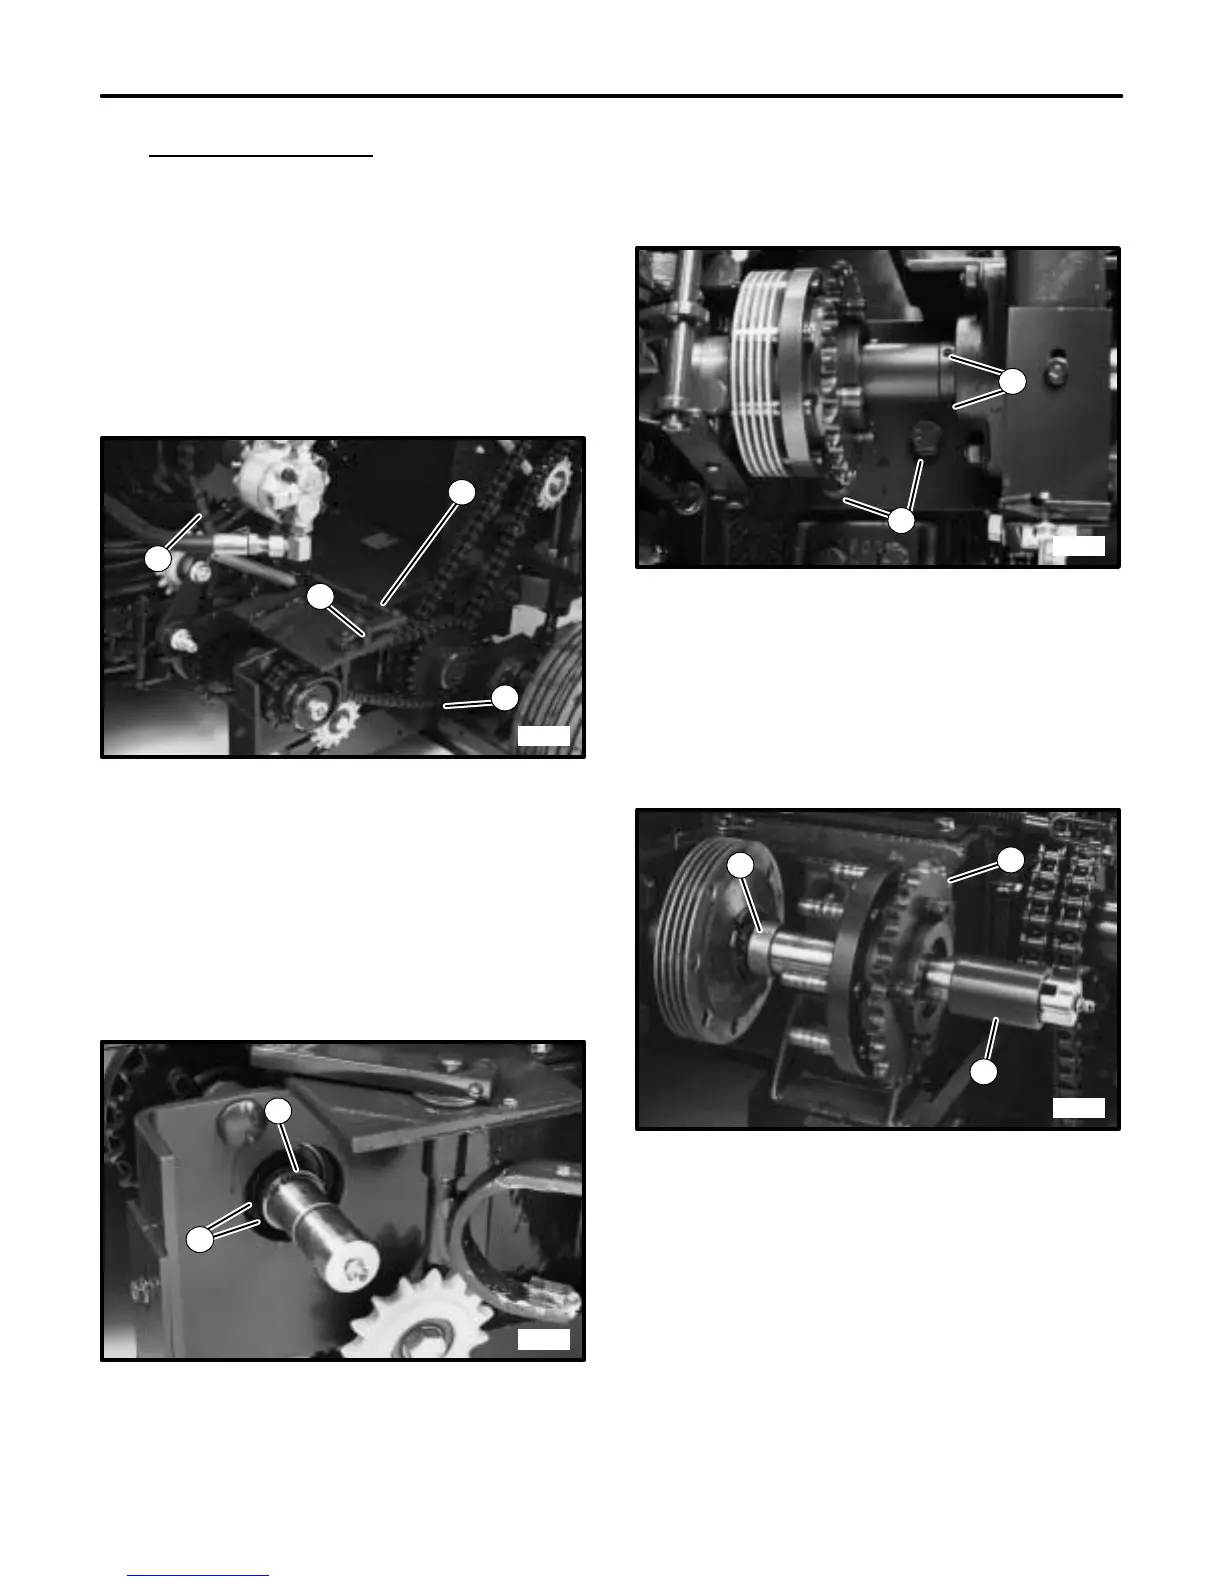
1. Disconnect connector link clevis from aerate clutch
lever and remove lever stop. (See FIGURE 41.)
2. Loosen idler sprockets and remove chain from dog
clutch to camshaft and chain from engine to master
clutch. (See FIGURE 41.)
3804
1
2
4
3
FIGURE 41
1. Connector Link Clevis
2. Lever Stop
3. Chain, Engine to Master Clutch
4. Chain, Dog Clutch to Camshaft
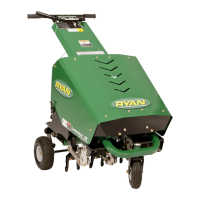
3. Remove dog clutch and key, snap ring and sprocket.
4. Remove snap ring and spacers shown in
FIGURE 42.
3805
1
2
FIGURE 42
1. Snap Ring
2. Spacers
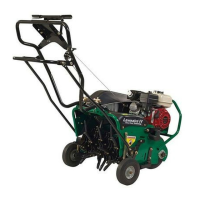
5. Loosen the two set screws in pillow block collar and
unbolt bracket assembly from the cam case. (See
FIGURE 43.)
3805
1
2
FIGURE 43
1. Set Screws
2. Bracket Assembly Mounting Bolts (3)
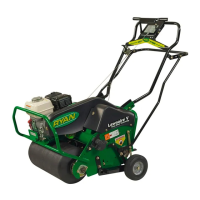
6. Remove shaft spacer, clutch sprocket and clutch
spacer from shaft. (See FIGURE 44.)
3807
1
2
3
FIGURE 44
1. Clutch Spacer
2. Clutch Sprocket
3. Shaft Spacer
7. Remove four cotter pins securing clutch arms(top
and bottom) to the clutch plate assembly. Remove
washers and clutch arms.
NOTE: Be sure the two washers removed from the lower
pressure plate pin are installed during reassembly.