SERVICE 7
21
7.12 DIFFERENTIAL
(8710 and prior)
1. Remove shields and jack unit up. Set on jack stands
so that both rear wheels are off the ground.
WARNING
!
Use jack stands to support unit. DO NOT rely
on hydraulic or mechanical jacks.
2. Remove both rear wheels and the differential drive
chain.
3. Remove the two nuts and washer from axle and pull
off differential.
4. Remove the chain sprocket and the differential will
come apart for service.
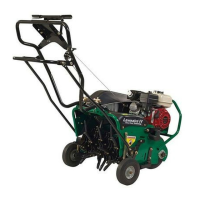
5. Pinion gears can be removed by loosening set
screws and removing pins shown in FIGURE 34.
2284
1
3
1
2
FIGURE 34
1. Set Screws
2. Pins
3. Pinion Gears
6. Check seal for damage and replace if necessary.
7. Lubricate all gears and bearing surfaces and reas-
semble. Leave sprocket screws loose to allow align-
ment with axle.
8. Slide differential onto axle and tighten sprocket
screws.
9. Install washer, axle nut and locking nut on axle. DO
NOT TIGHTEN NUTS.
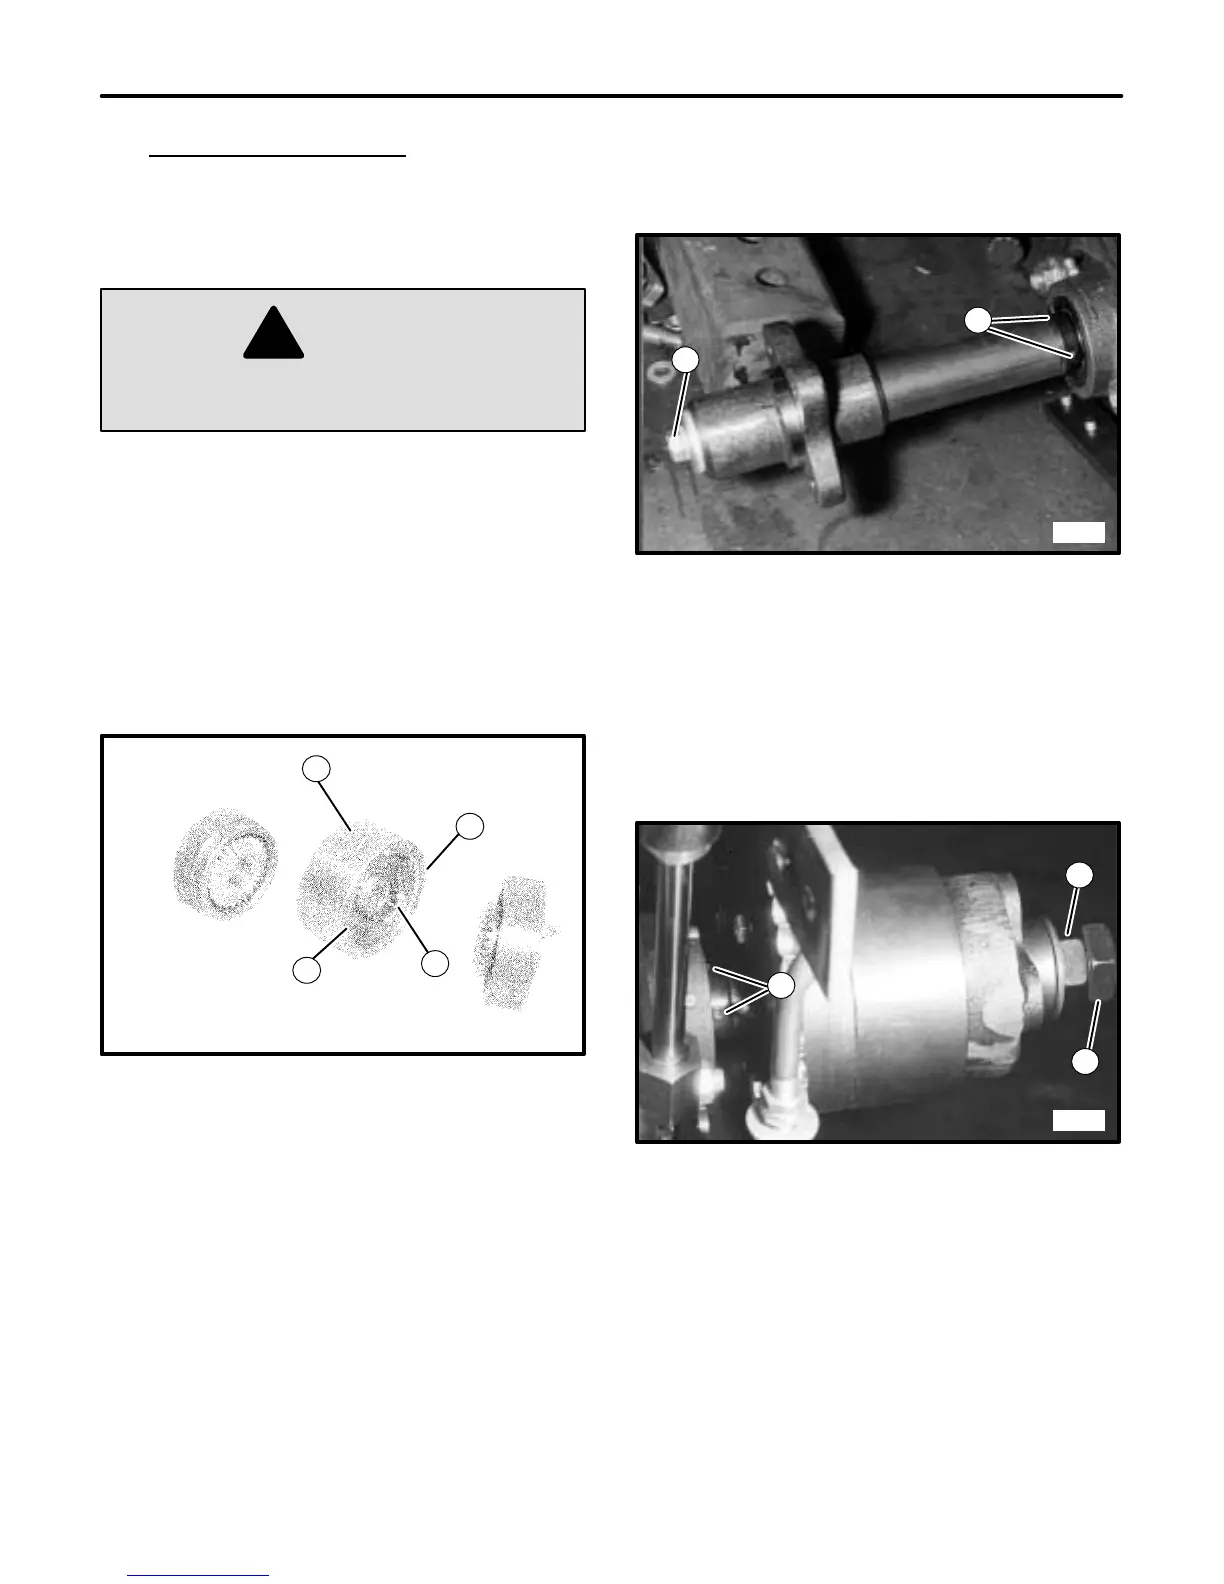
10. Loosen set screws in pillow block collar on left side of
unit. Make sure axle screw is tight. (See
FIGURE 35.)
2285
2
1
FIGURE 35
1. Axle Screw
2. Set Screws
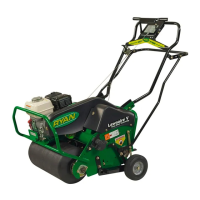
11. Loosen set screws in pillow block collar on right side
of unit. (See FIGURE 36.)
12. Snug axle nut against hub to set position of axle and
differential.
2286
3
2
1
FIGURE 36
1. Set Screws
2. Axle Nut
3. Locking nut
13. Tighten set screws on both sides of unit. Torque to 50
lbs. in. (5.5 N·m).
14. Loosen axle nut 3/4 of a turn and secure with locking
nut.
15. Lubricate fitting on differential until lubricant comes
out between washer and differential.