SERVICE 7
17
7.10 CONNECTOR ROD & WRIST PIN
REPLACEMENT
1. With the unit raised, move throttle to the off position
and disconnect spark plug wire.
2. Move Shift Control lever to “Tines Only” and engage
the master clutch.
3. Open door at rear of unit and pull recoil starter to
rotate crankshaft for best access to cap screws.
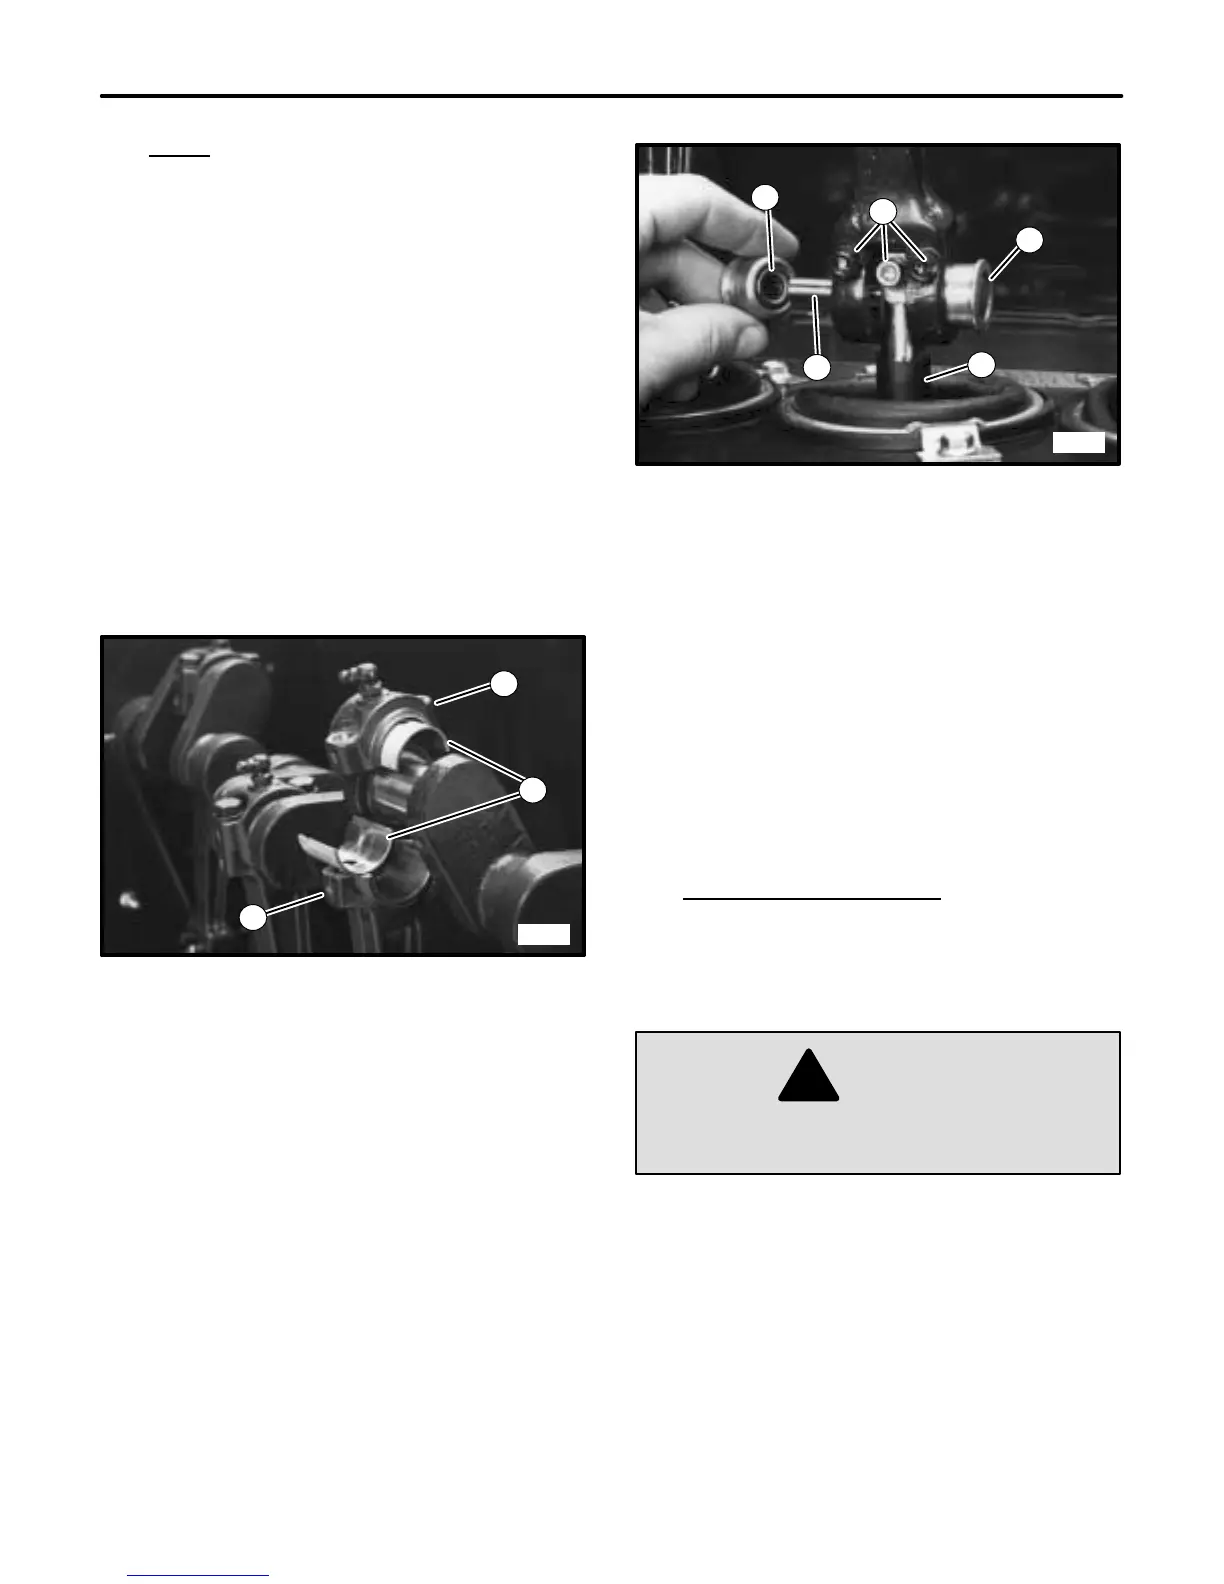
4. Remove screws from connector rod cap. Remove
cap and inserts. Replace worn inserts. (See
FIGURE 20.)
3791
1
2
3
FIGURE 20
1. Connector Rod
2. Cap
3. Inserts
5. Loosen set screws securing bearings at bottom of
connector rod. Remove bearings.
6. Loosen set screw in push rod and drive out wrist pin.
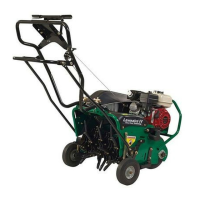
(See FIGURE 21.)
3784
1
2
2
3
4
FIGURE 21
1. Set Screws
2. Bearings
3. Wrist Pin
4. Push Rod
7. Remove and replace connector rod.
NOTE: If connector rod is not damaged, only new bear-
ing inserts may be needed.
8. Lubricate connector rod bearings before operation.
9. Reconnect spark plug wire before attempting to start
engine.
7.11 DIFFERENTIAL
(8720 and later)
1. Remove shields and jack unit up. Set on jack stands
so that both rear wheels are off the ground.
WARNING
!
Use jack stands to support unit. DO NOT rely
on hydraulic or mechanical jacks.
2. Remove both rear wheels.
3. On left side of unit, remove hub, key and spacer.
Loosen set screws in locking collar on pillow block.
(See FIGURE 22.)