7 SERVICE
26
8. Remove clutch plate assembly from shaft.
NOTE: To prevent damage to clutch during removal or
installation, apply pressure to the clutch hub only.
DO NOT pound or pry the clutch under any circum-
stances.
9. BEFORE REASSEMBLY, clean shaft and apply Loc-
tite anti–seize lubricant or equivalent.
10. Reassemble clutch by reversing disassembly proce-
dures.
11. When remounting bracket to camcase, apply 3M
Sealer #EC847 or equivalent to screws.
12. After bracket is reinstalled, push clutch assembly
firmly against pillow block collar and tighten set
screws in collar.
13. When reinstalling lever stop refer to page 14, steps
12 through 16 of Dog Clutch Adjustment section.
CLUTCH PLATE ASSEMBLY
To service the clutch plate assembly while removed from
unit:
1. Compress the belleville spring washers (with press
or vise) and remove snap ring.
NOTE: A cut piece of pipe can be used to compress
springs in a press and allow removal of the lock ring,
and pegs can be used to align disks (See
FIGURE 45).
3808
1
2
3
FIGURE 45
1. Belleville Spring Washers
2. Cut Pipe
3. Peg (each side)
2. Remove all components from hub. To make reas-
sembly easier, lay out components in the order
removed.
3. Replace parts as required.
4. Reassemble components onto hub. DO NOT
include wavy washers in assembly at this time.
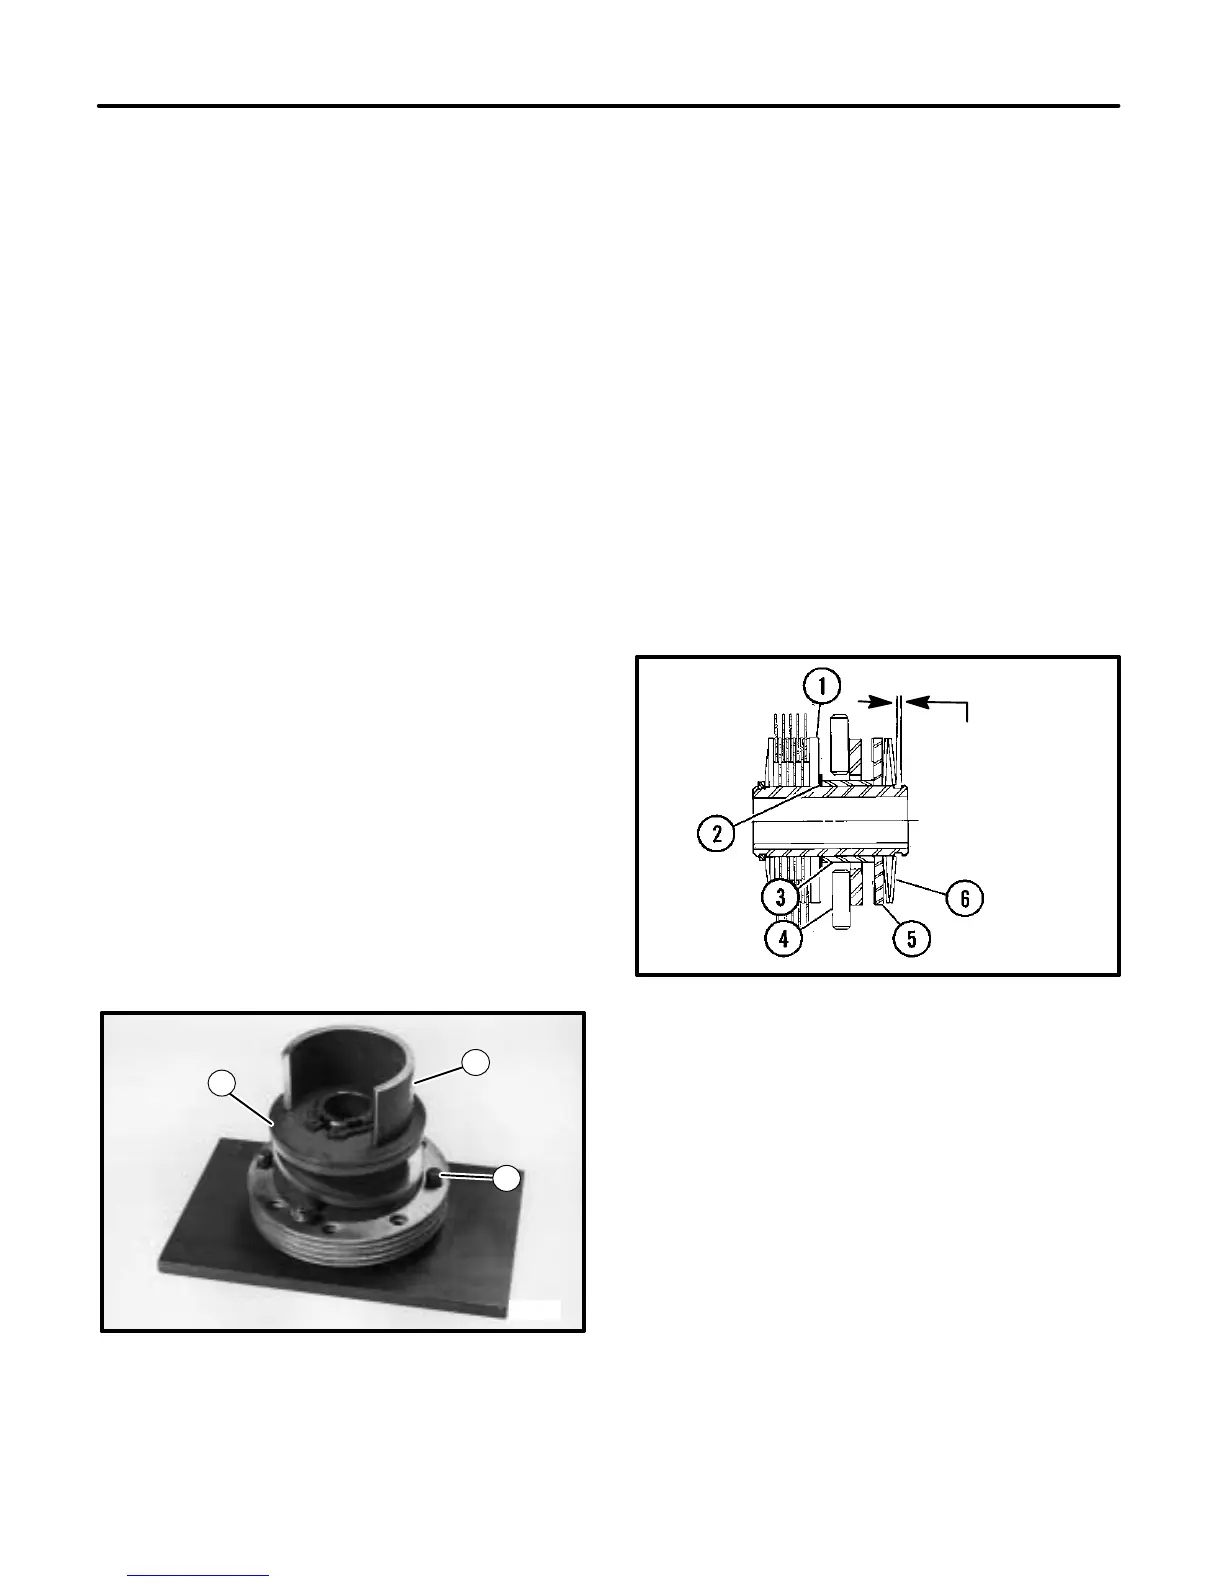
NOTE: Flange on friction plate must face pressure plate.
Belleville washers must be placed face to face as
shown in FIGURE 46 to provide proper spring
action.
5. Be sure components are properly seated against
each other on hub and check clearance between
belleville washer and outside edge of snap ring
groove. Clearance should be .005” ± .003”. Install or
remove shims as required. (See FIGURE 46.)
.005” ± .003”
FIGURE 46
1. Clutch Plate
2. Shims
3. Spacer
4. Pressure Plate
5. Friction Plate
6. Belleville Spring Washers
NOTE: Shims on some clutches were placed between fric-
tion plate and spacer. Shims must be placed between
clutch plate and spacer as indicated in FIGURE 46.
6. After proper clearance is obtained, remove compo-
nents from hub and reassemble including wavy
washers.
7. Compress spring washers and install snap ring.
8. Reinstall clutch plate assembly onto clutch shaft.