AK6-QE-006-03 - 27 - 05/2017
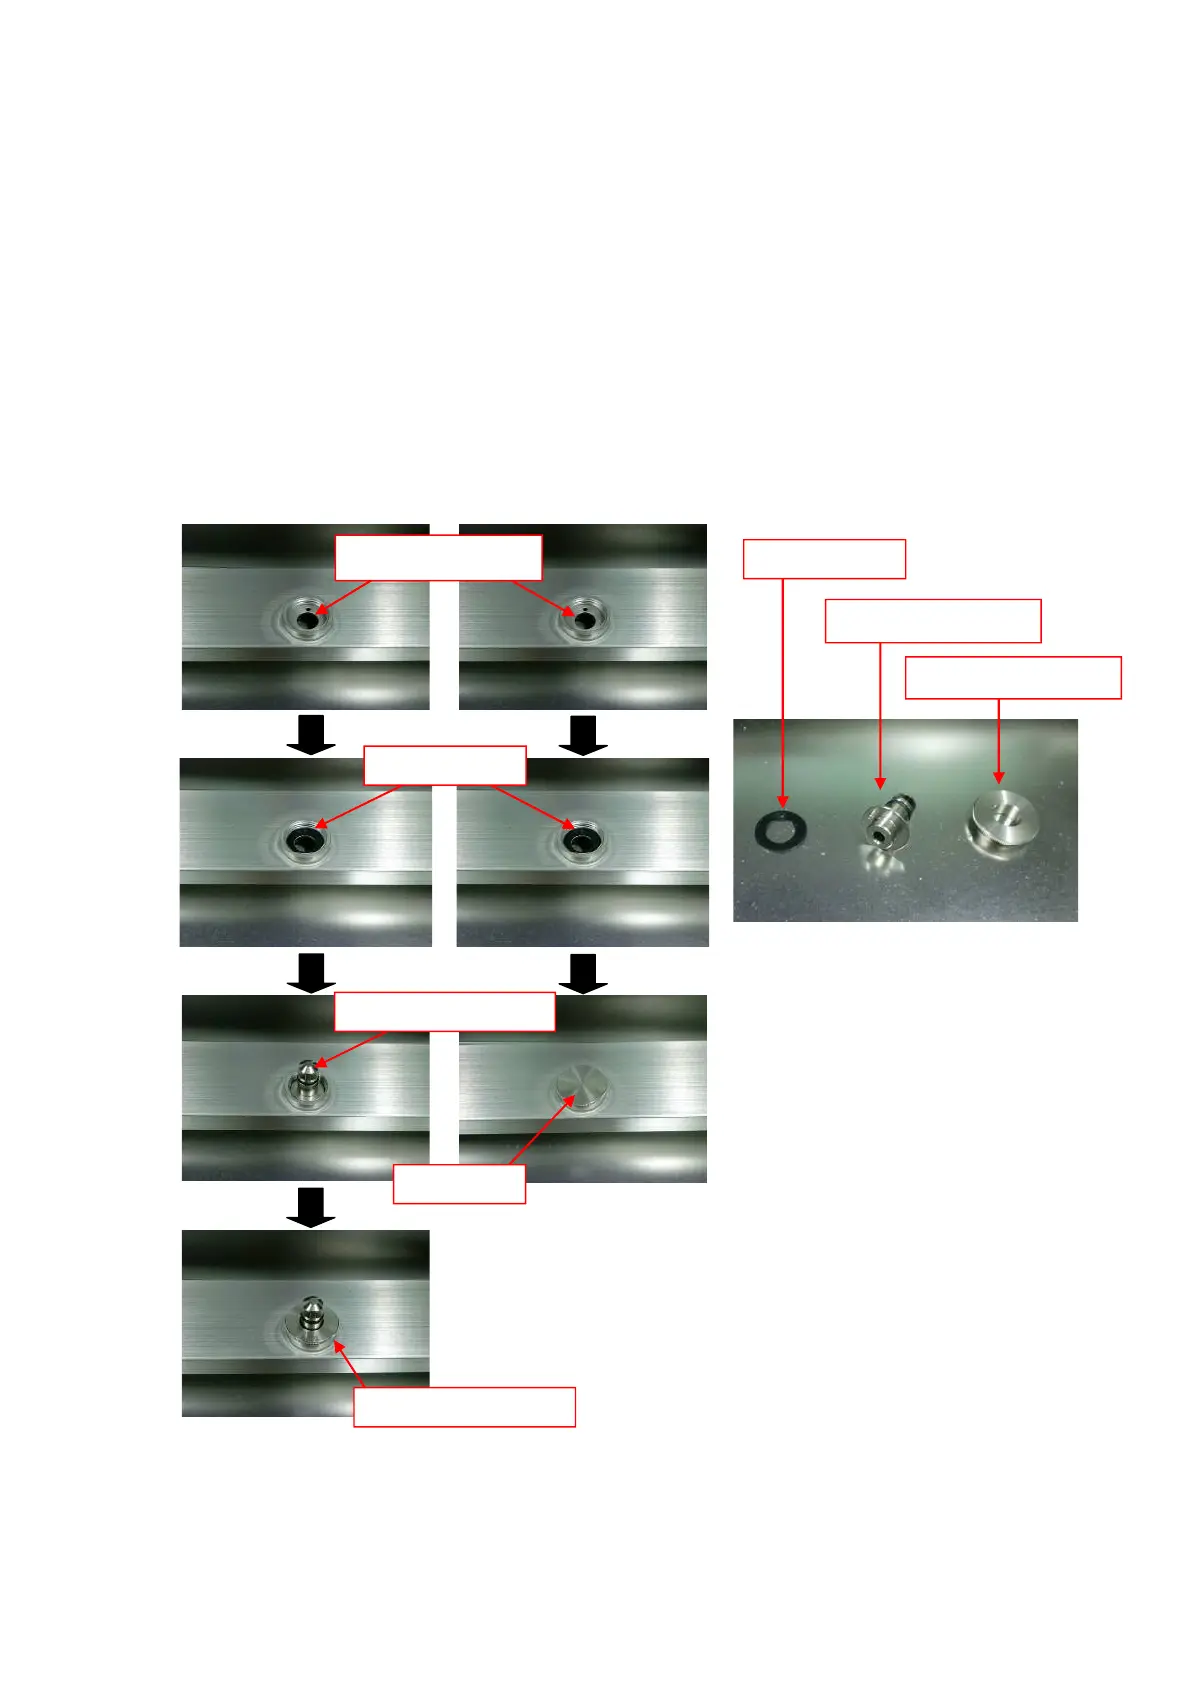
11-5. Installing the Water Station Nozzle
1) Remove the 4-position reservoir tray for wash reservoirs from the instrument.
2) Remove the nozzle cap or water station nozzle already installed.
To remove the nozzle cap, turn it counterclockwise.
To remove the nozzle, turn the nozzle cap with hole counterclockwise to remove, and then pull
the nozzle straight up.
3) To block the water supply port, attach the nozzle cap. Make sure that a water leak preventive
rubber gasket is seated in the port. Tighten the cap by turning clockwise.
4) To install the nozzle, place a water leak preventive rubber gasket into the water supply port so
that a small hole on the gasket aligns with a small hole in the water supply port. Next, insert
the nozzle into the port while facing a small protruded part on the underside of the nozzle
toward the small port in the port. Lastly, put the nozzle cap with hole onto the nozzle. Tighten
the cap by turning clockwise.
Wash station nozzle Nozzle cap
Water supply port
Rubber gasket
Wash station nozzle
Nozzle cap with hole
Nozzle cap
Rubber gasket
Wash station nozzle
Nozzle cap with hole
 Loading...