AK6-QE-006-03 - 14 - 05/2017
9. Installation
9-1. Positioning the Instrument
(1) Make sure that the place where the instrument is placed on is sturdy, level and capable of
supporting at least 150kg of weight.
(2) Lift up the instrument by several people and place it on the installation area.
If the installed instrument is unsteady or inclines heavily, adjust the level adjustment feet to
make the instrument level.
When the instrument is to be linked to Tissue-Tek Film or Glas g2, adjust the leveling feet to
adjust the height and tilt of the instrument.
(3) Once the instrument is properly installed, remove the carrying handles and insert the bushing
(bolt cap), provided with the instrument, into the threaded holes.
(4) Explain customer that there is an exhaust port on the left side of the instrument for discharging
volatile gases from the inside of the instrument.
9-2. Connecting the Water Supply Hose
◇ Water supply system
• Water pressure:
Dynamic pressure 0.098 to 0.441 MPa (0.18 MPa or more for ED and ES models)
Maximum static pressure 0.74 MPa
• Water temperature Lower than 30°C (no freezing)
• Diameter of plumbing Standard water tap faucet with 12mm to 17mm of faucet head
outer diameter
The faucet joint of the water supply hose provided with the instrument is not applicable to a
faucet with a different-sized head, a chemical faucet, a bubble-stream faucet aerator and
other faucets with a specially-shaped head.)
• The water supply system to be used for the instrument must meet the following requirements to
prevent health hazard caused by back-flow:
a. The water supply system is not directly connected to public water supply plumbing.
b. The water supply system is not directly connected to drinking water supply equipment.
c. The water supply system has some measure for preventing backflow caused by an inverted
siphon effect.
* Europe: Water supply system in compliance with EN1717:2001, category 4
* Outside Europe: Water supply system in compliance with local laws and regulations
◇ Standard accessories for water supply connection
• Nipple (1/2 inch.)
• Bushing (1/2x3/4 inch.) or bushing (processed)
• Water supply hose
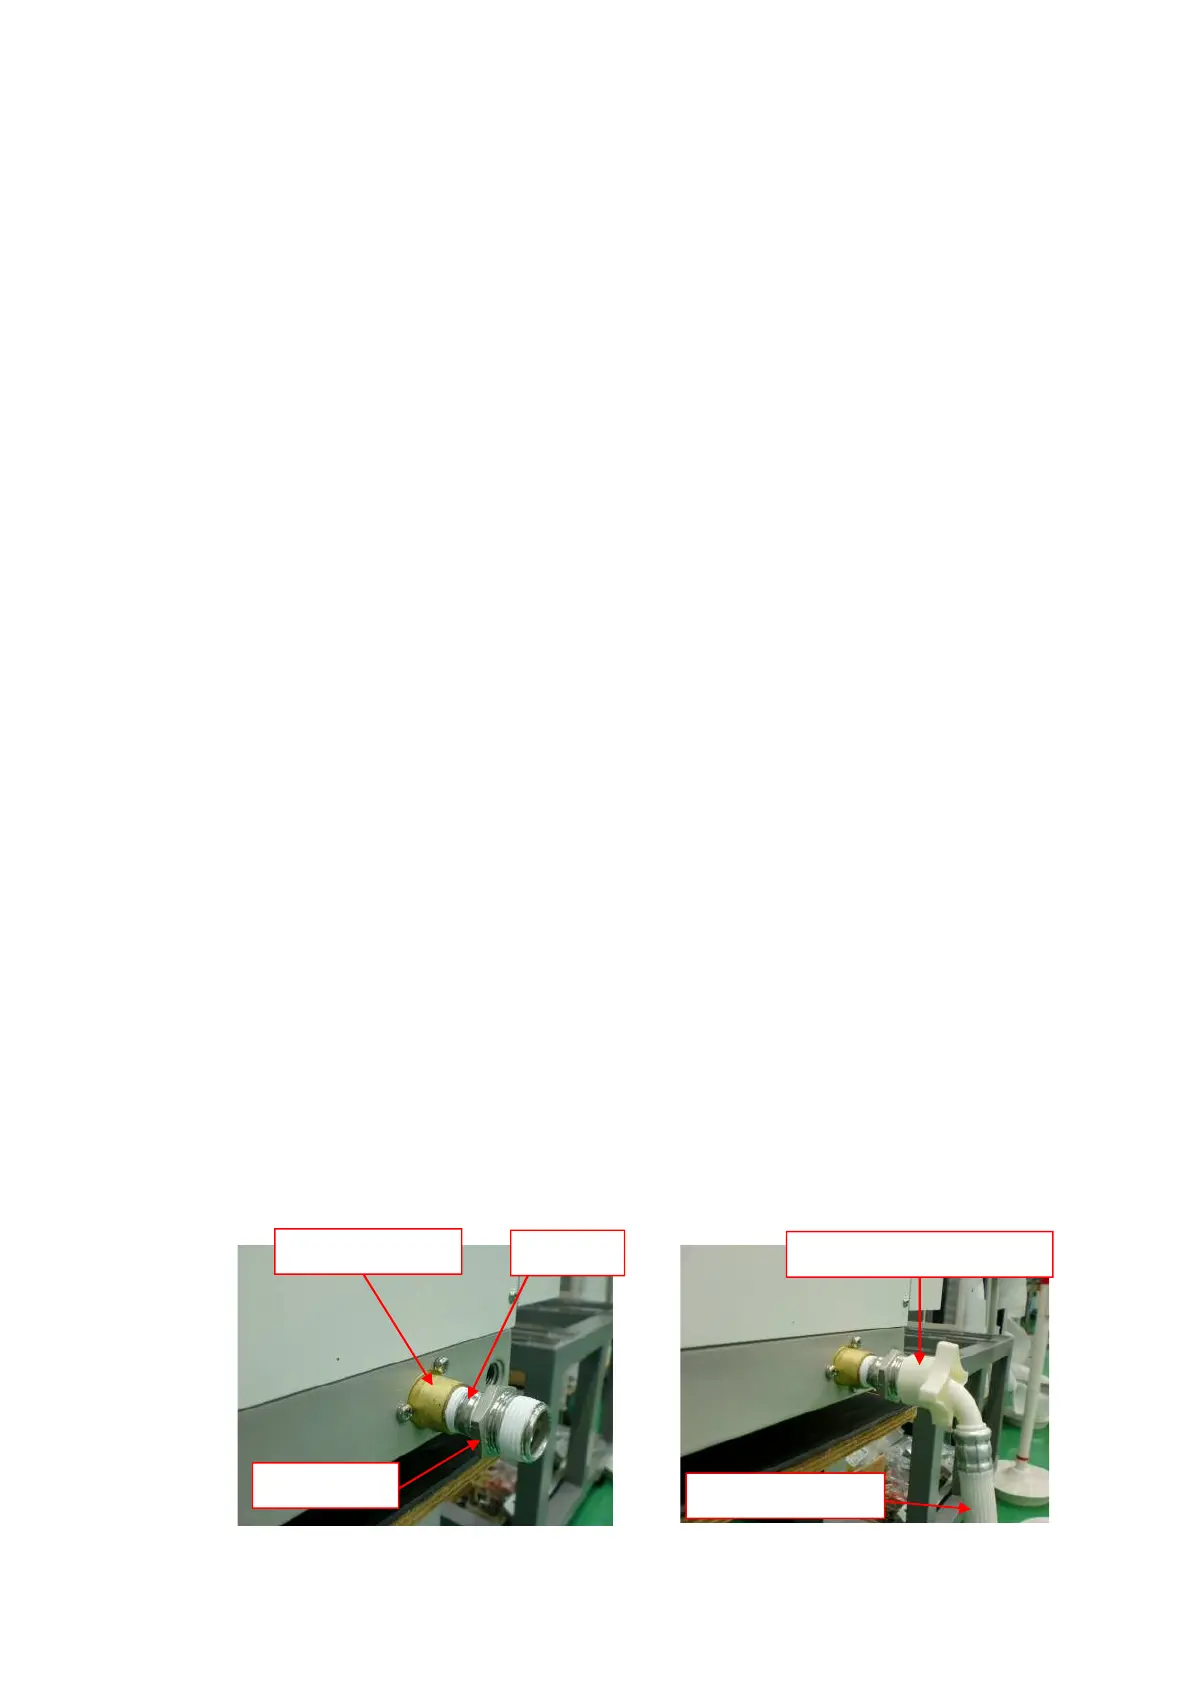
◇ How to connect the water supply hose
(1) Attach the nipple (1/2 inch) and the bushing (1/2x3/4 inch.), or bushing (processed), to the
water supply port located at the right bottom of the instrument. Connect the threaded end of
the water supply hose to the bushing.
Bushing
Water supply port
Nipple
Threaded end of the hose
Water supply hose
 Loading...