Revised 10/02/2012 3.7
NOTE: To return to the UTILITIES screen without
changing the USER DEFINED FILE, press the EXIT
button.
Setting Ready / Shutdown Times
The READY / SHUTDOWN TIMES option sets the
automatic warm-up (ON) and automatic shutdown (OFF)
times for the Tissue-Tek Xpress x120 for days on which
the system will normally be used (see “Setting Days Off”
on page 3.8 for more information). READY/SHUTDOWN
times may be set individually for each day of the week, or
the same times may be set for all days of the week. It is
also possible to indicate days on which the system is not
in use (automatic warm-up and shutdown is not per-
formed).
To access the READY / SHUTDOWN TIMES function:
1. From the UTILITIES screen, touch the READY /
SHUTDOWN TIMES button.
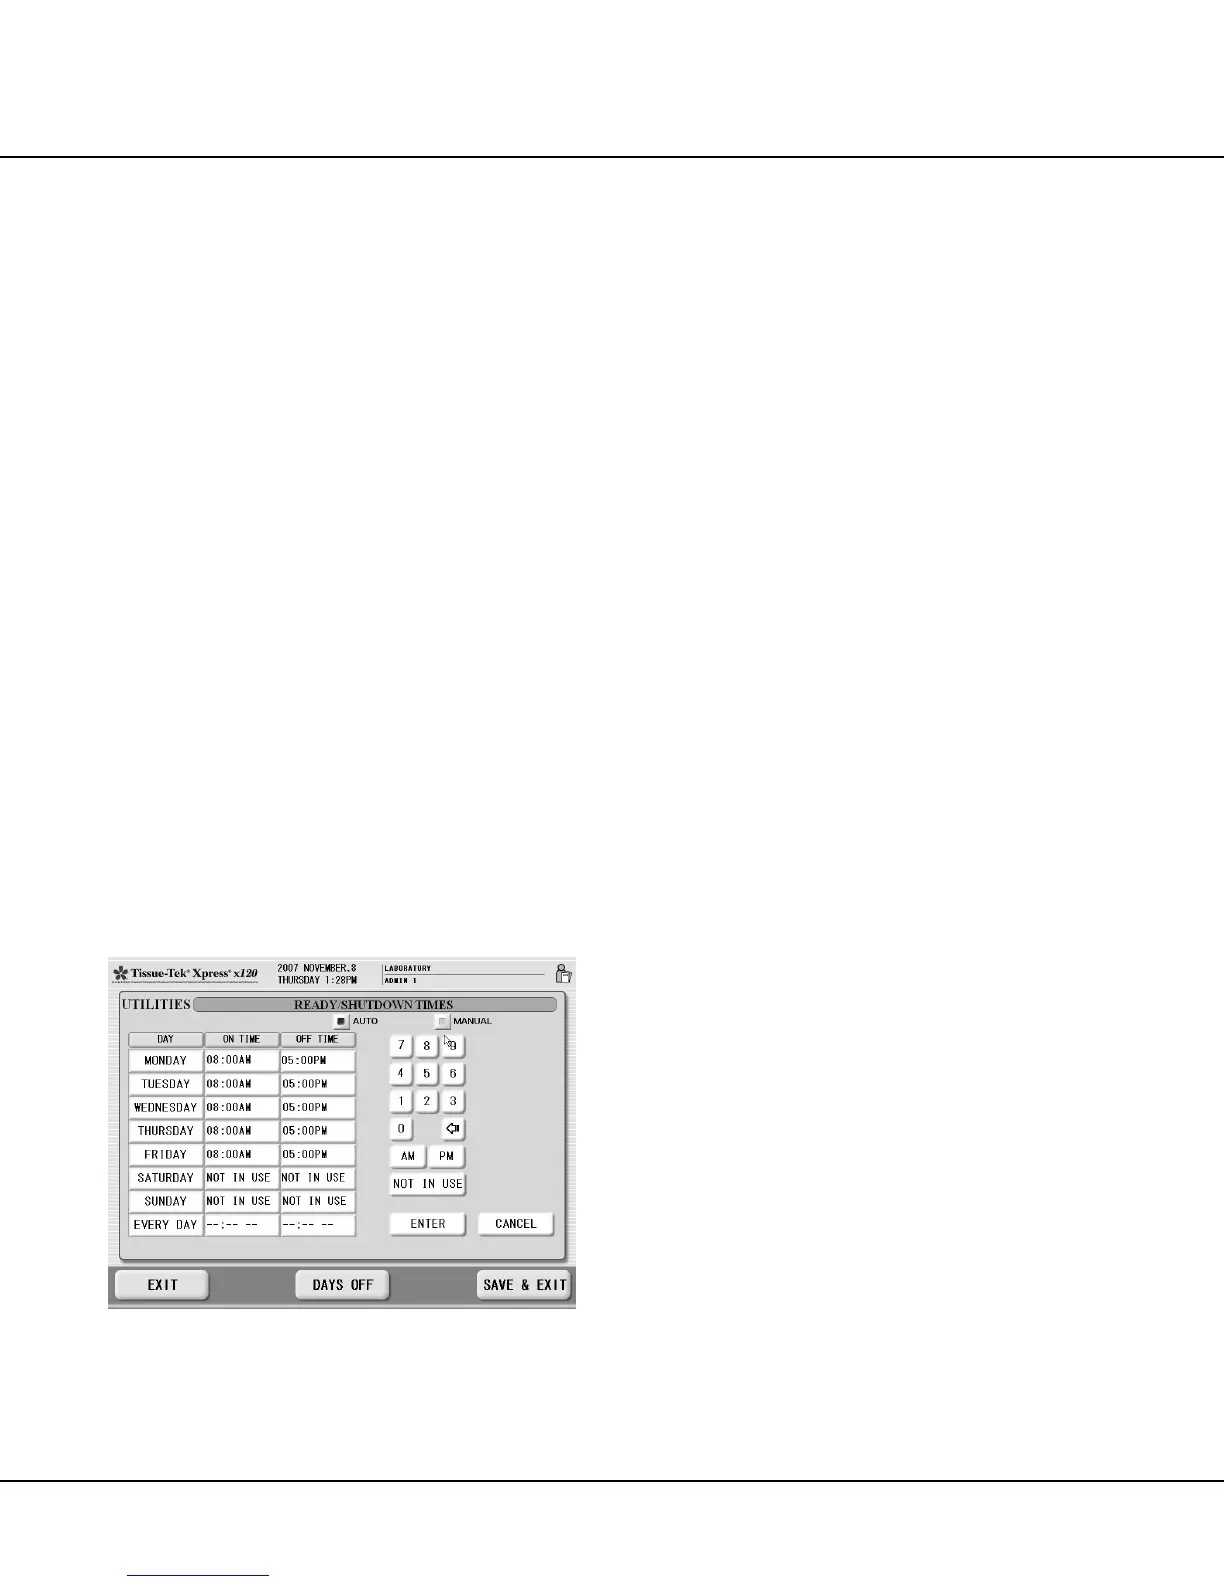
• The READY/SHUTDOWN TIMES screen dis-
plays (Figure 3-H), showing the current system ON
TIME and OFF TIME for each day of the week.
NOTE: When entering ON / OFF TIME, be sure to enter
the desired times using the appropriate format, either
12-hour or 24-hour, as established in SYSTEM SETUP
(see “Configuring System Settings” on page 3.2 for more
information).
Figure 3-H
To set on/off times for a single day:
1. Touch the ON TIME or OFF TIME field for the desired
day of the week (MONDAY through SUNDAY).
NOTE: Use the backspace key to edit a currently entered
time.
2. Use the keypad to enter the desired “on” time (the
time at which the instrument should be ready to begin
processing) or “off” time (the time at which the instru-
ment should normally shutdown).
3. When the desired time has been entered in the active
field, press the ENTER key.
4. Repeat steps 1 through 3 to set the ON TIME and
OFF TIME for the remaining days of the week.
5. When all desired on/off times have been entered or
edited, touch the SAVE & EXIT button to save the
changes and return to the Utilities screen.
NOTE: To return to the UTILITIES screen without
changing on/off times, press the EXIT button.
NOTE: On/off times will repeat weekly, unless “days off”
are specified (see “Setting Days Off on page 3.8 for more
information).
To set the same on/off times for all days:
1. Touch the EVERYDAY - ON TIME or EVERY DAY -
OFF TIME field
NOTE: Use the backspace key to edit a currently entered
time.
2. Use the keypad to enter the desired “on” time (the
time at which the instrument should be ready to begin
processing) or “off” time (the time at which the instru-
ment should normally shutdown).
3. When the desired time has been entered in the active
field, press the ENTER key.
4. When the desired EVERY DAY on/off times have
been entered or edited, touch the SAVE & EXIT but-
ton to save the changes and return to the Utilities
screen.
NOTE: To return to the UTILITIES screen without
changing on/off times, press the EXIT button.
NOTE: EVERY DAY on/off times will repeat daily, unless
“Days Off” are specified (see “Setting Days Off” on page
3.8 for more information).

 Loading...