Load/Save Receipt Images
You can load a preamble and postamble image for your ER-900 receipt. Before loading, the images must be
converted by the PC Utility to .img format. After conversion, they can be loaded directly by connecting a PC to
the ER-900 or by copying the images to a SD card and loading (or saving the image) using the SD utility
program.
Note: After loading images, you must set Print Options #28 and #29 for image printing.
Preparing a Graphic Logo Bitmap for an ER-900 Series
The image must be black/white, 384 x 192 pixels, and 10 Kbytes or less in size.
1. Open MS Paint.
2. Open the image file you wish to use.
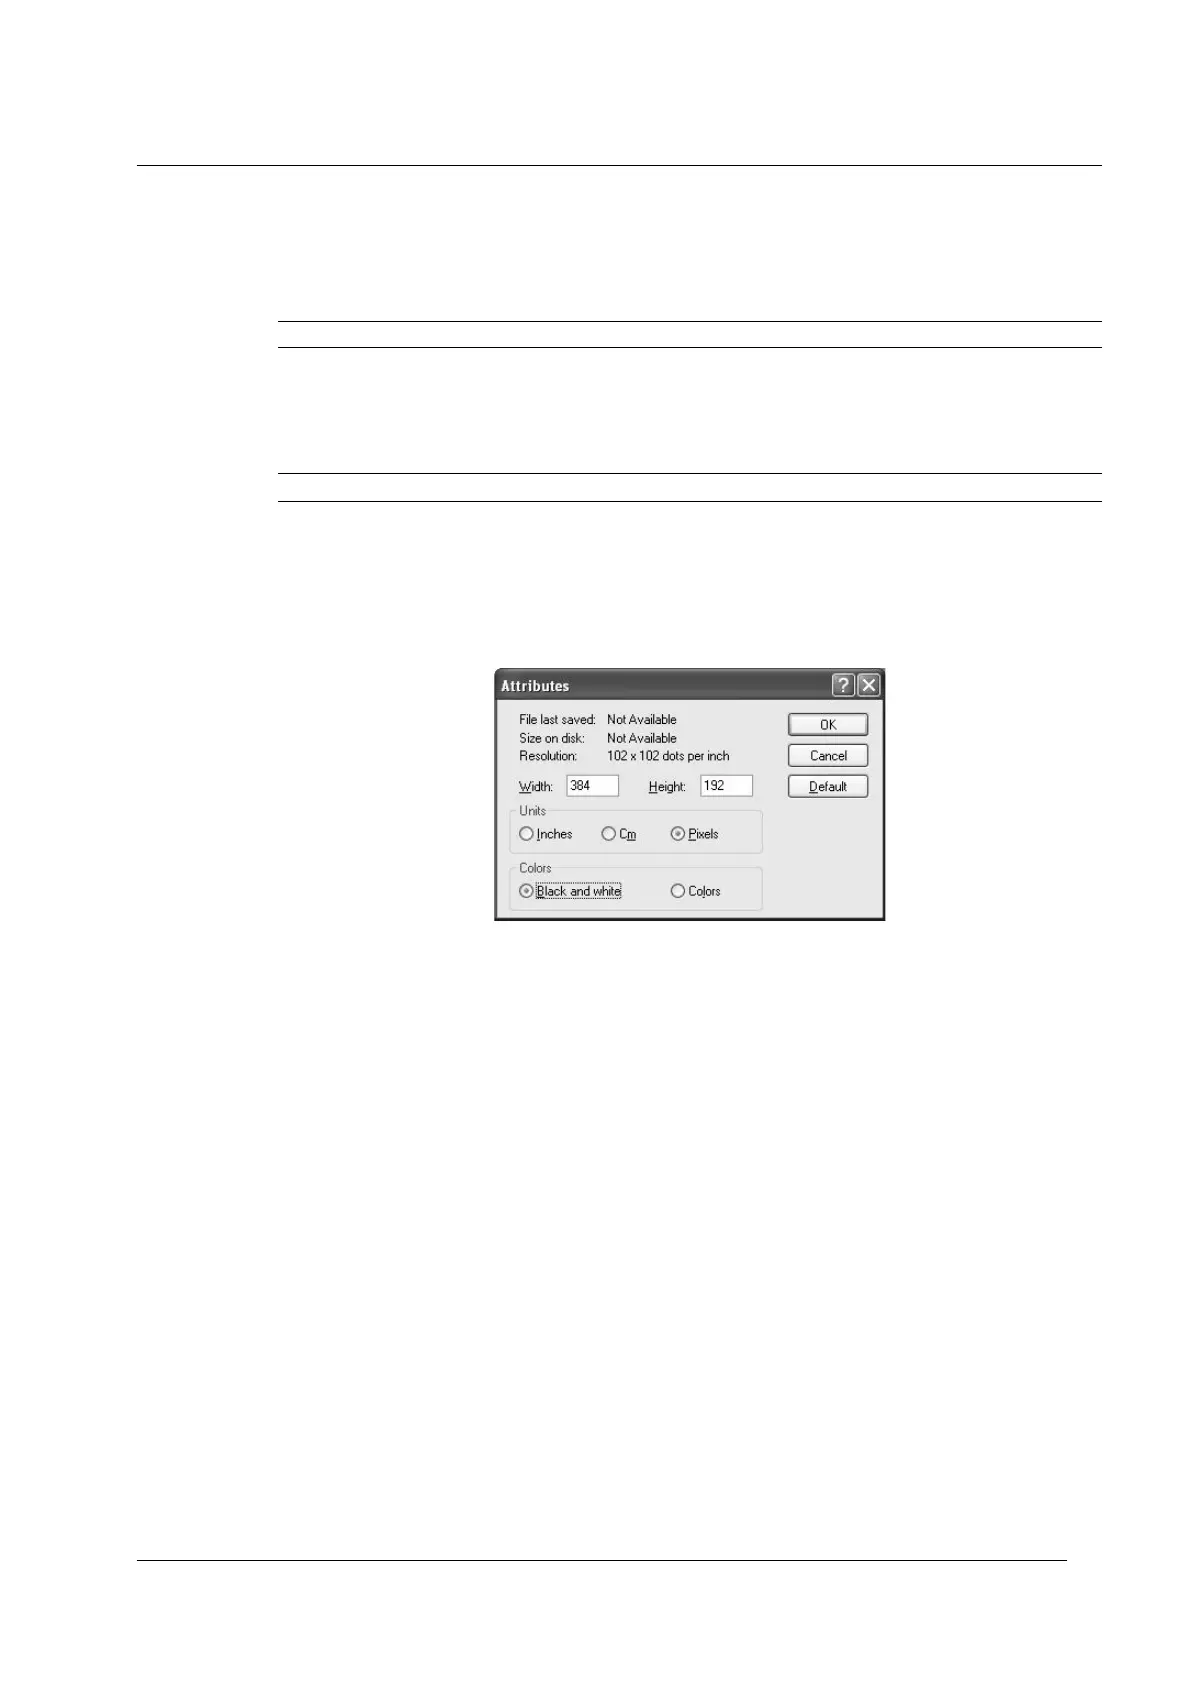
3. Choose Attributes from the Image menu. The Attributes dialog box
displays.
4. The image dimensions must be no larger than 384 pixels wide by 192 pixels
high. If the image size in pixels is greater than the maximum, you must resize
your image.
- Click OK to exit the Attributes dialog.
- Select your image. (Choose Select All from the Edit menu.)
- Using the handles of the selected image, resize the image. Keep the
image in the upper left corner of the screen.
- Choose Attributes from the Image menu. The Attributes dialog
box displays again. Enter 384 in the Width field; enter 192 in the
Height field; select Pixels as the unit. Click OK to exit the dialog box.
- Your image will be cropped to the 384 x 192 pixel size. If you cropped
part of the image you wish to keep, you can undo (Ctrl + Z) and try
again. You may have to experiment a bit to resize the image inside the
384 x 192 pixel limit.
5. After the image is sized, select Black and white in the Attributes dialog.
6. Save your image as type “Monochrome Bitmap (*.bmp,*.dib)” and confirm
that the size is 10k or less. If you resized your original image, you may wish
to rename when you save, so that you preserve a copy of the original image.