English - 70
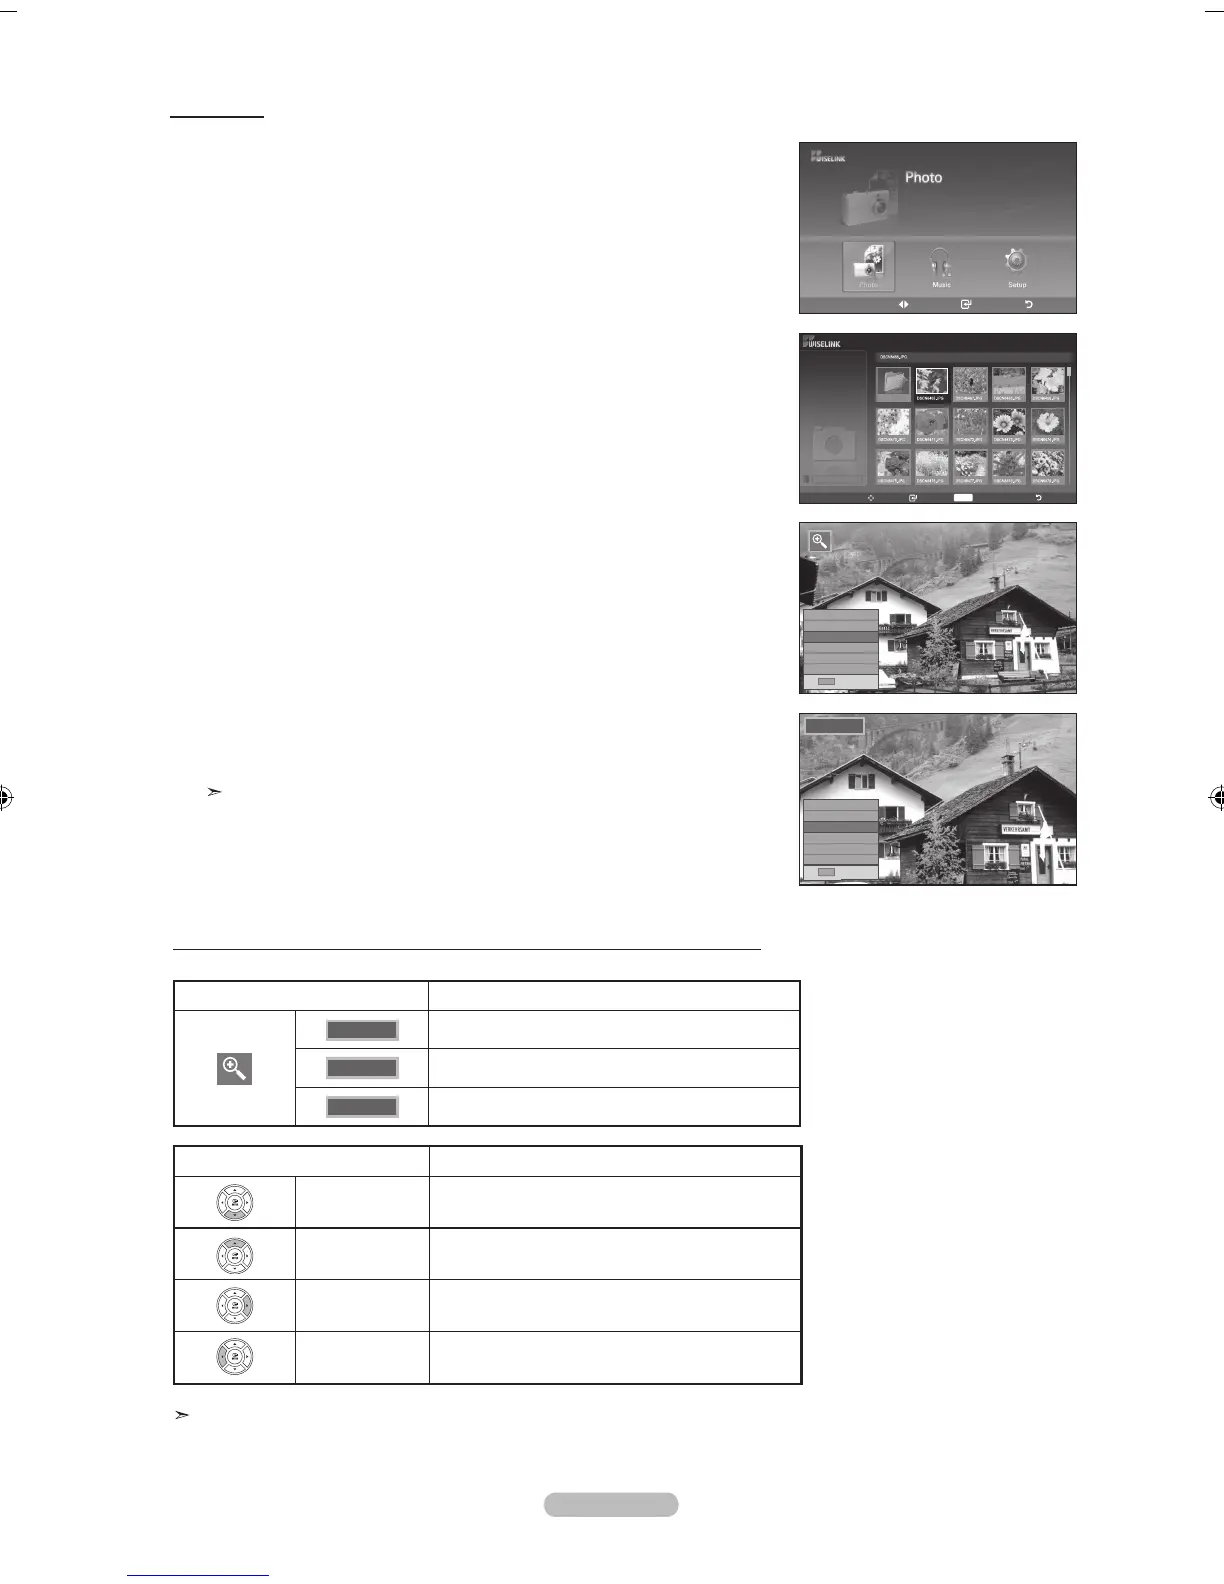
Zooming-in
1. Complete Steps 1 to 3 of “Using the WISELINK Menu”. (Refer to page 64)
2. Press the
◄ or ►
button to move to “Photo”, then press the ENTER button.
The saved file information is displayed as a folder or file.
3. Press the ▲, ▼, ◄ and ► buttons to select a file, then press the ENTER button.
Pressing the button over a photo thumbnail displays the photo in full screen.
4. Press the I
NFO button to display the option (Slide Show, Rotate, Zoom, Copy,
Delete, List).
Press the ▲ or ▼ button to select “Zoom”, then press the ENTER button.
Press the ENTER button to select the option ("X2", "X4", "X1").
•
Zoom(x 2): Zoom-in to the photo x2.
• Zoom(x 4): Zoom-in to the photo x4.
• Zoom(x 1): Restore the photo to its original size.
To pan up/down/left/right in the zoomed-in photo, press the INFO
button to exit
option menu, then press the ▲, ▼, ◄ and ► buttons.
The Rotate/Slide Show option is disabled when the Zoom option is selected.
Move Enter Return
x 1
X2
Zoom function information icon (Displayed at the top left of the screen).
Current OSD Function
X2
Zoom-in to a photo x2.
X4
Zoom-in to a photo x4.
X1
Restore a photo to its original size.
Button Function
Pan Down
Pan down to view the lower part of a zoomed-
in photo.
Pan Up
Pan up to view the upper part of a zoomed-in
photo.
Pan Right
Pan right to view the right side of a zoomed-in
photo.
Pan Left
Pan left to view the left side of a zoomed-in
photo.
The Rotate/Slide Show option is disabled when the Zoom option is selected.
Move Enter
INFO
Photo Menu Return
XTICK
Photo
1181x1447
2 MBytes
03 Feb 2007
2/125
◄◄ 1/6 Page ►►
Upper Folder
Slide Show
Rotate
Zoom
Copy
Delete
L
ist
INFO
Exit
Slide Show
Rotate
Zoom
Copy
Delete
L
ist
INFO
Exit