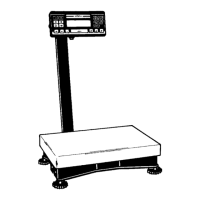
With the Classification application,
you can determine whether the weight
of a given sample lies within the limits
of a defined weight class.
Features
– Classification with 3 or 5 weight
classes. Configure in the operating
menu, under:
Appl 2:
class: 4.8.
– Enter the upper class limits using
the keypad or by saving weight values
from a load on the platform
– Enter the upper limits of weight classes
as absolute values or as a percentage
of deviation from the upper limit of
Class. Configure in the operating menu,
under:
Appl 2:
class: 4.9.
– Activate info-mode by pressing I
(> 2 sec)
– Toggle the main display between classes
and weight values by pressing w.
– Automatic printout of results.
Configure in the operating menu,
under:
Appl 2:
class: 4.10.
– Automatic taring of container weight.
Operating menu setting:
Appl: a.tare: 3.7.
– Automatic initialization when
you switch on the Signum with most
recently saved application data.
Operating menu setting:
Appl: a.start: 3.8.
– Closing application program;
deleting parameters:
You can select the function of the
c key for clearing application data.
When an application is active, this key
can either delete the values saved for
all applications, or delete selected
values saved for the active application.
Operating menu setting:
Appl: sel.cf: 3.24.
(select CF key function in applications)
– Tare function:
1) If you store a tare (weight value) by
pressing the ) key, you can later
enter a tare value manually. The tare
value you enter is added to the stored
tare value.
Setting: menu code 3.25.1 (factory
default)
2) A tare value entered manually over-
writes a stored tare value (weight
value). If you enter a tare value manu-
ally, a tare value (weight value) stored
later overwrites the manually entered
value.
Setting: menu code 3.25.2
Operating menu setting:
Signum 2
Appl :
W: 3.25.
Signum 3
Appl : tare. f : 3.25.
– Restore factory default settings. Operat-
ing menu setting:
Signum 2:
Appl :
W: 9.1.
Signum 3:
Appl : DEF.App : 9.1.
To use the Classification application,
you need to enter the delimiters that
separate one class from another.
The lower limit of Class 1 is defined
by the preset minimum load. The other
classes are configured by defining
their upper limits. There are two ways
to enter the delimiters for classes 1
through 3 (or 5):
– By saving the weight value indicated:
Each upper value, with the exception of
the highest, is entered using the keypad
or by saving the weight value of a load
on the weighing platform.
– By entering a percentage:
The upper value of Class 1 is entered
using the keypad or by saving the
value indicated. Upper limits for the
other classes are defined by entering
a percentage of deviation from the
upper limit of Class 1, using the keypad.
Example: Enter 100 g as the upper limit
of Class 1. Then enter 15%.
When working with 3 classes, this yields
the following weight classes:
Class 0: up to the minimum load
Class 1: > minimum load, up to 100 g
Class 2: >100 g to 115 g
Class 3: > 115 g, up to maximum load
When working with 5 classes, this yields
the following weight classes:
Class 0: up to the minimum load
Class 1: > minimum load, up to 100 g
Class 2: >100 g to 115 g
Class 3: >115 g to 130 g
Class 4: >130 g to 145 g
Class 5: > 145 g, up to maximum load
The initial application values are valid
until deleted by pressing the c key or
until overwritten by new values. They
also remain saved after you switch off
the scale.
Preparation
§ Switch on the scale: Press e
§ While all segments are lit,
press the ) key
§ Select the Application menu: Press k
repeatedly until
Appl is displayed
§ Open the Application menu:
Press the ) key
§ Select the Classification application:
Press the k key repeatedly until
the desired menu item is displayed and
press ) to open the submenu
Application Parameters: Classification
3.6. Minimum Load for Initialization
and Defining the Class 1 Lower
Limit
3.6.1* 1 digit
3.6.2 2 digits
3.6.3 5 digits
3.6.4 10 digits
3.6.5 20 digits
3.6.6 50 digits
3.6.7 100 digits
3.6.8 200 digits
3.6.9 500 digits
3.6.10 1000 digits
4.3. Activate Control Line for “Set” as:
4.3.1* “Set” output
4.3.2 Ready to operate (for
process control systems)
4.7. Activation of Outputs
4.7.1 Off
4.7.2 Always active
4.7.3* Active at stability
4.8. Number of Classes
4.8.1* 3 classes
4.8.2 5 classes
4.9. Parameter Input
4.9.1* Weight values
4.9.2 Percentage
4.10. Automatic Printing
4.10.1* Off
4.10.2 On
* = Factory setting
§ Press ) to save your settings
and press ( (repeatedly) to exit the
operating menu.
Application 2: Classification W
68

 Loading...
