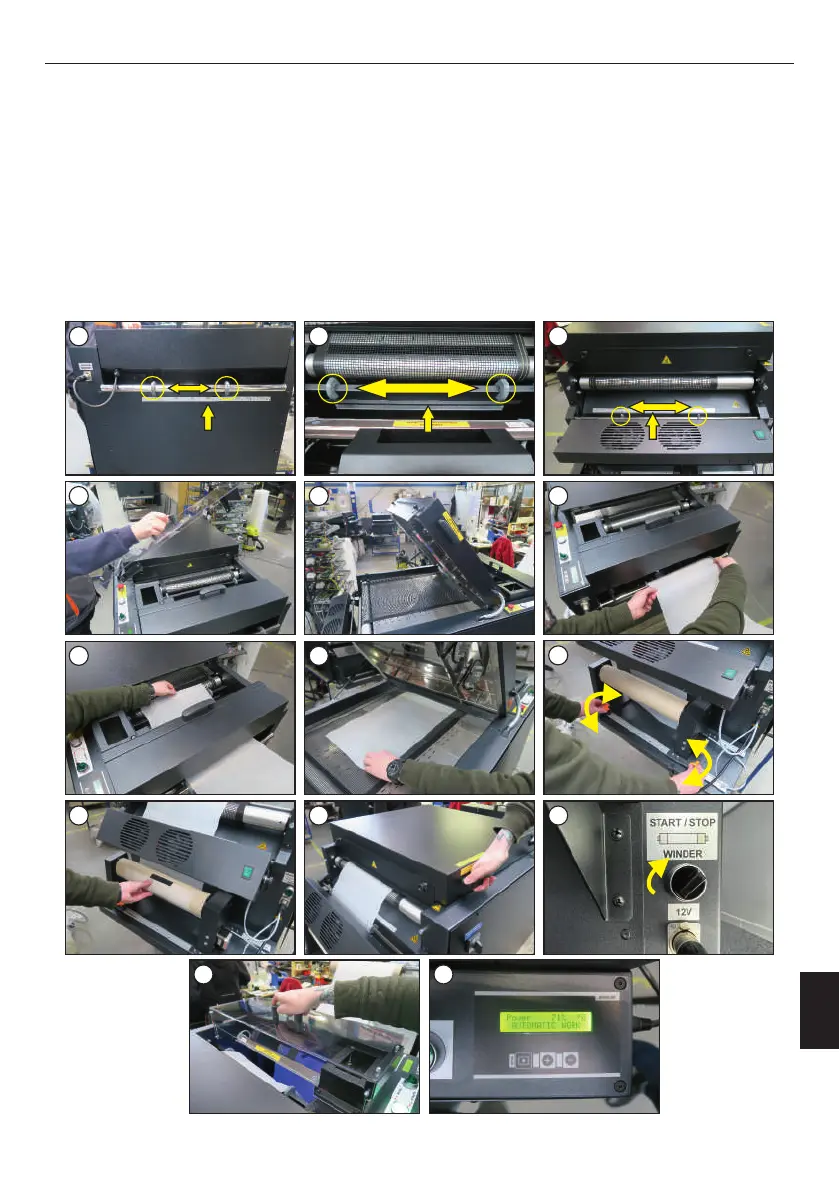
Foil can be applied when the powdering zone has been properly prepared (chapter 3.2). The machine should be positioned symmetrically to the
printer. The machine is equipped with three rulers to make easier the application of the foil through the center of the powdering, heating and
cooling zones. These rulers are located in the places shown in the photos (images 1-3). The foil should be applied with the WINDER knob turned
off. Then follow the instructions below:
6. Put the roll on the device, adjust its position with the adjustment knobs (image 9);
3. Open the heating zone cover (image 5);
5. Guide the foil through the powdering zone, heating zone and under the cooling zone (images 7-9);
7. Stick the foil on the roll as shown in the photo (image 10);
10. The machine is ready for work (image 14).
1. Lift the covers of the powder zone (image 4);
8. Lower the heating zone cover, switch on the WINDER (images 11-12);
To add some weight on the foil, it is possible to sprinkle the foil lightly with powder. Then press and hold the "-" button for a few seconds. From time
to time, the weight of the powder is checked: if there is not enough, the machine will add the required amount of powder. The powder can also be
manually poured onto the foil using the dispenser provided with the machine.
9. Put on the cover of the powdering zone (image 13);
2. Adjust the positioners on all (three) lines to the width of the foil. The foil must be centered (images 1-3);
4. Insert the foil (image 6);
3.3 Application of the foil
1 2 3
4 5 6
7
8 9
10 11 12
13 14
9
12
ENGLISH
25
Version 23.05