Section 1: Introduction
5
Section 1: Introduction
This section includes contact information, Quick Start procedure, and photos
of a standard SBE 19plus V2 shipment.
About this Manual
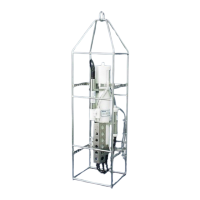
This manual is to be used with the SBE 19plus V2 SEACAT Profiler
Conductivity, Temperature, and Pressure Recorder.
It is organized to guide the user from installation through operation and data
collection. We have included detailed specifications, command descriptions,
maintenance and calibration information, and helpful notes throughout
the manual.
Sea-Bird welcomes suggestions for new features and enhancements of our
products and/or documentation. Please e-mail any comments or suggestions to
seabird@seabird.com.
How to Contact Sea-Bird
Sea-Bird Electronics, Inc.
1808 136
th
Place Northeast
Bellevue, Washington 98005 USA
Telephone: 425-643-9866 Fax: 425-643-9954
E-mail: seabird@seabird.com Website: http://www.seabird.com
Business hours:
Monday-Friday, 0800 to 1700 Pacific Standard Time
(1600 to 0100 Universal Time)
Except from April to October, when we are on summer time
(1500 to 0000 Universal Time)
Quick Start
Follow these steps to get a Quick Start using the SBE 19plus V2.
The manual provides step-by-step details for performing each task:
1. Install batteries and test power and communications (see Section 3: Power
and Communications Test).
2. Deploy the 19plus V2 (see Section 4: Deploying and Operating
SBE 19plus V2):
A. Install new batteries if necessary.
B. Ensure all data has been uploaded, and then send InitLogging to
make entire memory available for recording if desired.
C. Set date and time and establish setup and logging parameters.
D. Moored mode - Set 19plus V2 to start logging now or in the future.
E. Install dummy plugs and/or cable connectors, and locking sleeves.
F. If applicable, remove Tygon tubing that was looped end-to-end
around conductivity cell for storage. Reconnect tubing from pump to
conductivity cell.
G. Profiling mode - Put magnetic switch in On position, send
commands to start logging now or in the future, or apply external
power, as appropriate for your instrument’s setup.
H. Deploy 19plus V2.
12